


The correct wiring method between the motherboard and the chassis is crucial for the normal operation of the computer. Properly connecting the motherboard and chassis can ensure the normal operation of hardware devices such as power supplies and fans, while avoiding computer malfunctions caused by incorrect wiring. In this article, PHP editor Strawberry will introduce you in detail the wiring method of the motherboard and chassis, helping you to correctly connect computer hardware devices and ensure the stable operation of the computer.

How to connect the motherboard and chassis?
The wiring method between the motherboard and the chassis is as follows: First, align the I/O interface slot on the back panel of the chassis with the I/O interface on the back of the motherboard, install the motherboard into the chassis, align it with the screw holes and secure it .
Then connect the power cord between the motherboard and the chassis, and connect the power pins on the motherboard to the plug on the chassis power cord.
Next, connect the USB, audio and power button cables on the front panel of the case to the corresponding connectors on the motherboard.
Finally, connect other cables on the motherboard, such as hard drive data cables, fan power cables, etc. After ensuring that the connection is firm, close the side panel on the left side of the chassis and the wiring is completed.
How to connect the chassis to the motherboard?
Connecting the chassis and motherboard is one of the important steps in assembling a computer. The following is the general connection method:
1. Prepare the case and motherboard: Make sure you have selected a compatible case and motherboard and place them on a clean surface suitable for operation.
2. Install the I/O cover: There is usually a removable metal plate on the back of the chassis, called the I/O cover. Before installing the motherboard, you need to open the case and remove the I/O cover according to the I/O interface layout behind the motherboard and store it in a safe place.
3. Mounting brackets/screws: Look inside the case. There are usually some brackets or screw holes for fixing the motherboard. Determine which brackets/screws need to be installed based on the motherboard size and hole layout.
a. Generally, ATX motherboards require 9 brackets/screws, Micro-ATX requires 6, and Mini-ITX only requires 4.
b. Use the provided brackets/screws or your own brackets/screws, and insert them into the bottom of the chassis or the fixing holes. Make sure the brackets/screws line up with the motherboard's mounting holes.
4. Install the motherboard: Gently place the motherboard inside the case so that the brackets/screws pass through the corresponding mounting holes on the motherboard. Make sure the back of the motherboard is not in contact with the case.
5. Fix the motherboard: Use appropriate screws to fix the motherboard to the chassis. Make sure not to tighten the screws too tightly or too loosely to avoid damaging the motherboard.
6. Connect the front panel: According to the marks on the chassis and motherboard, connect the power button, USB interface, audio interface and other cables on the front panel of the chassis to the corresponding pins or connectors on the motherboard.
7. Connect power and data cables: Connect power cables, SATA data cables, fan cables, etc., and connect them to the corresponding interfaces on the motherboard and other hardware devices (such as hard drives, optical drives, and fans).
8. Double check: Make sure all connections are tight and no cables are caught between any moving parts.
After completing the above steps, the chassis and motherboard are successfully connected together. Note that the actual connection method may vary depending on your case and motherboard model, so refer to your case and motherboard's user manuals for detailed instructions before you begin.
Hope this information can help you. If you have any further questions, please feel free to ask.
The above is the detailed content of How to connect motherboard and chassis?. For more information, please follow other related articles on the PHP Chinese website!

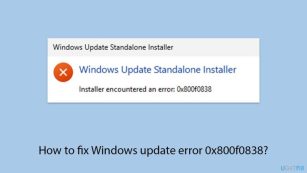 How to fix Windows update error 0x800f0838?Mar 11, 2025 am 12:00 AM
Windows updates are essential components delivered by Microsoft to enhance the functionality, security, and stability of the Windows operating system. These upd
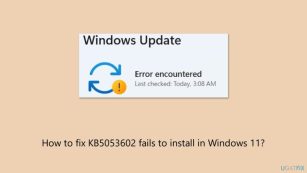 How to fix KB5053602 fails to install in Windows 11?Mar 13, 2025 am 10:00 AM
The KB5053602 patch, released on March 11, 2025, targets Windows 11 editions 22H2 and 23H2, elevating the OS to OS Builds 22621.5039 and 22631.5039, respectivel
 Spotlight on KB5053606 Not Installing for Windows 10, Exact StepsMar 13, 2025 pm 08:02 PM
Windows 10 KB5053606 Update installation failed? This guide provides effective solutions! Many users are having problems trying to install the Windows 10 KB5053606 update released on Tuesday of Microsoft's March 2025 patch, such as SSH connection interruption, Dwm.exe unresponsiveness, or input method editor (IME) issues. Updates may be stuck during downloading or installation, or error codes may appear, such as 0x800f0922, 0xd000034, 0x80070437 and 0x80072efe. KB5053606 installation failure is usually caused by a variety of reasons, including Windows update component failure, system file corruption, and disk
 What if KB5053598 Fails to Install on Windows 11? Fixes HereMar 13, 2025 pm 08:03 PM
Microsoft's March 11, 2025 update, KB5053598, is a crucial patch for Windows 11 24H2 (OS Build 26100.3476). This MiniTool guide covers everything you need to know, including troubleshooting installation problems. What's New in KB5053598? Released on
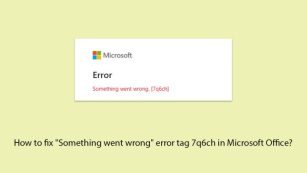 How to fix 'Something went wrong' error tag 7q6ch in Microsoft Office?Mar 15, 2025 am 02:00 AM
The “Something went wrong” error tag 7q6ch in Microsoft Office disrupts your workflow during essential tasks such as creating documents or handling emails it a
 GTA V Enhanced ERR_GFX_D3D_NOD3D12, Quick Fix in 4 WaysMar 14, 2025 pm 08:04 PM
GTA 5 Enhanced ERR_GFX_D3D_NOD3D12 Error Fix Guide Grand Theft Auto V Enhanced (GTA 5 Enhanced) is an upgraded game, but some players encounter the "ERR_GFX_D3D_NOD3D12: DirectX 12 adapter or runner found" error when starting. This article provides several solutions. Cause of the Error: This error usually indicates that your system is missing a DirectX 12 runtime library or a compatible DirectX 12 graphics card. Solution: Method 1: Install DirectX Runtime Library Inspection
 What's New in Windows 11 KB5054979 & How to Fix Update IssuesApr 03, 2025 pm 06:01 PM
Windows 11 KB5054979 Update: Installation Guide and Troubleshooting For Windows 11 24H2 version, Microsoft has released cumulative update KB5054979, which includes several improvements and bug fixes. This article will guide you on how to install this update and provide a solution to the installation failure. About Windows 11 24H2 KB5054979 KB5054979 was released on March 27, 2025 and is a security update for Windows 11 24H2 versions.NET Framework 3.5 and 4.8.1. This update enhances security and
 How to fix KB5053598 fails to install in Windows 11?Mar 13, 2025 am 10:01 AM
Windows 11 receives regular updates to enhance security, fix bugs, and introduce new features. One aspect of this update process is Patch Tuesday, which occurs


Hot AI Tools

Undresser.AI Undress
AI-powered app for creating realistic nude photos

AI Clothes Remover
Online AI tool for removing clothes from photos.

Undress AI Tool
Undress images for free

Clothoff.io
AI clothes remover

AI Hentai Generator
Generate AI Hentai for free.

Hot Article
Hot Tools

SublimeText3 Chinese version
Chinese version, very easy to use

MinGW - Minimalist GNU for Windows
This project is in the process of being migrated to osdn.net/projects/mingw, you can continue to follow us there. MinGW: A native Windows port of the GNU Compiler Collection (GCC), freely distributable import libraries and header files for building native Windows applications; includes extensions to the MSVC runtime to support C99 functionality. All MinGW software can run on 64-bit Windows platforms.

Atom editor mac version download
The most popular open source editor

Notepad++7.3.1
Easy-to-use and free code editor

mPDF
mPDF is a PHP library that can generate PDF files from UTF-8 encoded HTML. The original author, Ian Back, wrote mPDF to output PDF files "on the fly" from his website and handle different languages. It is slower than original scripts like HTML2FPDF and produces larger files when using Unicode fonts, but supports CSS styles etc. and has a lot of enhancements. Supports almost all languages, including RTL (Arabic and Hebrew) and CJK (Chinese, Japanese and Korean). Supports nested block-level elements (such as P, DIV),

