


UbuntuServerUbuntu
bitsCN.comUbuntu Server使用automysqlbackup脚本
昨天服务器意外关闭,导致开发环境数据库文件损坏,所以想起了做自动备份的事情,原本是打算自己用Mysqldump写个脚本来做计划任务的,不过出于偷懒的角度考虑,在网上找了找,发现了automysqlbackup,看评论都还不错,而且本身也是shell脚本实现的。本着不重复造轮子的精神,就下载来使用了。
地址:http://sourceforge.net/projects/automysqlbackup/
选择的版本是最新的automysqlbackup-v3.0_rc6.tar.gz。
安装非常简单,比较麻烦的地方,是后面配置邮件客户端,以及脚本中的一个小bug。
1、在任意目录下,解压文件包
tar –xzf automysqlbackup-v3.0_rc6.tar.gz
2、省事起见,切个权限
sudo su -
3、安装(若对路径没有什么特别的要求,出现提示回车即可)
./install.sh
默认配置文件位置:/etc/automysqlbackup
默认sh文件位置:/usr/local/bin
4、修改配置文件
安装完成,默认会有两个配置文件,一个是automysqlbackup.conf,还有一个是myserver.conf。
实际上看了安装脚本就知道,这两个文件本来就是拷贝冗余了一个出来,猜测用途是防止二次安装或者误操作的情况下,误操作覆盖已经配置好的配置文件。不过从脚本逻辑上看起来,貌似没太大用,因为他重装,照样两个文件一块会覆盖。不过如果发现automysqlbackup.conf配置有值的话,会给出提示就是了。
依旧,为了偷懒期间,就直接修改automysqlbackup.conf了,毕竟这是默认配置,sh执行的时候,不用带任何参数。
主要需要注意的配置,有以下几个:(配置文件中,带有默认值,如果不需要更改,直接保持被注释的状态就好)
# Username to access the MySQL server e.g. dbuser
(数据库连接用户名)
CONFIG_mysql_dump_username='root'
# Password to access the MySQL server e.g. password(数据库连接密码)
CONFIG_mysql_dump_password='密码'
# "Friendly" host name of MySQL server to be used in email log
# if unset or empty (default) will use CONFIG_mysql_dump_host instead(dump的时候,数据库host显示的别名,不配的话,基本就都是localhost之流了)
CONFIG_mysql_dump_host_friendly='DataBaseAlias'
# Backup directory location e.g /backups(不用多说了,重中之重,备份路径)
CONFIG_backup_dir='/srv/backup/mysql'
# List of databases for Daily/Weekly Backup e.g. ( 'DB1' 'DB2' 'DB3' ... )
# set to (), i.e. empty, if you want to backup all databases(需要日备份和周备份的数据库名称)
CONFIG_db_names=('TestDB')
# List of databases for Monthly Backups.
# set to (), i.e. empty, if you want to backup all databases(需要月备份的数据库名称)
CONFIG_db_month_names=('TestDB')
# Which day do you want monthly backups? (01 to 31) (月备份的日期,如果配置的日期大于当月最大日期,会在当月最后一天的时候执行)
# If the chosen day is greater than the last day of the month, it will be done
# on the last day of the month.
# Set to 0 to disable monthly backups.
#CONFIG_do_monthly="01"
# Which day do you want weekly backups? (1 to 7 where 1 is Monday)(周备份在星期几发生)
# Set to 0 to disable weekly backups.
#CONFIG_do_weekly="5"
# Set rotation of daily backups. VALUE*24hours
# If you want to keep only today's backups, you could choose 1, i.e. everything older than 24hours will be removed.(日备份文件保留多少天)
CONFIG_rotation_daily=7
# Set rotation for weekly backups. VALUE*24hours(周备份文件保留多少天)
#CONFIG_rotation_weekly=35
# Set rotation for monthly backups. VALUE*24hours(月备份文件保留多少天)
#CONFIG_rotation_monthly=150
# Use ssl encryption with mysqldump?(是否使用ssl,本地的话,开ssl找抽?远程就另算了)
CONFIG_mysql_dump_usessl='no'
# What would you like to be mailed to you?(是不是想要备份完的时候,自动给你发个邮件?)
# - log : send only log file(邮件内容仅包含日志)
# - files : send log file and sql files as attachments (see docs)(邮件内容除了日志意外,把备份的压缩包也发给你)
# - stdout : will simply output the log to the screen if run manually.(表邮件了,屏幕显示下就好。问题是谁吃饱没事一天到晚盯着server屏幕看?)
# - quiet : Only send logs if an error occurs to the MAILADDR.(出错了的话,给个信儿就好)
CONFIG_mailcontent='files'
# Email Address to send mail to? (user@domain.com)(mail地址咯,不用多说了吧)
CONFIG_mail_address='nc@na.com'
5、先改个脚本的小bug吧。。不过如果你的server上mail和mutt齐备,请忽略该步骤。
vi /usr/local/bin/automysqlbackup
到1026行,将:
if [[ "x$CONFIG_mailcontent" = 'xlog' || "x$CONFIG_mailcontent" = 'xquiet' ]]; then
dependencies=( "${dependencies[@]}" 'mail' )
elif [[ "x$CONFIG_mailcontent" = 'xfiles' ]]; then
dependencies=( "${dependencies[@]}" 'mail' )
if [[ "x$CONFIG_mail_use_uuencoded_attachments" != 'xyes' ]]; then
dependencies=( "${dependencies[@]}" 'mutt' )
fi
fi
改为:
if [[ "x$CONFIG_mail_use_uuencoded_attachments" != 'xyes' ]]; then
if [[ "x$CONFIG_mailcontent" = 'xlog' || "x$CONFIG_mailcontent" = 'xquiet' ]]; then
dependencies=( "${dependencies[@]}" 'mutt' )
elif [[ "x$CONFIG_mailcontent" = 'xfiles' ]]; then
dependencies=( "${dependencies[@]}" 'mutt' )
fi
else
if [[ "x$CONFIG_mailcontent" = 'xlog' || "x$CONFIG_mailcontent" = 'xquiet' ]]; then
dependencies=( "${dependencies[@]}" 'mail' )
elif [[ "x$CONFIG_mailcontent" = 'xfiles' ]]; then
dependencies=( "${dependencies[@]}" 'mail' )
fi
fi
6、安装邮件客户端 mutt+msmtp
apt-get install mutt
安装mutt的时候,会自动安装postfix用作mail server,问题是这玩意太大,出于比较有洁癖的心态,我就主动把它干掉了。毕竟小巧玲珑的msmtp在那等着我呢。(看个人需求和喜好而定)
apt-get remove postfix –purge
apt-get autoremove –purge
安装msmtp
apt-get install msmtp
安装完了,来配邮件吧。
7、邮件客户端配置
vi /etc/Muttrc
最上面加上如下:
#My Mail Setting
set sendmail="/usr/bin/msmtp"
set use_from=yes
set realname="邮件地址别名"
set from=username@126.com
set envelope_from=yes
#不保留sent的本地存档
set copy = no
然后到~目录下,新建个.msmtprc
cd ~
vi .msmtprc
加上如下内容:
account 邮箱别名
host smtp.126.com
from username@126.com
auth plain
user username
password pwd
logfile ~/.msmtp.log
因为这里是明文密码,所以建议修改个600之流,再增加个日志文件
chmod 600 .msmtprc
touch ~/.msmtp.log
这全部完成了的话,可以试试邮件发不发的出去了。
echo "喂" |mutt -s "发出去没?" testmail@126.com
测试成功的话,就跑一下备份脚本看看吧
8、装上几个我服务器上木有的命令:
apt-get install pax
apt-get install pigz
9、mysql如果之前没设环境变量,只是加了个快捷方式的话,设个环境变量
vi /etc/profile
在最后的位置加入
export PATH=$PATH:/usr/local/mysql/bin
保存,然后再刷新检查下
source /etc/profile
echo $PATH
10、启动下备份脚本试试了,对了,记得要先创建备份路径
mkdir /srv/backup
mkdir /srv/backup/mysql
automysqlbackup
如果没什么问题的话,就会看到备份文件路径下面,自动给你创建好了几个目录:
daily fullschema latest monthly status tmp weekly
而且打开daily,里面应该就会有刚才备份的文件了。
再去check一下mail,都ok,那就配个计划任务就完事了。
11、配置计划任务
crontab –l
先查查看目前有没有任务,没有的话,就在~建个配置文件
cd ~
vi root-crontab
内容添上
30 23 * * * /usr/local/bin/automysqlbackup
表示每天23点30,自动运行备份脚本
然后再添加到计划任务里面去
crontab -u root root-crontab
齐活。。。
bitsCN.com
 如何在 RHEL 9 上配置 DHCP 服务器Jun 08, 2023 pm 07:02 PM
DHCP是“动态主机配置协议DynamicHostConfigurationProtocol”的首字母缩写词,它是一种网络协议,可自动为计算机网络中的客户端系统分配IP地址。它从DHCP池或在其配置中指定的IP地址范围分配客户端。虽然你可以手动为客户端系统分配静态IP,但DHCP服务器简化了这一过程,并为网络上的客户端系统动态分配IP地址。在本文中,我们将演示如何在RHEL9/RockyLinux9上安装和配置DHCP服务器。先决条件预装RHEL9或RockyLinux9具有sudo管理权限的普
 在容器中怎么使用nginx搭建上传下载的文件服务器May 15, 2023 pm 11:49 PM
一、安装nginx容器为了让nginx支持文件上传,需要下载并运行带有nginx-upload-module模块的容器:sudopodmanpulldocker.io/dimka2014/nginx-upload-with-progress-modules:latestsudopodman-d--namenginx-p83:80docker.io/dimka2014/nginx-upload-with-progress-modules该容器同时带有nginx-upload-module模块和ng
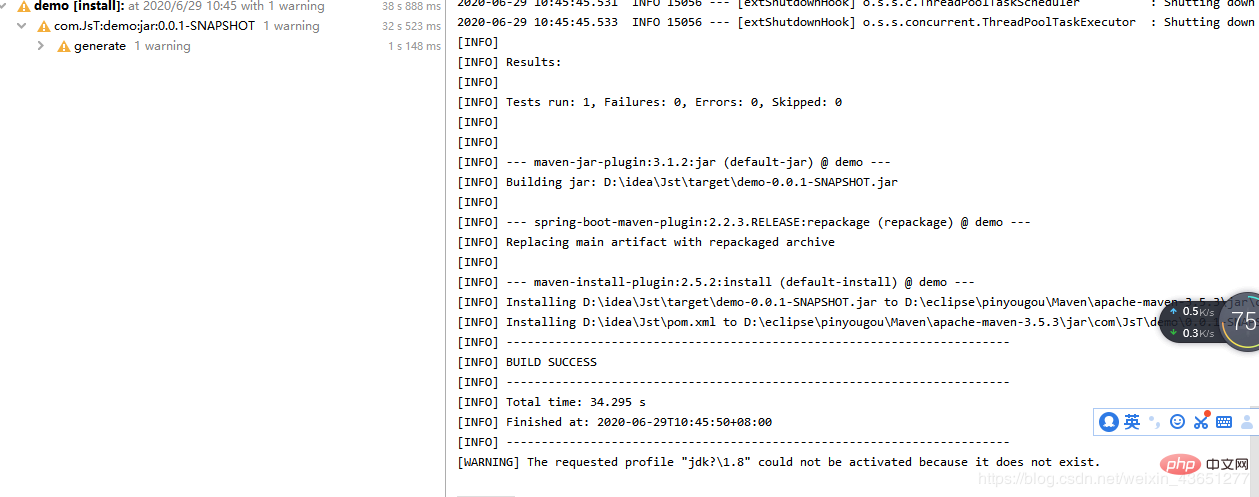 服务器怎么使用Nginx部署Springboot项目May 14, 2023 pm 01:55 PM
1,将java项目打成jar包这里我用到的是maven工具这里有两个项目,打包完成后一个为demo.jar,另一个为jst.jar2.准备工具1.服务器2.域名(注:经过备案)3.xshell用于连接服务器4.winscp(注:视图工具,用于传输jar)3.将jar包传入服务器直接拖动即可3.使用xshell运行jar包注:(服务器的java环境以及maven环境,各位请自行配置,这里不做描述。)cd到jar包路径下执行:nohupjava-jardemo.jar>temp.txt&
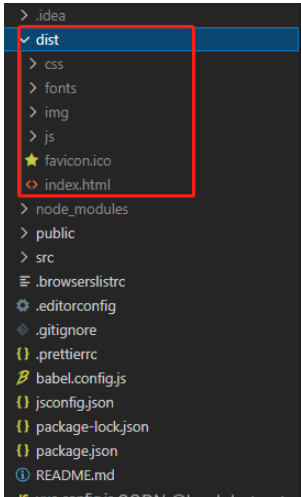 vue3项目打包发布到服务器后访问页面显示空白怎么解决May 17, 2023 am 08:19 AM
vue3项目打包发布到服务器后访问页面显示空白1、处理vue.config.js文件中的publicPath处理如下:const{defineConfig}=require('@vue/cli-service')module.exports=defineConfig({publicPath:process.env.NODE_ENV==='production'?'./':'/&
 python中怎么使用TCP实现对话客户端和服务器May 17, 2023 pm 03:40 PM
TCP客户端一个使用TCP协议实现可连续对话的客户端示例代码:importsocket#客户端配置HOST='localhost'PORT=12345#创建TCP套接字并连接服务器client_socket=socket.socket(socket.AF_INET,socket.SOCK_STREAM)client_socket.connect((HOST,PORT))whileTrue:#获取用户输入message=input("请输入要发送的消息:&
 Linux怎么在两个服务器直接传文件May 14, 2023 am 09:46 AM
scp是securecopy的简写,是linux系统下基于ssh登陆进行安全的远程文件拷贝命令。scp是加密的,rcp是不加密的,scp是rcp的加强版。因为scp传输是加密的,可能会稍微影响一下速度。另外,scp还非常不占资源,不会提高多少系统负荷,在这一点上,rsync就远远不及它了。虽然rsync比scp会快一点,但当小文件众多的情况下,rsync会导致硬盘I/O非常高,而scp基本不影响系统正常使用。场景:假设我现在有两台服务器(这里的公网ip和内网ip相互传都可以,当然用内网ip相互传
 如何使用psutil模块获取服务器的CPU、内存和磁盘使用率?May 07, 2023 pm 10:28 PM
psutil是一个跨平台的Python库,它允许你获取有关系统进程和系统资源使用情况的信息。它支持Windows、Linux、OSX、FreeBSD、OpenBSD和NetBSD等操作系统,并提供了一些非常有用的功能,如:获取系统CPU使用率、内存使用率、磁盘使用率等信息。获取进程列表、进程状态、进程CPU使用率、进程内存使用率、进程IO信息等。杀死进程、发送信号给进程、挂起进程、恢复进程等操作。使用psutil,可以很方便地监控系统的运行状况,诊断问题和优化性能。以下是一个简单的示例,演示如何
 怎么在同一台服务器上安装多个MySQLMay 29, 2023 pm 12:10 PM
一、安装前的准备工作在进行MySQL多实例的安装前,需要进行以下准备工作:准备多个MySQL的安装包,可以从MySQL官网下载适合自己环境的版本进行下载:https://dev.mysql.com/downloads/准备多个MySQL数据目录,可以通过创建不同的目录来支持不同的MySQL实例,例如:/data/mysql1、/data/mysql2等。针对每个MySQL实例,配置一个独立的MySQL用户,该用户拥有对应的MySQL安装路径和数据目录的权限。二、基于二进制包安装多个MySQL实例


Hot AI Tools

Undresser.AI Undress
AI-powered app for creating realistic nude photos

AI Clothes Remover
Online AI tool for removing clothes from photos.

Undress AI Tool
Undress images for free

Clothoff.io
AI clothes remover

AI Hentai Generator
Generate AI Hentai for free.

Hot Article
Hot Tools

Dreamweaver CS6
Visual web development tools

Dreamweaver Mac version
Visual web development tools

mPDF
mPDF is a PHP library that can generate PDF files from UTF-8 encoded HTML. The original author, Ian Back, wrote mPDF to output PDF files "on the fly" from his website and handle different languages. It is slower than original scripts like HTML2FPDF and produces larger files when using Unicode fonts, but supports CSS styles etc. and has a lot of enhancements. Supports almost all languages, including RTL (Arabic and Hebrew) and CJK (Chinese, Japanese and Korean). Supports nested block-level elements (such as P, DIV),

Notepad++7.3.1
Easy-to-use and free code editor

Zend Studio 13.0.1
Powerful PHP integrated development environment

