
Home >Computer Tutorials >Computer Knowledge >How to modify the mouse pointer skin in win11? Win11 mouse pointer skin setting tutorial
How to modify the mouse pointer skin in win11? Win11 mouse pointer skin setting tutorial

- 王林forward
- 2024-02-20 16:12:101257browse
php editor Xiaoxin will introduce to you how to modify the mouse pointer skin in the Win11 operating system. Win11 brings a new interface design, including changes to the mouse pointer skin. To modify the mouse pointer skin, you can follow the following tutorial: click "Settings" -> "Personalization" -> "Theme" -> "Mouse Pointer" to set it. With these simple steps, you can easily change the mouse pointer skin of Win11 system and personalize your operating system experience.
Win11 mouse pointer skin setting method:
1. Win R shortcut key to start running, enter control and press Enter to open.
2. After entering the new interface, switch the viewing mode in the upper right corner to large icons.

3. Then click on the mouse option.

4. Then in the window that opens, click the Pointer tab in the top.

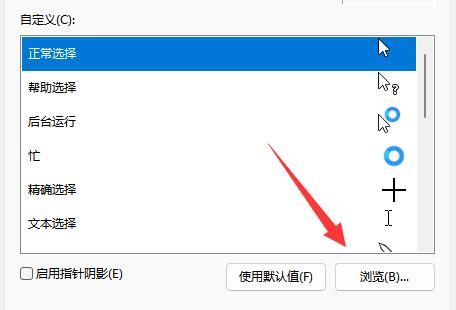
Finally, you can personalize your mouse pointer skin. If you want to use a custom image, just click the browse button in the lower right corner and select the image you want.
The above is the detailed content of How to modify the mouse pointer skin in win11? Win11 mouse pointer skin setting tutorial. For more information, please follow other related articles on the PHP Chinese website!