 Backend Development
 Python Tutorial
 Learn Pygame game development: step-by-step guide to the installation process
Easy to get started with Pygame: Detailed installation step analysis, specific code examples are required
Introduction:
Pygame is an open source Python library focused on game development. It provides many powerful tools and functions to help developers easily create their own games. This article will analyze the installation steps of Pygame in detail and provide specific code examples to help beginners get started quickly.
1. Install Python:
1. Visit the official Python website (https://www.python.org/downloads) and download the latest version of Python suitable for your operating system.
2. Run the Python installer, select the "Install Python" option, and set the installation path.
3. During the installation process, check the "Add Python to PATH" option, which will allow Python to run on the command line.
4. After completing the installation of Python, open the command line tool and enter the "python" command on the command line to confirm that Python has been successfully installed and display the version information.
2. Install Pygame:
1. Open the command line tool and enter the following command in the command line to install Pygame:
pip install pygame
2. Wait for the installation to complete, and the command line will display that the installation is successful. After receiving the information, Pygame is installed.
3. Create Pygame window:
1. Create a new Python file in any text editor and name it game.py.
2. Import the Pygame library in the file:
import pygame
3. Initialize Pygame and create a window:
pygame.init()
screen = pygame.display.set_mode((800, 600))
4. Set the window title:
pygame.display.set_caption("My Game")5 .Create a main loop to keep the window displayed:
running = True
while running:
    for event in pygame.event.get():
        if event.type == pygame.QUIT:
            running = False
6. In the main loop, handle the window closing event. If the user closes the window, mark running as False and exit. main loop.
4. Display the game image:
1. Add the following code in the main loop to display an image on the window:
image = pygame.image.load("image.jpg")
screen.blit(image, (0, 0))
pygame.display.flip()
2. Replace the image file name with your own image file.
3. Use the screen.blit() function to draw the image onto the window.
4. Use the pygame.display.flip() function to refresh the window to display the image.
5. Run the game:
1. After saving the game.py file, open the command line tool.
2. Enter the directory where game.py is located on the command line.
3. Run the following command to launch the game:
python game.py
4. The game window will appear showing the image you selected.
Conclusion:
Through the detailed step-by-step analysis and specific code examples in this article, we can easily get started with Pygame and start creating our own games. I hope this article can help beginners and stimulate their interest and creativity in game development. After mastering the basic installation and window display, if you further learn Pygame's functions and API, you will have more interesting discoveries and challenges waiting ahead. I wish you all have fun in the world of Pygame!
The above is the detailed content of Learn Pygame game development: step-by-step guide to the installation process. For more information, please follow other related articles on the PHP Chinese website!
 win11安装语言包错误0x800f0950什么原因Jul 01, 2023 pm 11:29 PM
win11安装语言包错误0x800f0950什么原因?当我们在给windows11系统安装新语言包时,有时会遇到系统提示错误代码:0x800f0950,导致语言包安装流程无法继续进行下去。导致这个错误代码一般是什么原因,又要怎么解决呢?今天小编就来给大家说明一下win11安装语言包错误0x800f0950的具体解决步骤,有需要的用户们赶紧来看一下吧。win11电脑错误代码0x800f0950解决技巧1、首先按下快捷键“Win+R”打开运行,然后输入:Regedit打开注册表。2、在搜索框中输入“
 如何在 Google Docs 中安装自定义字体Apr 26, 2023 pm 01:40 PM
GoogleDocs在学校和工作环境中变得很流行,因为它提供了文字处理器所期望的所有功能。使用Google文档,您可以创建文档、简历和项目提案,还可以与世界各地的其他用户同时工作。您可能会注意到GoogleDocs不包括MicrosoftWord附带的所有功能,但它提供了自定义文档的能力。使用正确的字体可以改变文档的外观并使其具有吸引力。GoogleDocs提供了大量字体,您可以根据自己的喜好从中选择任何人。如果您希望将自定义字体添加到Google文档,请继续阅读本文。在本文中
 Pygame安装详解:一步步教你安装并配置开发环境Feb 20, 2024 pm 04:54 PM
Pygame安装详解:一步步教你安装并配置开发环境,需要具体代码示例引言:Pygame是一个基于Python的游戏开发库,它提供了丰富的工具和函数,使游戏开发变得简单而有趣。本文将详细介绍如何安装Pygame,并配置开发环境,同时提供具体的代码示例。第一部分:安装Pygame安装Python:在开始安装Pygame之前,首先需要确保你的电脑上已经安装了Pyt
 适用于 Windows 11 的记事本++:如何下载和安装它Jul 06, 2023 pm 10:41 PM
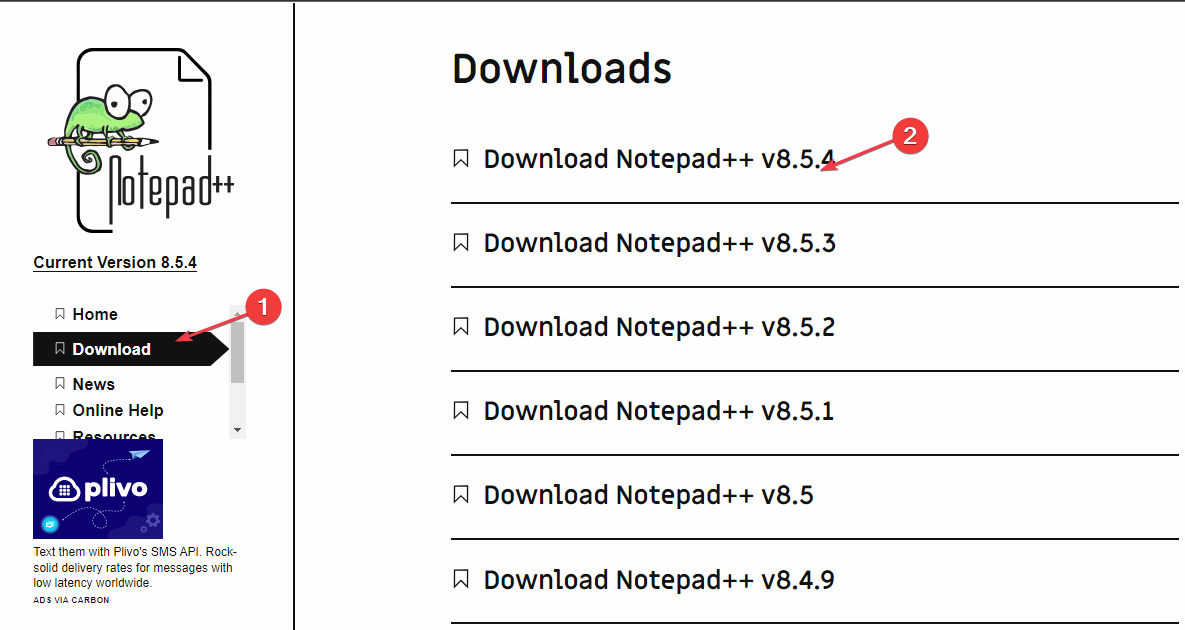
Notepad++主要由开发人员用于编辑源代码,由临时用户用于编辑文本。但是,如果您刚刚升级到Windows11,则在您的系统上下载和安装该应用程序可能具有挑战性。因此,我们将讨论在Windows11上下载和安装记事本++。此外,您可以轻松阅读我们关于修复Notepad++在Windows上没有响应的详细指南。记事本++可以在Windows11上运行吗?是的,记事本++可以在Windows11上有效工作,而不会出现兼容性问题。更具体地说,没有臃肿的选项或错误,只需在一个非常小的编辑器中即可。此外
 Steam 未检测到 Windows 11/10 中已安装的游戏,如何修复Jun 27, 2023 pm 11:47 PM
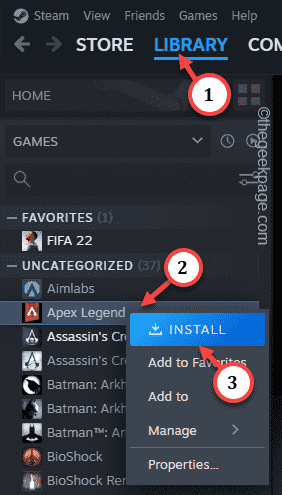
Steam客户端无法识别您计算机上的任何游戏吗?当您从计算机上卸载Steam客户端时,会发生这种情况。但是,当您重新安装Steam应用程序时,它会自动识别已安装文件夹中的游戏。但是,别担心。不,您不必重新下载计算机上的所有游戏。有一些基本和一些高级解决方案可用。修复1–尝试在同一位置安装游戏这是解决这个问题的最简单方法。只需打开Steam应用程序并尝试在同一位置安装游戏即可。步骤1–在您的系统上打开Steam客户端。步骤2–直接进入“库”以查找您拥有的所有游戏。第3步–选择游戏。它将列在“未分类
 pygame怎么安装Nov 27, 2023 pm 03:49 PM
pygame安装步骤:1、使用“python --version”命令查看安装的Python版本;2、安装pip;3、下载pygame;4、进入cmd,输入命令pip install wheel,安装wheel;5、在cmd中进入.whl文件的目录;6、cmd中输入Python,然后输入import pygame查看安装是否成功;7、在编辑器设置中安装pygame即可。
 Pygame入门指南:全面安装和配置教程Feb 19, 2024 pm 10:10 PM
从零开始学习Pygame:完整的安装和配置教程,需要具体代码示例引言:Pygame是一个使用Python编程语言开发的开源游戏开发库,它提供了丰富的功能和工具,使得开发者可以轻松创建各种类型的游戏。本文将带您从零开始学习Pygame,并提供完整的安装和配置教程,以及具体的代码示例,让您快速入门。第一部分:安装Python和Pygame首先,确保您的计算机上已
 修复:在 Xbox 应用上的 Halo Infinite(Campaign)安装错误代码 0X80070032、0X80070424 或 0X80070005May 21, 2023 am 11:41 AM
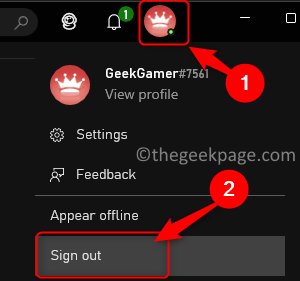
<p><strong>HaloInfinite(Campaign)</strong>是一款第一人称射击视频游戏,于2021年11月推出,可供单人和多用户使用。该游戏是Halo系列的延续,适用于Windows、XboxOne和Xbox系列的用户X|S。最近,它还在PC版XboxGamePass上发布,以提高其可访问性。大量玩家报告在尝试使用WindowsPC上的<strong>Xbox应


Hot AI Tools

Undresser.AI Undress
AI-powered app for creating realistic nude photos

AI Clothes Remover
Online AI tool for removing clothes from photos.

Undress AI Tool
Undress images for free

Clothoff.io
AI clothes remover

AI Hentai Generator
Generate AI Hentai for free.

Hot Article

Hot Tools

Dreamweaver Mac version
Visual web development tools

VSCode Windows 64-bit Download
A free and powerful IDE editor launched by Microsoft

MinGW - Minimalist GNU for Windows
This project is in the process of being migrated to osdn.net/projects/mingw, you can continue to follow us there. MinGW: A native Windows port of the GNU Compiler Collection (GCC), freely distributable import libraries and header files for building native Windows applications; includes extensions to the MSVC runtime to support C99 functionality. All MinGW software can run on 64-bit Windows platforms.

PhpStorm Mac version
The latest (2018.2.1) professional PHP integrated development tool

SAP NetWeaver Server Adapter for Eclipse
Integrate Eclipse with SAP NetWeaver application server.


