


php Editor Banana motherboard discharge is an essential step in the installation process, which can effectively avoid damage to the motherboard caused by static electricity. Correct methods include disconnecting the power supply, pressing the power button to discharge, using an electrostatic discharger, etc. The following will introduce in detail the correct method of motherboard discharge to make your installation process safer and more reliable.

The correct way to discharge the motherboard?
Correct motherboard discharge method:
1. First unplug the power supply of the chassis and remove the side cover
2. Find the motherboard battery, which is usually a little below the graphics card slot. , the battery in some people's case is blocked by the entire graphics card, so they need to remove the graphics card first
3. Press the small metal clip inside and take out the battery
4. Then use a screwdriver to simultaneously touch the metal piece under the battery and the metal clip that you just held down with the battery. If you don’t have a screwdriver, remove the battery and press the power button
5. Find the front and back of the battery (positive and negative), and then put it back. If you can’t tell the front and back, take a photo with your phone before disassembling
Notes: Before disassembling the case Be sure to cut off the power! Also be careful not to install the battery upside down.
How to discharge the computer motherboard?
Simple operation:
Remove the battery from the motherboard and short-circuit the positive and negative terminals in the battery slot. In fact, just hold the battery vertically and touch the two iron pieces in the battery slot a few times.
Detailed description:
Correct operation method of CMOS clearing:
1. Disconnect the 220V mains power first. That means unplugging the power plug.
2. Find the CR2032 CMOS battery on the motherboard, 3V. Take it off too.
3. Then, usually next to the battery holder, there will be a 3-pin jumper. You must remember the current combination. Then press it in another way. That is, if it is currently 1-2, then change it to 2-3. The short-circuiting time should be more than 6 seconds, so it should be handled in 10 seconds.
Let me talk here, if you encounter a very extreme motherboard, there is no printed explanation on the motherboard indicating where the jumper is, and there is no similar jumper. You can also use metal to directly short-circuit the positive and negative terminals on the battery holder for 10 seconds.
4. Here is the reverse operation of the previous one. Press the jumper cap back into the original combination. Put the CR2032 3V battery into the battery holder, connect it to the 220V mains plug, turn it on, and usually press the "Del" key to enter the CMOS for setting operations.
How to discharge the computer motherboard?
When the computer motherboard discharges, you first need to shut down the computer and disconnect the power cord. Then, take out the battery or find the CMOS clear jumper on the motherboard and short it for a few seconds. You can also unplug all cables and plugs from the computer motherboard, and then press the power button for a few seconds to allow the charge inside the motherboard to completely discharge. Finally, plug all cables and plugs back into the motherboard and install the battery or put the jumpers back into place. Doing so can effectively remove static electricity inside the motherboard and avoid malfunctions and damage.
How to discharge the computer motherboard?
Simple operation: Remove the battery from the motherboard and short-circuit the positive and negative poles in the battery slot. In fact, just hold the battery vertically and touch the two iron pieces in the battery slot a few times. Detailed description: CMOS reset Correct operation method:
1. Disconnect the 220V mains power first. That means unplugging the power plug.
2. Find the CR2032 CMOS battery on the motherboard, 3V. Take it off too.
3. Then, usually next to the battery holder, there will be a 3-pin jumper. You must remember the current combination. Then press it in another way. That is, if it is currently 1-2, then change it to 2-3. The short-circuiting time should be more than 6 seconds, so it should be handled in 10 seconds. Let me talk about it here, if you encounter a very extreme motherboard, there is no printed explanation on the motherboard where the jumper is, and there is no similar jumper. You can also use metal to directly short-circuit the positive and negative terminals on the battery holder for 10 seconds.
4. Here is the reverse operation of the previous one. Press the jumper cap back into the original combination. Put the CR2032 3V battery into the battery holder, connect the 220V mains plug, turn on the computer, usually press the "Del" key to enter the CMOS for setting operations
How to quickly discharge the motherboard?
1. Use the BIOS discharge jumper. Most of the current motherboards are designed with BIOS discharge jumpers to facilitate users to perform discharge operations. This is the most commonly used BIOS discharge method.
2. Take out the motherboard battery. I want to discharge the motherboard bios, but I can’t find the bios discharge jumper on the motherboard. What should I do? At this time, the bios power battery can be taken out for the purpose of discharge.
How to discharge the computer motherboard?
Simple operation: Remove the battery from the motherboard and short-circuit the positive and negative poles in the battery slot. In fact, just hold the battery vertically and touch the two iron pieces in the battery slot a few times. Detailed description: CMOS reset Correct operation method:
1. Disconnect the 220V mains power first. That means unplugging the power plug.
2. Find the CR2032 CMOS battery on the motherboard, 3V. Take it off too.
3. Then, usually next to the battery holder, there will be a 3-pin jumper. You must remember the current combination. Then press it in another way. That is, if it is currently 1-2, then change it to 2-3. The short-circuiting time should be more than 6 seconds, so it should be handled in 10 seconds. Let me talk about it here, if you encounter a very extreme motherboard, there is no printed explanation on the motherboard where the jumper is, and there is no similar jumper. You can also use metal to directly short-circuit the positive and negative terminals on the battery holder for 10 seconds.
4. Here is the reverse operation of the previous one. Press the jumper cap back into the original combination. Put the CR2032 3V battery into the battery holder, connect it to the 220V mains plug, turn it on, and usually press the "Del" key to enter the CMOS for setting operations.
How to discharge the motherboard?
1. Disconnect the power supply: First, you need to power off the computer host and unplug the power plug at the same time to ensure that the power supply is completely disconnected.
2. Remove the battery: Find the CMOS battery on the motherboard, gently press the metal buckle on the battery with your hand to pop the battery out of the socket, and take out the battery.
3. Press and hold the power button: Press and hold the power button for 5-10 seconds to ensure that the capacitor energy on the motherboard is fully released.
4. Use a discharge rod: If you need to discharge more thoroughly, you can use a special discharge rod. Insert one port of the discharge rod into the power socket, contact the other port with the metal part on the motherboard, and then press the button on the discharge rod to release the power.
How to discharge the motherboard?
To discharge the motherboard, first make sure all power to the motherboard is disconnected and unplug the power plug from the socket. Then, touch a metal object to discharge static electricity from your body.
Next, connect one end of a conductive material such as a metal screwdriver to a metal part of the motherboard (such as a heat sink), and use the other end to touch the metal contacts or component pins on the motherboard.
After maintaining the touch for a few seconds, disconnect and touch the metal object again to discharge static electricity.
This ensures that all charges on the motherboard are discharged to avoid electrostatic breakdown or damage to the motherboard when repairing or replacing components.
The above is the detailed content of What is the correct way to discharge the motherboard?. For more information, please follow other related articles on the PHP Chinese website!

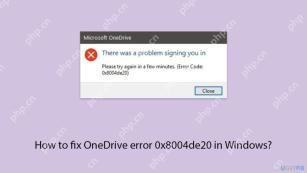 How to fix OneDrive error 0x8004de20 in Windows?Apr 15, 2025 am 12:00 AM
Microsoft OneDrive is the default cloud storage for Windows users, depending on it for file syncing between devices and keeping important documents saved in the
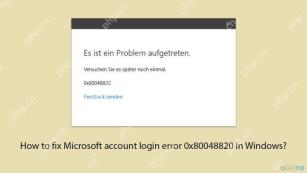 How to fix Microsoft account login error 0x80048820 in Windows?Apr 14, 2025 pm 10:00 PM
Error code 0x80048820 is a Windows-specific error that will typically pop up when users attempt to log in using their Microsoft account usually aiming at servi
 Schedule 1 Dealer Not Working, See a Pro Guide with Top 7 FixesApr 14, 2025 pm 08:09 PM
Troubleshooting Schedule 1 Dealer Issues: A Comprehensive Guide A malfunctioning Schedule 1 dealer can be incredibly frustrating. This guide provides multiple solutions to get your drug empire back on track. Schedule 1 Dealer Not Selling: The Problem
 Alert: Do Not Delete the New inetpub Folder in Windows 11Apr 14, 2025 pm 08:08 PM
Windows 11 KB5055523 Update and the Mysterious inetpub Folder: Should You Worry? After installing the April 2025 Patch Tuesday update (KB5055523) on your Windows 11 (version 24H2) system, did a new inetpub folder suddenly appear on your C: drive? Th
 Discord Loading Chunk Failed: Fix with 4 Useful WaysApr 14, 2025 pm 08:03 PM
Discord Loading Scramble Error: Four Practical Solutions Discord loading failure issues plagued many users. This article will provide four effective solutions to help you quickly get rid of this problem! Method 1: Refresh Discord Simple refresh operations can often solve some minor problems. On the stuck interface, press Ctrl R (Windows) or CMD R (Mac) to refresh Discord and try to reconnect to the server. If it does not work, try the following method. Method 2: Task Manager ends the Discord process If Discord is completely unresponsive, force the relevant process to end: Step 1: Press Ct
 5 Useful Methods to Fix File Unreadable Google DriveApr 14, 2025 pm 08:02 PM
This guide tackles the frustrating "file unreadable Google Drive" error. We'll explore potential causes and offer six practical solutions. Quick Navigation: Fix 1: Internet Connection Check Fix 2: Google Drive Server Status Fix 3: File Si
 Fixes for SFC.DLL Is Either Not Designed to Run on WindowsApr 14, 2025 pm 08:01 PM
Encountering the error "SFC.DLL is either not designed to run on Windows"? This guide provides solutions to resolve this frustrating issue, which often appears after startup or when launching specific programs. Quick Navigation: Understand
 How to fix KB5055613 fails to install in Windows 11?Apr 14, 2025 pm 08:00 PM
The KB5055613 update, which was a Preview update for Windows 11 version 24H2, was released on April 11, 2025, in the Beta Channel for Windows Insiders, updating


Hot AI Tools

Undresser.AI Undress
AI-powered app for creating realistic nude photos

AI Clothes Remover
Online AI tool for removing clothes from photos.

Undress AI Tool
Undress images for free

Clothoff.io
AI clothes remover

AI Hentai Generator
Generate AI Hentai for free.

Hot Article
Hot Tools

Zend Studio 13.0.1
Powerful PHP integrated development environment

DVWA
Damn Vulnerable Web App (DVWA) is a PHP/MySQL web application that is very vulnerable. Its main goals are to be an aid for security professionals to test their skills and tools in a legal environment, to help web developers better understand the process of securing web applications, and to help teachers/students teach/learn in a classroom environment Web application security. The goal of DVWA is to practice some of the most common web vulnerabilities through a simple and straightforward interface, with varying degrees of difficulty. Please note that this software

EditPlus Chinese cracked version
Small size, syntax highlighting, does not support code prompt function

SublimeText3 Mac version
God-level code editing software (SublimeText3)

Safe Exam Browser
Safe Exam Browser is a secure browser environment for taking online exams securely. This software turns any computer into a secure workstation. It controls access to any utility and prevents students from using unauthorized resources.

