

How to connect to a network printer in Win11 system


php editor Xigua Win11 system has brought many new features, among which it has become more convenient to connect network printers. Users can connect to a network printer in Win11 system through simple steps to realize the convenience of wireless printing. Next, we will introduce in detail the specific method of connecting to a network printer in Win11 system, so that you can easily enjoy the convenience of printing.
With the development of technology, network printers are becoming more and more common in our lives. Network printers offer more convenience and flexibility than traditional printers. In the Win11 system, connecting to a network printer has become simpler and more convenient. This article will introduce you how to connect to a network printer in Win11 system.
Step One: Preparation Before connecting the network printer, you need to ensure the following points: 1. Confirm that your network printer has been connected to the network and is in normal working condition. 2. Make sure your computer is connected to the same network and can communicate with the network printer.
Step 2: Open Settings In Win11 system, you can open the settings interface by clicking the "Start" button in the lower right corner of the taskbar, and then clicking the "Settings" icon.
Step 3: Select the device In the setting interface, you can see multiple options. Click the "Device" option to enter the device setting interface.
Step 4: Add a printer In the device settings interface, you can see multiple device options. Click the "Printers and Scanners" option to enter the printer settings interface.
Step 5: Add a network printer In the printer settings interface, you can see a list of connected printers. If your network printer is already connected to the same network, it will be automatically detected and displayed in the list. If it doesn't appear, you can click the "Add Printer or Scanner" button to add it manually.
Step 6: Select a network printer In the add printer interface, the system will automatically search for available network printers. You can select the printer you want to connect from the list and click the "Next" button.
Step 7: Install the driver Before connecting the network printer, the system may need to install the corresponding driver. If the system prompts you to install the driver, you can click the "Install Driver" button to install it.
Step 8: Complete the connection After installing the driver, the system will automatically connect to the network printer you selected. You can click the "Finish" button to complete the connection process.
At this point, you have successfully connected the network printer. Now, you can use a network printer for printing tasks in Win11 system.
The method of connecting to a network printer in Win11 system is very simple and convenient. With just a few simple steps, you can easily connect to your network printer and enjoy even more printing convenience. I hope this article is helpful to you and I wish you a happy use!
The above is the detailed content of How to connect to a network printer in Win11 system. For more information, please follow other related articles on the PHP Chinese website!

 Oblivion Remastered Disk Full Save Failed, Best Tips to FollowApr 27, 2025 pm 08:02 PM
Frustrated by "Disk Full – Save Failed" errors in Oblivion Remastered? This guide provides solutions to get your game saving again. Oblivion Remastered's stunning visuals and gameplay can be ruined by save errors. This post focuses on fix
 Quick Guide to Finding Post Trauma Save File Location on PCApr 27, 2025 pm 08:01 PM
This MiniTool guide explains the Post Trauma save file location and how to back up and restore your game data, safeguarding your progress against loss. Quick Navigation: Post Trauma Save File Location (PC) Backing Up Post Trauma Game Data Recovering
 3 Ways to Troubleshoot SSD Recognized as HDD on WindowsApr 27, 2025 pm 06:13 PM
SSD displays as HDD? Don’t panic! MiniTool teaches you how to solve it easily! Is the SSD displayed as HDD in your disk management? Don't worry, this is common and will not affect the computer or data. This article will introduce several effective ways to solve this problem. Quick navigation: Why is an SSD recognized as an HDD? How to fix an SSD recognized as an HDD? Summarize Displaying an SSD as an HDD is often considered a minor problem, mainly manifested as visual errors in the operating system interface. This error indication does not usually affect the performance or functionality of the SSD, because the drive still operates at its expected speed and capacity. However, it may make it possible to rely on precise drive recognition to perform
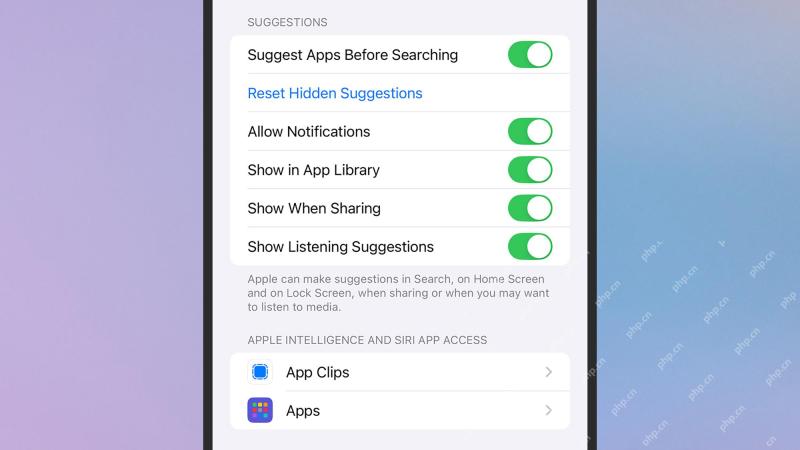 How to manage Siri Suggestions on your iPhoneApr 27, 2025 am 09:46 AM
Recent news highlights the potential pitfalls of Siri Suggestions, an iPhone feature that offers contextual assistance, even inadvertently adding unauthorized individuals to private group chats. This incident, dubbed "Signalgate," undersco
 Fixes for Tempest Rising Crashing/Not Launching/Stuck on LoadingApr 26, 2025 pm 08:01 PM
Tempest Rising is a recently released game. Many players have encountered the problem of the game crashing when starting it. If you are also looking for some methods to fix the problem of Tempest Rising crashing, then this MiniTool article is perfect
 Frequently Asked Questions about Data Recovery: A Top GuideApr 26, 2025 pm 06:01 PM
Data Recovery: A Comprehensive Guide to Recovering Lost Files Have you ever experienced the frustration of losing important data? This guide addresses common questions about data recovery and provides a step-by-step process to retrieve lost files. Qu
 The Elder Scrolls IV: Oblivion Remastered Fatal Error, Quick FixApr 25, 2025 pm 08:05 PM
Solving The Elder Scrolls IV: Oblivion Remastered Crashing Issues The Elder Scrolls IV: Oblivion Remastered, released April 22, 2025, for PS5, Xbox Series X/S, and Windows, boasts stunning visuals and improved gameplay. However, some players experien
 Clair Obscur: Expedition 33 UE-Sandfall Game Crash? 3 Ways!Apr 25, 2025 pm 08:02 PM
Solve the UE-Sandfall game crash problem in "Clair Obscur: Expedition 33" "Clair Obscur: Expedition 33" has been widely expected by players after its release, but many players encountered the error of UE-Sandfall crashing and closing when starting the game. This article provides three solutions to help you smooth the game. Method 1: Change the startup options Change the Steam startup options to adjust game performance and graphics settings. Try setting the startup option to "-dx11". Step 1: Open the Steam library, find the game, and right-click to select "Properties". Step 2: Under the General tab, find the Startup Options section.


Hot AI Tools

Undresser.AI Undress
AI-powered app for creating realistic nude photos

AI Clothes Remover
Online AI tool for removing clothes from photos.

Undress AI Tool
Undress images for free

Clothoff.io
AI clothes remover

Video Face Swap
Swap faces in any video effortlessly with our completely free AI face swap tool!

Hot Article
Hot Tools

Atom editor mac version download
The most popular open source editor

SecLists
SecLists is the ultimate security tester's companion. It is a collection of various types of lists that are frequently used during security assessments, all in one place. SecLists helps make security testing more efficient and productive by conveniently providing all the lists a security tester might need. List types include usernames, passwords, URLs, fuzzing payloads, sensitive data patterns, web shells, and more. The tester can simply pull this repository onto a new test machine and he will have access to every type of list he needs.

Dreamweaver CS6
Visual web development tools

SublimeText3 Chinese version
Chinese version, very easy to use

DVWA
Damn Vulnerable Web App (DVWA) is a PHP/MySQL web application that is very vulnerable. Its main goals are to be an aid for security professionals to test their skills and tools in a legal environment, to help web developers better understand the process of securing web applications, and to help teachers/students teach/learn in a classroom environment Web application security. The goal of DVWA is to practice some of the most common web vulnerabilities through a simple and straightforward interface, with varying degrees of difficulty. Please note that this software

