


php editor Banana brings you a comprehensive interpretation of the dual-screen display of the Apple Mac system. In today's digital life, dual-screen display has become one of the efficient office methods pursued by many users. The Apple Mac system also provides a wealth of dual-screen display settings and functions, allowing users to complete multitasking more conveniently and improve work efficiency. Next, we will introduce in detail how to implement dual-screen display on Apple Mac systems, and how to adjust and optimize the dual-screen display effect to take your work experience to the next level!
How to split screen in Apple notebook windows system?
After opening the window that needs to be split screen, move the mouse pointer to the full screen button of the window and click to make the window enter full screen mode. Move the mouse to the upper left or right corner of the screen, and a split-screen preview will appear.
In Windows 10 system, you can use the Win key left/right arrow keys to implement the split screen function, allowing the current window to automatically move to half of the screen, and a window selector will appear at the same time, allowing you to select another The window fills the other half of the screen.
In the Mission Control Center window, just click and drag the application icon you want to use to the left or right split-screen position to automatically split the screen. If there are other applications in the left and right split screen positions, they will be adjusted accordingly. Open a split-screen window and open the program window that needs to be displayed in split-screen mode.
Setting up split screen on Apple laptops is easy. Just find the split-screen application icon in Mission Control Center, click and drag it to the home screen to exit split-screen mode. These five steps can help you achieve a split-screen setup with ease.

mac connects two monitors to split screen
1. Select the file to be opened and enter the main page of the Mac computer. Click on the desktop to open the two monitors. files that need to be split screen. Press and hold the green icon to open the file, select one of the files, and press and hold the green icon in the upper left corner of the file. Currently, there are two external monitors connected to this MacBookPro laptop.
The steps to operate the split-screen window include: first open the program window that needs to be displayed in split-screen mode, then click the split-screen icon in the upper left corner of the interface, and select the appropriate split-screen option in the pop-up menu to complete the split-screen operation. .
There are two display modes: mirror display, that is, the same content is displayed on both displays; and split-screen extended display, that is, different content is displayed on the two displays.
Hello, to use the split screen function, you need to open the two software you want to split screen, such as a browser and a video player. After opening the software, long press the maximize icon in the upper left corner of one of the software and select split screen.
How to set up split screen on Apple laptop
In the Mission Control Center window, just click and drag the application icon to the left or right side to achieve split screen. If there are already applications in the left and right positions, they will be adjusted accordingly. Open split-screen window: Open the program window to be displayed in split-screen mode.
2. In the Mission Control Center window, click and drag the application icon you want to use to the left or right split-screen position to automatically split the screen. If there are other applications in the left and right split screen positions at this time, corresponding changes will also be made at this time.
3. Select the file you want to open to split screen. After entering the main page of your Mac computer, click on the desktop to open the two files that need to be split screen. Press and hold the green icon to open the file, select one of the files, and press and hold the green icon in the upper left corner of the file. Currently, there are two external monitors connected to this MacBookPro laptop.
4. First turn on the computer, select the two applications you want to split screen, open them, and on the page of one of the applications, move our mouse cursor to the green dot in the upper left corner, and click on the displayed menu , you can choose full screen or fix the window to the left or right side of the screen. The editor takes fixing to the left as an example, click.
How to switch screens on Apple computers?
The screen switching shortcut keys of Apple computers are very convenient. It allows users to quickly switch screens and improve work efficiency. Apple computers have two shortcut keys for switching screens, namely "Command F1" and "Control F1". First, let’s introduce the “Command F1” shortcut key.
The first method is to press Command M on the keyboard, but it can only minimize one window. The second method is to quickly hide the program, switch to the desktop, and press F11. The third method is to change desktop 1 and desktop 2. You can use command 1 or 2 to switch to realize window switching. Open System Preferences on your computer.
Use shortcut keys: You can use the command F3 or F11 shortcut keys to quickly switch to the desktop. Use the icon: If there is an Apple icon on your computer desktop, you can click the icon to quickly switch to the desktop.
As shown in the picture below, this MacBook Pro laptop is currently connected to two external monitors. If you want to set the primary and secondary displays, first click the Apple icon in the upper left corner of the system, and then click the [System Preferences] option in the menu.
How to switch the main monitor on Mac As shown in the picture below, there are currently two external monitors connected to this MacBook Pro laptop.
Step 1: Open the application First, click the Apple icon in the upper left corner of the screen, select the application from the drop-down menu, or find and click the application icon in the Dock bar.
How to set up dual monitors on Apple computers
Set [Mirror Display]: Select [Apple Icon] [System Preferences], click [Display] [Arrange], and then check [Mirror Display]; Settings [Extended Desktop]: When [Mirror Display] is unchecked, "Extended Mode" can be achieved.
Method 1: Turn on the external monitor and connect it to the MAC through the data cable. Select Apple's menu, then click System Preferences, then click to enter the Displays interface.
Open "System Preferences" "Display" In "Arrangement", whichever screen the white strip is placed on will be used as the main monitor! At the same time, you can drag any screen to set it to the left, right, top or bottom.
There are usually two ways to switch screens on a computer: 1: using shortcut keys; 2: using display settings. Here are the specific steps. Using shortcut keys If your computer is connected to multiple monitors, you can use the following shortcut keys to switch screens: Windows system: Win P; Mac system: Control F2.
Determine the monitor interface, purchase a suitable conversion connector, and connect it to the mac. Open the 'Display' and 'Arrangement' columns in System Preferences on your Mac to set the screen display mode. After connecting your MacBook Air to an external monitor, here's how to set it up: Click the Apple menu.
Connect the first monitor to the computer's main video output connector, which is usually the connector for a discrete graphics card and is separate from the motherboard video connector. Connect the second monitor to the second video output (if available) or use an adapter. Set up dual monitor mode in your computer operating system.
Conclusion: The above is all the content about dual-screen display of Apple mac system introduced by this site. I hope it will be helpful to everyone. If you want to know more about this aspect, remember to bookmark and follow it. This site.
The above is the detailed content of Dual screen display on Apple mac system?. For more information, please follow other related articles on the PHP Chinese website!

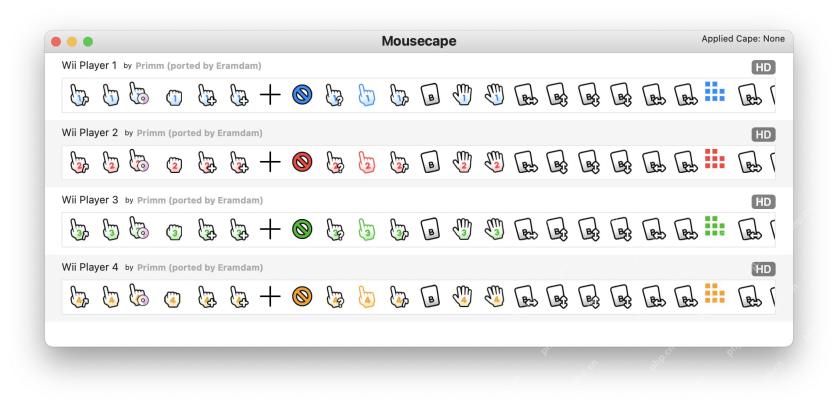 How to Customize Your Mac Mouse Cursor with MousescapeApr 29, 2025 am 10:25 AM
Want to customize the cursor on MacOS? Maybe you want to use a Windows-style white cursor on your Mac, or a gray 3D-style Linux cursor or even a cursor on your Mac using the Wii interface? You can use a free app called Mousescape for Mac to achieve all of this and more. Macs don't offer a lot of cursor customization options by default, you can change the Mac cursor to make it bigger, adjust the color with accessibility settings, and turn the shake lookup feature on or off, and that's it. But that's where Mousescape comes in, which allows you to use a fully customized cursor on your Mac. Mousescape is easy to make
 MacOS Sequoia 15.4.1 Update Released with Bug & Security FixesApr 29, 2025 am 10:15 AM
Apple released the MacOS Sequoia 15.4.1 system update for Mac users running the Sequoia operating system. This update is entirely focused on security updates and bug fixes and does not include any new features. Apple also released iOS 18.4.1 for iPhone, iPadOS 18.4.1 for iPad, and updates to tvOS, watchOS and visionOS, which also focus on bug fixes and security patches. How to download and install the MacOS Sequoia 15.4.1 update Be sure to back up your Mac using Time Machine before starting any system software updates: From Apple dishes
![How to Use Apple Intelligence on Mac: Benefits of Using It [ Features]](https://img.php.cn/upload/article/001/242/473/174589279141366.png?x-oss-process=image/resize,p_40) How to Use Apple Intelligence on Mac: Benefits of Using It [ Features]Apr 29, 2025 am 10:13 AM
How to Use Apple Intelligence on Mac: Benefits of Using It [ Features]Apr 29, 2025 am 10:13 AMApple Intelligence: Your Mac's AI-Powered Assistant Apple Intelligence leverages AI to enhance your macOS experience, personalizing recommendations and boosting privacy and performance. This machine learning technology adapts to your workflow, makin
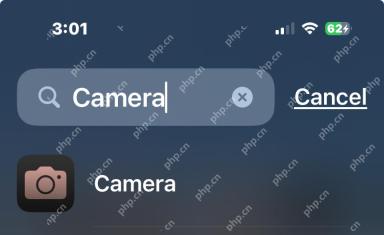 iPhone Camera App Deleted or Icon Missing? Here’s the FixApr 29, 2025 am 10:07 AM
iPhone camera app icon is missing? Don’t panic! Easy to retrieve! Some iPhone users may find their camera app icon disappearing from the iPhone home screen. don’t worry! This does not mean that your camera app has been deleted. Solving this problem is usually simple. Camera applications are an integral part of the iPhone system. While it rarely disappears, is inaccessible, or looks deleted, it is actually still on your iPhone. We will teach you how to find it and reuse the camera app with four practical tips. 1. Camera app icon was accidentally removed from iPhone home screen? The recovery method is as follows If the camera app suddenly disappears from the iPhone home screen, it is usually because it is accidentally moved
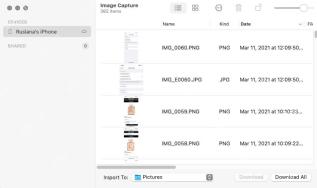 How to Transfer Photos From an iPhone to a MacApr 29, 2025 am 10:02 AM
Transferring iPhone Photos to Your Mac: A Comprehensive Guide Need to get those vacation photos off your iPhone and onto your Mac? This guide explores multiple methods for effortlessly transferring your images. We'll cover wired and wireless options
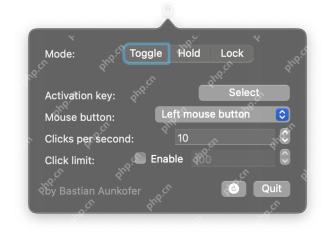 3 Free Auto-Clickers for MacApr 29, 2025 am 09:57 AM
Auto-clickers are relatively niche software that is often associated with repetitive data entry, gaming, or software testing tasks, but it has also gained some wider popularity as many people work from home. If you need an auto-clicker for Mac, here are some free auto-clicker options built for MacOS, and we'll cover a few of them. What is the purpose of the automatic clicker? First, it may be helpful to understand what the auto-clicker does or what it is expected to do… As the name suggests, the auto-clicker simulates mouse clicks, helping you automate repetitive tasks or actions by clicking on specific locations on the screen. This allows you to automate clicks without manual clicks, simulating the user's clicking on the mouse button or trackpad. A good automatic
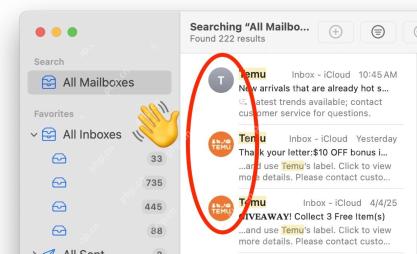 How to Disable Contact Photos in Mail on MacApr 29, 2025 am 09:56 AM
Apple recently updated the interface and features of the Mac version of the email app, adding the email sender icon. Next to the email sender's name, subject, and email content preview, a contact's photo or sender icon is now displayed. Whether you like contact photos in the mail app may depend on who the email sender you most often is and what the email content is. Some users may like the mail sender icon, while others may not like it at all. If you belong to the latter, you will be happy to find that you can disable the contact photos displayed in the mail app for Mac as the mailer icon. Contact photos initially appeared in the iPhone mail app, but with another important design change (mail category sorting feature,
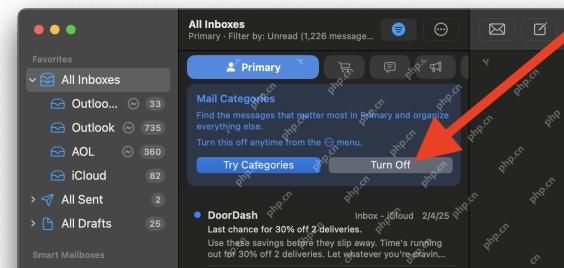 How to Disable Mail Categories on MacApr 29, 2025 am 09:49 AM
Apple's controversial Mail Categories feature has arrived on macOS Mail, enabled by default. This feature automatically sorts your inbox into four categories: Primary, Transactions, Updates, and Promotions. A hidden "All Mail" category co


Hot AI Tools

Undresser.AI Undress
AI-powered app for creating realistic nude photos

AI Clothes Remover
Online AI tool for removing clothes from photos.

Undress AI Tool
Undress images for free

Clothoff.io
AI clothes remover

Video Face Swap
Swap faces in any video effortlessly with our completely free AI face swap tool!

Hot Article
Hot Tools

SAP NetWeaver Server Adapter for Eclipse
Integrate Eclipse with SAP NetWeaver application server.

mPDF
mPDF is a PHP library that can generate PDF files from UTF-8 encoded HTML. The original author, Ian Back, wrote mPDF to output PDF files "on the fly" from his website and handle different languages. It is slower than original scripts like HTML2FPDF and produces larger files when using Unicode fonts, but supports CSS styles etc. and has a lot of enhancements. Supports almost all languages, including RTL (Arabic and Hebrew) and CJK (Chinese, Japanese and Korean). Supports nested block-level elements (such as P, DIV),

SublimeText3 Mac version
God-level code editing software (SublimeText3)

Dreamweaver Mac version
Visual web development tools

EditPlus Chinese cracked version
Small size, syntax highlighting, does not support code prompt function

