Home >System Tutorial >Windows Series >How to add accounts to local users and groups in win11? How to add accounts to local users and groups in win11
How to add accounts to local users and groups in win11? How to add accounts to local users and groups in win11
- WBOYWBOYWBOYWBOYWBOYWBOYWBOYWBOYWBOYWBOYWBOYWBOYWBforward
- 2024-02-14 23:24:371153browse
php editor Strawberry will introduce to you how to add local user and group accounts in the Win11 operating system. In Win11, adding local user and group accounts can help us better manage and control system access permissions and ensure system security. Next, we will introduce in detail the steps to add local user and group accounts, we hope it will be helpful to everyone.
How to add accounts to win11 local users and groups
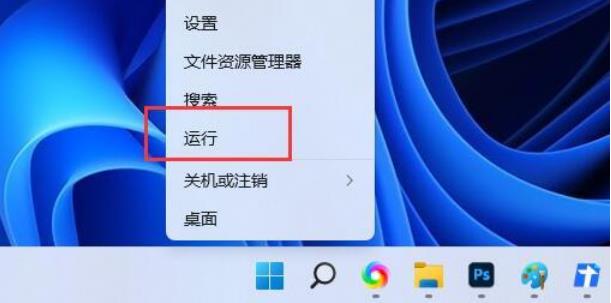
1. First, press the [Win In the right-click menu item that opens, select [Run].
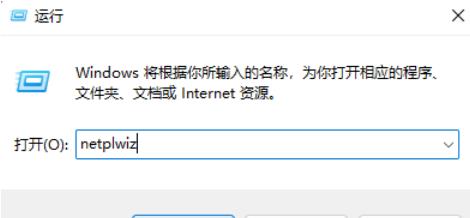
#2. In the run window, enter the [netplwiz] command and press [OK or Enter].
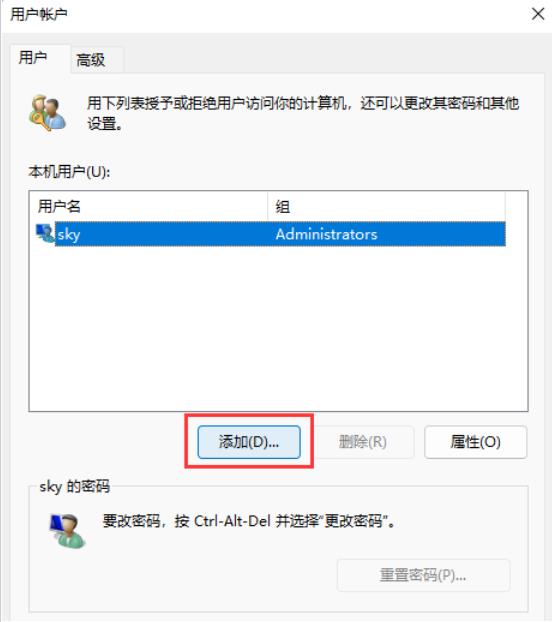
#3. In the user account window, click [Add].
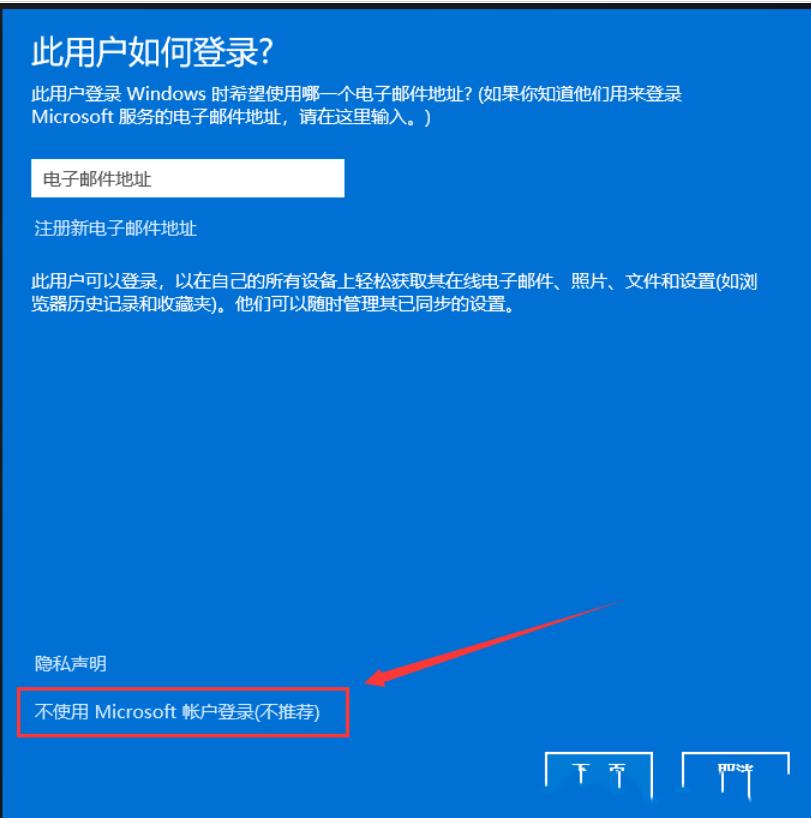
4. How does this user log in? Click [Sign in without a Microsoft account (not recommended)] at the bottom.
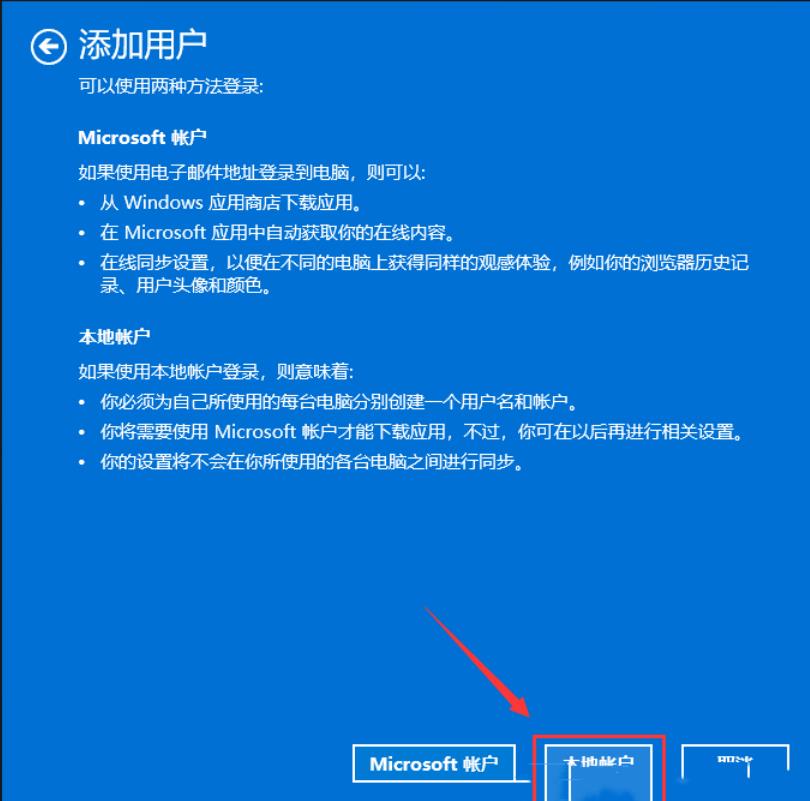
5. Similarly, click [Local Account] at the bottom.
Local Account
If you log in with a local account, this means:
-You must create a separate account for each computer you use Create a separate username and account
-You will need a Microsoft account to download the app, but you can set it up later
-Your settings will not be used by you Synchronize between computers
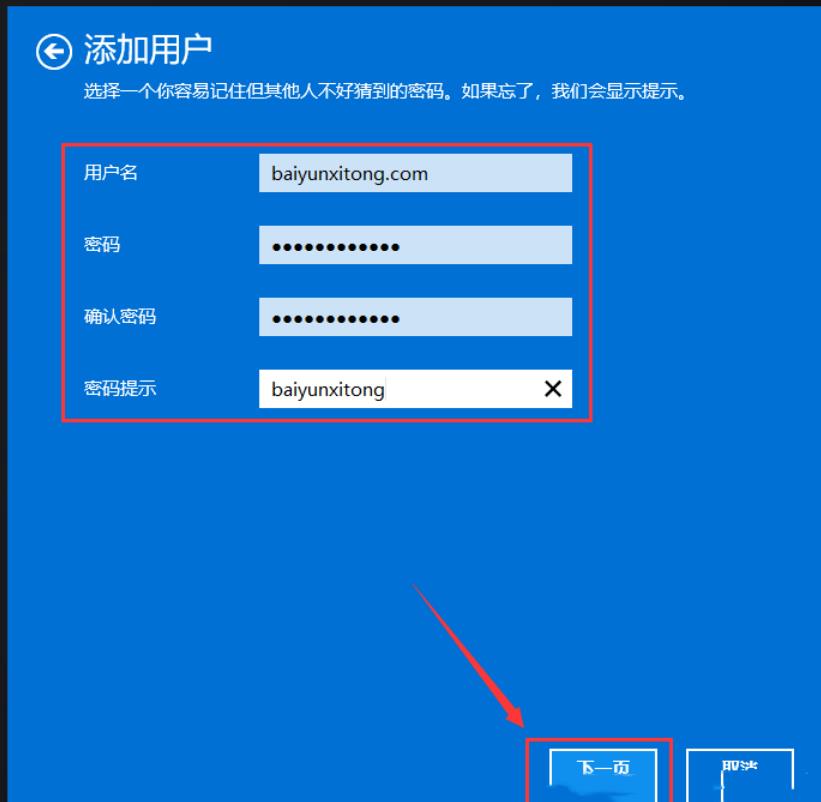
6. Enter user name, password, password prompt and other information, and then click [Next Page].
#7. It shows that the user has been added successfully, click [Finish].

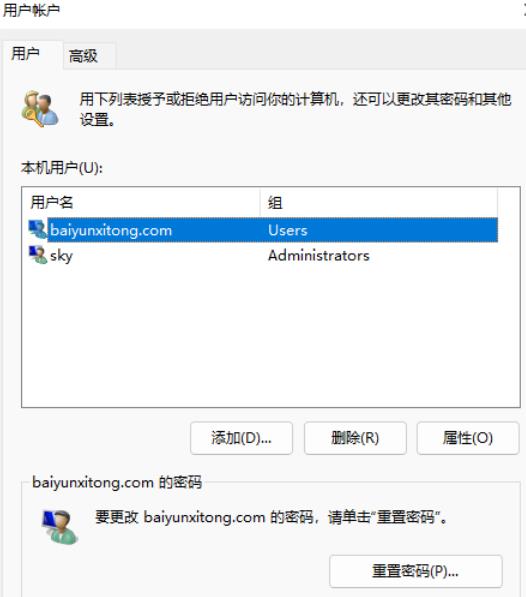
#8. Finally, you can see the user you just added in the user list.
The above is the detailed content of How to add accounts to local users and groups in win11? How to add accounts to local users and groups in win11. For more information, please follow other related articles on the PHP Chinese website!

