


php editor Zimo brings you a concise guide to flashing the BIOS for Gigabyte motherboards. During the computer maintenance and upgrade process, flashing the BIOS is an important operation, which can fix errors, improve performance and compatibility, etc. This article will give you a detailed introduction to the steps and precautions for flashing the BIOS of a Gigabyte motherboard to help you complete the operation smoothly. Before flashing the BIOS, make sure to back up your data, select the correct BIOS version, and strictly follow the steps to avoid irreversible losses. Now let us learn how to flash the BIOS of a Gigabyte motherboard!

How to flash bios on Gigabyte motherboard?
The steps are as follows: 1. Download the bios file suitable for your motherboard model and extract it to the root directory of the USB flash drive. 2. Insert the USB flash drive, restart the computer, and enter bios settings. 3. Find the "Q-Flash" option in the bios settings and select it. 4. After entering the Q-Flash page, find the "Update BIOS from Drive" option and select your USB flash drive. 5. Select your bios file and start the update. 6. During the update process, the computer will restart several times. After the update is completed, restart the computer. 7. Check whether the computer starts normally and enter the bios settings to confirm that the bios version has been updated.
Does the computer enter Q-FLASH as soon as it is turned on?
is possible because Q-FLASH is a tool for hardware backup and firmware update, which usually detects the hardware and runs automatically when the computer starts. If your computer is set to automatically start Q-FLASH, the computer will enter Q-FLASH when it is turned on. If you need to solve this problem, you can try to enter the BIOS settings to see if there are related startup items, or press F8 or other designated keys to enter the startup menu when the computer is turned on, and choose to boot from the hard disk. At the same time, please also pay attention to the security of computer hardware and software and beware of illegal intrusion or virus infection.
The computer cannot enter the system. appears at the bottom of the computer: BIOSSetup/Q-Flash, :XpressRecovery2?
Yours should be a Gigabyte motherboard! The English meaning of the previous paragraph: Press the DEL key to enter the CMOS settings. If the English that appears after you press DEL is black and white with only one line, you are generally required to enter the CMOS password. If there is no password, you need to open the chassis CLS_CMOS. If it is a piece of white text on a blue background, just press the F10 key to save and exit.
How to use Gigabyte's Q-FLASH?
1. First go to Gigabyte's official website to download the BIOS suitable for your motherboard model, then double-click the downloaded file to open it and extract it to your USB flash drive (the disk type of the USB flash drive can only be FAT32). There are three decompressed files (one FLASHSPI.EXE, one motherboard BIOS file, and one autoexec.bat batch file); anyway, just copy them to the USB flash drive.
2. Press the "End" key after booting or press the "F8" key after entering the BIOS interface to enter the Q-Flash tool
3. Then select "Update BIOS from Drive". Then it will automatically search for the BIOS file in your USB flash drive, such as MA78GUS2.F7, select it.
4. After the upgrade, remember to restore the BIOS to default, that is, select "Load Optimized Defaults", and then restart.
Motherboard Restart line doesn’t work?
Regarding this problem, if the motherboard’s restart line does not work, there may be several reasons:
1. The restart line is not connected correctly: First, make sure that the restart line is correctly connected to the motherboard the restart pin. You can refer to the motherboard's user manual or check the markings on the motherboard to determine the correct connection location.
2. The restart line is damaged: The restart line may be damaged and cannot work properly. You can try replacing a new restart cable to eliminate this problem.
3. Motherboard failure: If there is no problem with the above two points, then the motherboard itself may be faulty. In this case, it is recommended to contact the motherboard manufacturer or professional technicians for further testing and repair.
In short, if the motherboard's restart line does not work, you can first check whether the connection is correct, and then try to replace the new restart line. If the problem persists, the motherboard itself may be faulty and requires further professional testing and repair.
What is Q-Flash on Gigabyte motherboards? I saw it accidentally. What is the use of it?
A small tool to flash the motherboard BIOS (Basic Input Output System). Upgrading the motherboard to a higher version of the BIOS may support more newer CPUs or adjust some basic settings. Under normal circumstances, it is not recommended or necessary to use this tool.
Which Gigabyte motherboard BIOS recovery method is used?
GIGABYTE motherboard BIOS restore (BIOS flashback) is a technology that restores the BIOS firmware solidified on the motherboard to the factory state through specific operations. Generally, Gigabyte motherboards integrate a BIOS restore button or port, called Q-Flash or DualBIOS function.
If you want to use the BIOS restore function, you can follow the steps below:
1. First, find the BIOS restore related operation guide in the model and specification manual of the Gigabyte motherboard. Or go to GIGABYTE's official website to download the BIOS restore guide.
2. Then, connect the motherboard that needs to restore the BIOS to the power supply to ensure that the power supply is normal.
3. According to the guide, plug in a USB flash drive or other bootable device to the BIOS restore button or interface, and copy the BIOS restore program and firmware files to the device.
4. Press the BIOS restore button or interface and wait for the firmware restore to complete, which will take about a few minutes.
5. After the BIOS restoration is completed, restart the computer and enter the BIOS setting interface for appropriate optimization and settings.
It should be noted that you need to be very careful when restoring the BIOS. Any improper operation may cause the motherboard to fail to start or even be scrapped. Therefore, when performing BIOS restore operations, be sure to read carefully and follow the relevant operating guide requirements.
The above is the detailed content of How to flash bios on Gigabyte motherboard?. For more information, please follow other related articles on the PHP Chinese website!

 Clipchamp Video Loss on Windows? 2 Ways to Recover Files!May 09, 2025 pm 08:12 PM
Recover Lost Clipchamp Videos: A Step-by-Step Guide Losing a video you've edited in Clipchamp can be frustrating. This guide provides effective methods to recover your lost Clipchamp video files. Finding Your Clipchamp Videos Before attempting recov
 7 Useful Fixes for Action Center Keeps Popping upMay 09, 2025 pm 08:07 PM
Action Center allows you to access quick settings and notifications. However, some users say that they encounter the “Action Center keeps popping up” issue on Windows 11/10. If you are one of them, refer to this post from MiniTool to get solutions.Qu
 Instant Ways to Restore Missing Google Chrome Icon on WindowsMay 09, 2025 pm 08:06 PM
Troubleshoot Missing Google Chrome Icon on Windows Can't find your Google Chrome icon on Windows? This guide offers several solutions to restore it. Why is my Chrome icon missing? Several factors can cause the Chrome icon to vanish from your desktop:
 Brave Browser High CPU and RAM Usage: Best 5 Tips to ReduceMay 09, 2025 pm 08:05 PM
Brave browser CPU and memory usage too high? Under Windows 10/11 system, Brave browser's high CPU and memory usage problems have troubled many users. This tutorial will provide a variety of solutions to help you easily resolve this issue. Quick navigation: Brave browser high CPU and memory footprint Solution 1: Clear cookies and cache data Solution 2: Disable hardware acceleration Solution 3: Close the tab and update the Brave browser Solution 4: Disable the plugin Solution 5: Create a new user profile Optional: Run MiniTool System Booster System Optimization Tool Summarize Brave browser high CP
 Targeted Fixes for Xbox Error 0x87e0000f When Installing GamesMay 09, 2025 pm 08:04 PM
Troubleshooting Xbox Error Code 0x87e0000f: A Comprehensive Guide Encountering the Xbox error code 0x87e0000f while downloading games from Xbox Game Pass can be frustrating. This guide provides several solutions to help you resolve this issue and get
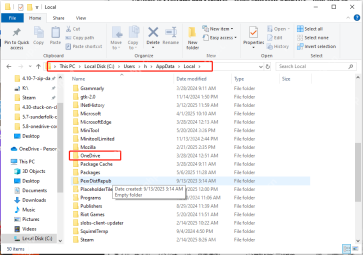 OneDrive Couldn't Start Files on Demand?Top 4 MethodsMay 09, 2025 pm 08:02 PM
OneDrive Files On-Demand troubleshooting: resolving the "OneDrive couldn't start Files On-Demand" error. This MiniTool guide provides solutions for the persistent "Microsoft OneDrive Couldn’t start files on Demand" error (codes 0x
 How to fix 'Microsoft Store is blocked' error in Windows?May 09, 2025 pm 06:00 PM
Microsoft Store is blocked error occurs when Windows prevents access to the Microsoft Store app, displaying the message Microsoft Store is blocked. Check with y
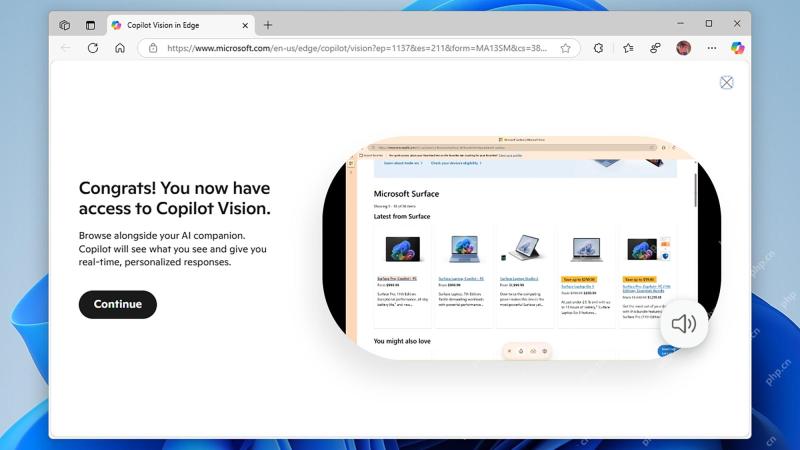 How to use Copilot Vision for free in Microsoft EdgeMay 09, 2025 am 10:32 AM
Staying current with all the new AI tools is a challenge. Many might even overlook readily available AI features. For instance, Copilot Vision is now free for all Microsoft Edge users – a fact easily missed if you don't regularly use Edge or haven't


Hot AI Tools

Undresser.AI Undress
AI-powered app for creating realistic nude photos

AI Clothes Remover
Online AI tool for removing clothes from photos.

Undress AI Tool
Undress images for free

Clothoff.io
AI clothes remover

Video Face Swap
Swap faces in any video effortlessly with our completely free AI face swap tool!

Hot Article
Hot Tools

MinGW - Minimalist GNU for Windows
This project is in the process of being migrated to osdn.net/projects/mingw, you can continue to follow us there. MinGW: A native Windows port of the GNU Compiler Collection (GCC), freely distributable import libraries and header files for building native Windows applications; includes extensions to the MSVC runtime to support C99 functionality. All MinGW software can run on 64-bit Windows platforms.

ZendStudio 13.5.1 Mac
Powerful PHP integrated development environment

SecLists
SecLists is the ultimate security tester's companion. It is a collection of various types of lists that are frequently used during security assessments, all in one place. SecLists helps make security testing more efficient and productive by conveniently providing all the lists a security tester might need. List types include usernames, passwords, URLs, fuzzing payloads, sensitive data patterns, web shells, and more. The tester can simply pull this repository onto a new test machine and he will have access to every type of list he needs.

SublimeText3 English version
Recommended: Win version, supports code prompts!

VSCode Windows 64-bit Download
A free and powerful IDE editor launched by Microsoft

