Home >System Tutorial >Windows Series >How to set up virtual memory in win7? Share the steps to set up virtual memory in win7
How to set up virtual memory in win7? Share the steps to set up virtual memory in win7
- 王林forward
- 2024-02-14 17:00:291635browse
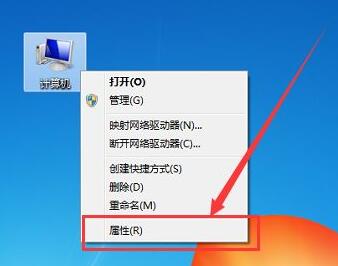
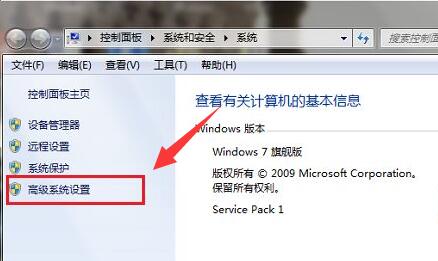
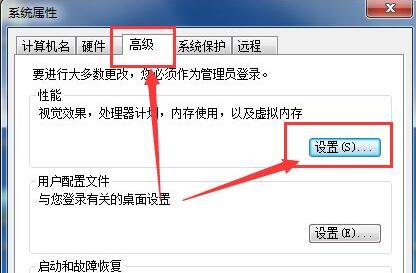
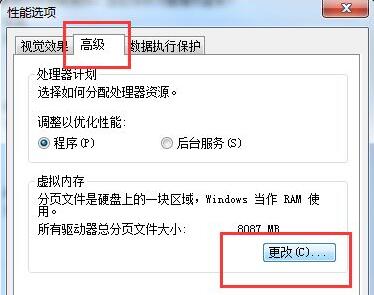
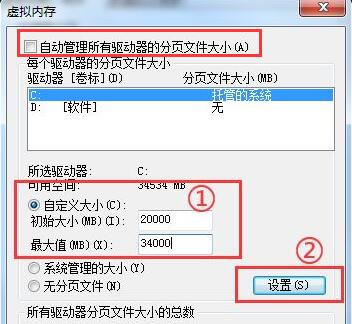
php editor Baicao will share with you the steps to set up win7 virtual memory. Virtual memory plays an important role in the computer. When the physical memory is insufficient, the performance of the system can be improved by setting virtual memory. In win7 system, setting up virtual memory only requires a few simple steps. First, click on the Start menu, right-click on "Computer" and select "Properties". In the system window, click "Advanced system settings" on the left. Next, in the system properties window that pops up, click the "Advanced" tab, find the "Settings" button in the "Performance" area, and then click the "Change" button in the "Advanced" tab. Finally, in the virtual memory area, select "Automatically manage paging file size for all drives", or set the initial size and maximum size yourself, and click the "Settings" button to save the settings. In this way, you have successfully set up the virtual memory of win7 and improved the performance of the system.
How to set up virtual memory in win7:
1. First, right-click the computer and open "Properties".
#2. Then click on "Advanced System Settings" on the left.
#3. Then click "Settings" under Advanced.
#4. Then click "Change" of virtual memory under "Advanced".
#5. After entering, cancel "Automatically manage paging file sizes for all drives".
6. Then check "Custom size" to start customizing your virtual memory.
The above is the detailed content of How to set up virtual memory in win7? Share the steps to set up virtual memory in win7. For more information, please follow other related articles on the PHP Chinese website!

