


php editor Youzi gives you the answer: In Mac system, you can use shortcut keys to quickly start the scanner. Just hold down the Command key and the Spacebar and type "scanner" in the Spotlight search bar to find and launch the scanner app that comes with your system. This shortcut key is simple and convenient to operate, allowing you to operate more efficiently when you need to use the scanner. No need to install additional software or manually find applications, quickly launch the scanner in just a few simple steps.
Which key in the keyboard is the scan key?
1. Tab key: The Tab key is the abbreviation of tabulator, usually we call it the tab key.
MOUSE1 on the keyboard is the left mouse button. Pressing this key is equivalent to clicking the left mouse button. The function of the MOUSE1 key is equivalent to the confirmation button.
The Del key and the backspace key are two common delete keys on computer keyboards. Pressing the Del key will delete the character or text to the right of the cursor. Pressing the backspace key will move the cursor one space to the left and delete the character to the left of the cursor. The backspace key can also be used to delete selected content. These two keys are often used in editing text and input boxes to facilitate users to delete and edit operations.

How to connect a scanner on Mac? Tutorial on connecting a scanner on Mac?
The first step to open System Preferences on Mac is to click on the upper left corner [Apple] icon. Then, find and click the [System Preferences] option in the pop-up menu bar. Next, find and click the [Printers and Scanners] icon in the pop-up window.
Before using an Apple computer, you need to connect the scanner and install the driver. There are two types of connection cables between the scanner and the Mac: SCSI interface and USB interface. The USB interface supports plug-and-play function. The method of installing the scan driver is to install it in the application software Photoshop, or you can choose to install it independently on the host hard disk.
3. Open your Apple computer and click the "Preferences" button on the screen. Find the "Printers and Scanners" option in the window that opens and click to enter. Then, a dialog box will pop up, check the box in front of "Share this printer on the network". Find the "Preview" option in Launchpad and click to enter.
How to use mac scanner
The first step to open System Preferences on Mac is to click the [Apple] icon in the upper left corner. Then, find and click the [System Preferences] option in the pop-up menu bar. Next, find and click the [Printers and Scanners] icon in the pop-up window.
The basic steps for an ordinary scanner are as follows: Take scanning a reflective original as an example. First, turn on the power and turn on the scanner switch. Then, start the scanning software Photoshop, click File in the menu bar, select Import, and then select the scanning software to open the scanning driver.
3. Open your Apple computer and click the "Preferences" button on the screen. Find the "Printers and Scanners" option in the window that opens and click to enter. Then, a dialog box will pop up, check the box in front of "Share this printer on the network". Find the "Preview" option in Launchpad and click to enter.
4. How to use the Apple lidar scanner is as follows: turn on the rangefinder, align the origin in the lens with the starting point of the measurement object, and press [ ] to mark the starting point. Move the phone slowly, and when it reaches the end point, click the [ ] sign to end the measurement. Open and click to enter "Camera".
How to use a scanner on Apple computers
1. First, click the [Apple] icon in the upper left corner, and then click [System] in the pop-up menu bar according to the arrow in the picture below. Preferences] option. Step 2: In the pop-up window, click the [Printers and Scanners] icon as pointed by the arrow in the picture below.
2. Open preferences. Turn on Printers and Scanners. Check Share on the network. Open the preview program in LAUNCHPAD. Click on File and select Import from Scanner. Just save the file.
3. Open your Apple computer and click the "Preferences" button on the screen. Find the "Printers and Scanners" option in the window that opens and click to enter. Then, a dialog box will pop up, check the box in front of "Share this printer on the network". Find the "Preview" option in Launchpad and click to enter.
4. Question 1: How to scan using Apple computer system. Use Mac to scan images. Connect the scanner: Before turning on the Apple computer, you need to connect the scanner and install the scanner driver. There are two types of connection cables between the scanner and the Mac: one is a SCSI interface, and the other is a USB interface, plug and play.
Conclusion: The above is all the content about the shortcut keys for starting the scanner on Mac that this site has compiled for you. Thank you for taking the time to read the content of this site. I hope it will be helpful to you. Don’t forget to learn more related content. Find it on this site.
The above is the detailed content of Mac startup scanner shortcut key?. For more information, please follow other related articles on the PHP Chinese website!

 How to use Photoshop and Photoshop alternativesApr 15, 2025 am 11:39 AM
Adobe Photoshop: The Industry Standard and its Alternatives Adobe Photoshop remains the gold standard for raster image editing, a professional's choice for over three decades. Its influence is undeniable, shaping nearly every subsequent image editor
 How to partition hard drives on Mac | A complete guideApr 15, 2025 am 11:20 AM
This guide helps you master Mac hard drive partitioning, whether for better file organization or dual-booting operating systems. Fear not data loss; we'll cover backups! Why Partition? Organizing files, installing Windows, or simply improving data
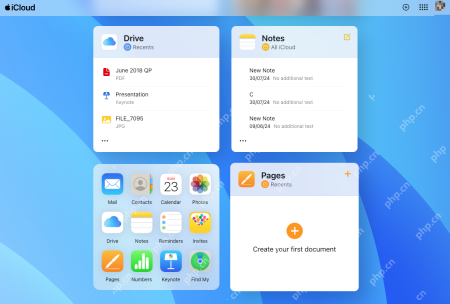 Best Cloud Storage for Mac: Which Online Storage Choose for Your MacBook?Apr 15, 2025 am 11:12 AM
Must-have cloud storage for Mac computers: space expansion and cross-device access Cloud storage services not only effectively free up space in Mac hard drives, but more importantly, it allows you to access files on almost any connected device. For example, you can create a file on your Mac and then access it on your iPhone. Recommended best cloud storage for Mac computers There are a wide range of cloud storage services on the market. Here are some of the ones we recommend: iCloud Google Drive Microsoft OneDrive Sync.com Dropbox Icedrive MEGA 1. iCloud For many Apple users, iCloud is a natural first choice. All modern
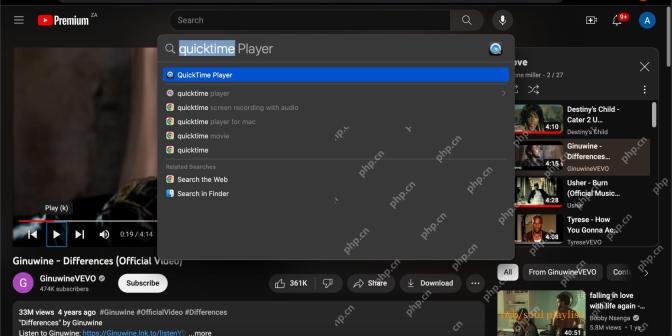 MacBook Microphone Not Working: How to Fix it on Mac Air/Pro?Apr 15, 2025 am 11:06 AM
Troubleshooting Your MacBook's Uncooperative Microphone: A Step-by-Step Guide Experiencing audio issues with your MacBook's microphone? Whether it's failing during a QuickTime recording, a FaceTime call, or a crucial Zoom meeting, this guide provide
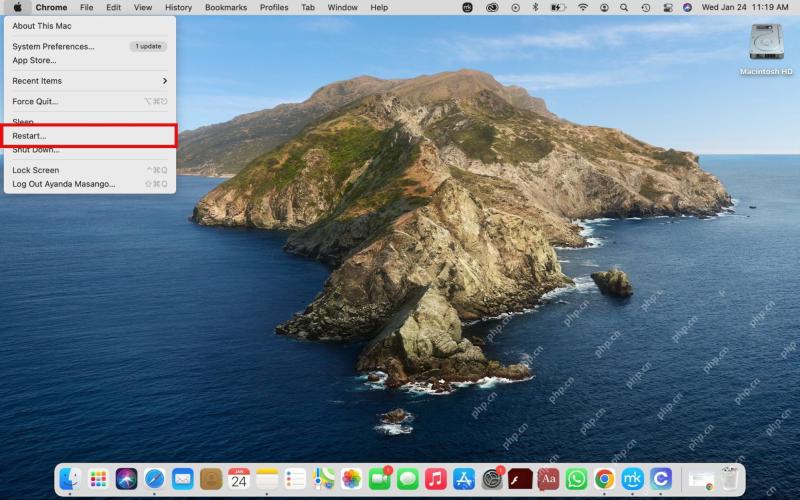 An Error Occurred While Preparing the Installation: What Is It & How to Fix?Apr 15, 2025 am 11:02 AM
During the macOS installation process, you will sometimes encounter the prompt of "an error occurred while preparing for installation", which will cause installation delays. This article will introduce a variety of solutions. "An error occurred while preparing for installation" means that macOS update failed, which could be caused by unstable network connections, incorrect date and time settings, or Apple server issues. Causes that cause this error can include: date and time mismatch (especially if Apple is not selected as the date and time source), installation media corruption, or Mac hardware issues (e.g., the disk you choose to install macOS is empty). Here is a solution to this error: Check device compatibility: Make sure your Mac model is compatible with the version of macOS to be installed. Apple supports website columns
 How to access your Mac remotely: Complete tutorialApr 15, 2025 am 10:58 AM
Remotely Access Your Mac: A Comprehensive Guide Working remotely is now the standard, making remote Mac access more crucial than ever. Apple simplifies this process, and with helpful third-party apps, it's surprisingly easy. This guide covers vario
 What is FileVault disk encryption and how to use itApr 15, 2025 am 10:56 AM
FileVault: Your Mac's Data Fortress – A Comprehensive Guide FileVault, as its name suggests, is macOS's built-in data vault, providing robust encryption for your entire startup disk. In today's digital landscape, data security is paramount, especia
 How to fix 504 gateway timeout errors on MacApr 15, 2025 am 10:42 AM
When visiting the website, all kinds of mysterious mistakes emerge one after another. The most famous one is the 404 error - the error encountered when accessing a web page that does not exist. The common error that ranks second is the 504 error gateway timeout. There are many other error codes in addition. When encountering such errors when loading a website, it is very frustrating for both visitors and brands. Visitors are unable to get the information they need, and brands reduce exposure and alienate their audience. The good news is that the 504 error is controllable to a certain extent. You can maintain your reputation by taking some precautions and learning how to quickly fix 504 gateway timeout issues. But first, let's clarify what exactly does the 504 error gateway timeout mean and why. What is 504 gateway timeout? Every visit


Hot AI Tools

Undresser.AI Undress
AI-powered app for creating realistic nude photos

AI Clothes Remover
Online AI tool for removing clothes from photos.

Undress AI Tool
Undress images for free

Clothoff.io
AI clothes remover

AI Hentai Generator
Generate AI Hentai for free.

Hot Article
Hot Tools

ZendStudio 13.5.1 Mac
Powerful PHP integrated development environment

PhpStorm Mac version
The latest (2018.2.1) professional PHP integrated development tool

Dreamweaver CS6
Visual web development tools

VSCode Windows 64-bit Download
A free and powerful IDE editor launched by Microsoft

Dreamweaver Mac version
Visual web development tools

