


php editor Youzi will introduce to you the problem that Lenovo computer bios cannot start the U disk. When using Lenovo computers, we sometimes encounter situations where it cannot be booted through a USB flash drive, which brings inconvenience to our work and life. But, don’t worry, there are some simple things we can do to fix this problem. Next, we will explain in detail the reasons why Lenovo computer bios cannot boot the USB flash drive and the solutions. Let’s take a look!
1: Generally, when you turn on a Lenovo machine, you press F12 to enter the bios. When entering the bios, we use the cursor to move to the Security option, which means security. Then use the arrow keys to move the cursor to the Security Boot option, which means safe boot. Then press the Enter key on your keyboard. 
2: Then select the Secure Boot option, press the Enter key on the keyboard, then select Disabled to close this item, and press the Enter key on the keyboard
3: Then select the Startup option again, first select the UEFI/Legacy Boot option, which means the new UEFI and traditional startup methods. Now it shows the UEFI Only single UEFI mode. We At this moment, select the compatibility mode, which means it is compatible with the traditional BIOS mode, so press Enter to enter, select the Both item, and press the Enter key on the keyboard to confirm. 
4: Then select the UEFI/Legacy Boot Priority option to enter, then press Enter to select the Legacy First option, which means that the traditional boot mode is listed first, and then press the keyboard Enter key. Confirm
First, restart the computer and press the F12 key to enter the startup options. Then, select the boot device in the BOOT option and press the Enter key to confirm the selection. Please note that some computers may have the F12 key disabled, so you need to enable it in the BIOS settings. After making sure the F12 key is set to enabled, save the settings and restart the computer.
#After setting the startup item, select the U disk startup item, usually USB HDD SanDisk Cruzer Edge. Then use your keyboard's plus and minus keys to move the option to the top and press Enter to confirm. Please note that depending on the BIOS version and model of your computer, the options displayed may be different. If you want to boot from a USB flash drive, select the USB-HDD option. If you want to boot from a disc, select the ATAPI CD0 HL-DT-ST DVDRAM GU70M option. If you want to return to hard disk booting, select the ATA HDD0 HGST HT3541010A9E600 option. Again, use the plus and minus keys to move them to the top and press Enter to confirm.

#7: Then press F10 to save and exit. Restart the computer to enter the U disk or CD to install the system.
In addition, some additional information needs to be added. On some computers, you press the DEL key to enter the BIOS, while on others you press the F12 key. After entering the BIOS, find the "Restart" option and change its "OS Optimized Defaults" (that is, the default settings for operating system optimization) to "Disabled" to turn off this function. Next, enter the "Startup" option, set "UEFI/Legacy Boot" to "Legacy First", and then press the F10 key to save the settings. After exiting the BIOS, you can use the USB boot disk to start the computer.
The problem is the hard disk mode, because some older systems, including a large part of XP systems, do not have SATA drives in their systems, so they are using an old-fashioned Ghost or PE When installing the system (old PEs do not come with SATA drivers, and most new PEs come with SATA drivers), the hard disk will not be found. The general problem is that the hard disk mode setting in the BIOS is incorrect. To correctly set the hard disk mode, first enter the Configuration item and change its mode from AHCI to Compatible (compatibility mode), so that the hard disk can be displayed in PE. After installing the system, change back to AHCI. Why should you change back? Because AHCI hard disk mode has better performance and faster speed.
I hope my answer is useful to you!
The above is the detailed content of Lenovo bios cannot boot from USB disk. For more information, please follow other related articles on the PHP Chinese website!

 联想小新一键恢复小孔还原系统教程Jul 15, 2023 am 10:09 AM
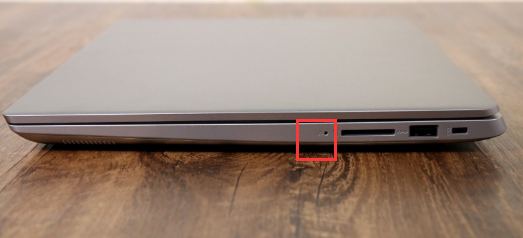
当我们的电脑遇到问题时,很多小伙伴都会使用恢复出厂设置来还原系统解决问题,今天要讲的就是联想电脑一键恢复系统的特点,我们都知道联想笔记本上都有一个小孔,大部分小伙伴都不知道这个小孔的用处,接下来小编就把联想一键恢复小孔的使用方法带给大家。 联想小新一键恢复小孔: 1.首先我们准备一个卡针,然后使用卡针捅一下机器左侧的一键恢复孔。 2.接着使用键盘上的按键选择“systemrecovery”,按回车。 3.在选择一个选项页面中,我们选择“疑难解答”。 4.我们点击“重置此电脑”选项。
 联想win7旗舰版如何开启vt虚拟化Jul 22, 2023 am 10:49 AM
win7vt虚拟化开启的话必须要在BIOS里设置,很多小伙伴不知道怎么开启,下面就和大家聊聊win7系统开启vt虚拟化的方法吧。方法一:1、进入BIOS设置后,切换到“Configuration”选项,将光标移动到“IntelVirtualTechnology”并按下回车,如果没有找到VT选项或不可更改,说明不支持VT技术。2、打开选项后,选择“Enabled”,并按下回车。3、此时该选项将变为Enabled,按F10热键保存并退出即可开启VT功能。方法二:1、进入bios设置后,切换到“Adv
 联想win10改win7专业版系统详细教程Jul 19, 2023 pm 04:01 PM
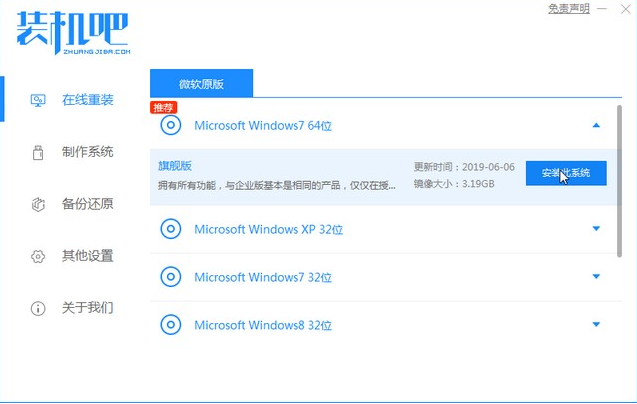
现在买的笔记本电脑大多数都是安装win10系统,最近身边的小伙伴就购买了联想的笔记本电脑,但是由于他比较习惯使用win7系统,所以想将联想win10改win7,下面小编就演示一下联想win10改win7怎么操作。联想win10改win7操作步骤:1、第一步我们打开浏览器搜索下载装机吧一键重装系统软件,选择win7系统。2、等待软件下载完成后,点击重启电脑即可。3、进入启动页面,选择第二选项zhuangjibape进入。4、进入pe系统后,等待装机吧在线重装系统工具帮助我们重装系统,最后重启电脑即
 联想Win10自动修复无法开机如何解决?Jul 10, 2023 pm 12:25 PM
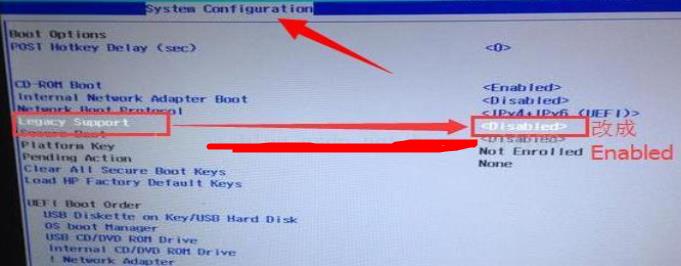
当电脑出现问题后许多客户都是会挑选自动修复,可是有联想Win10客户体现自身挑选自动修复以后碰到无法开机的状况,这是什么原因?下边就一起来看看联想Win10自动修复无法开机的极致解决方案。联想win10自动修复无法开机该怎么办:1、最先按下开机键,进到以后按下F10。2、随后传统式启动取得成功以后在搜寻中键入cmd,开启cmd。3、在里面键入编码:bcdedit/setrecoveryenabledNO,按下回车键就可以关掉自动修复。4、进到电脑上bios后转换至系统设置页面,改动LegacyS
 一些联想 Legion 笔记本电脑在 Windows BIOS 更新后无法启动May 04, 2023 pm 11:25 PM
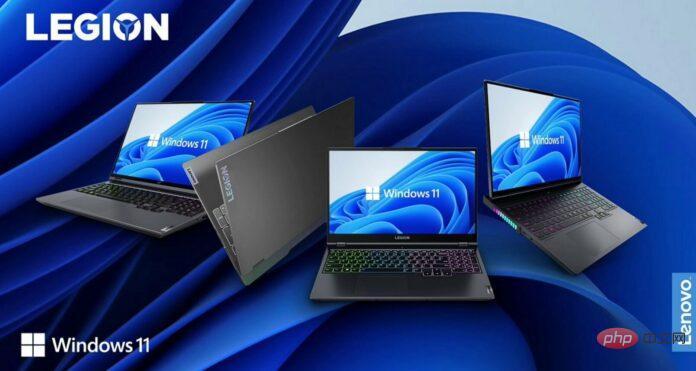
一些不幸的联想笔记本电脑用户(尤其是那些拥有Legion的用户)在安装了通过联想Vantage应用程序推送的BIOS更新后显然遇到了严重的麻烦。根据各种报告,Windows10和Windows11都提供BIOS更新会导致一些令人讨厌的启动失败。值得注意的是,只有部分联想Legion机型受到影响,其中包括Legion5和Legion7阵容。BIOS更新版本GKCN53WW会导致随机蓝屏死机错误,并带有相当模糊的停止代码“DRIVER_POWER_STATE_F
 联想y7000p和y9000p有什么区别Jun 08, 2023 am 10:14 AM
联想y7000p和y9000p的区别有:1、机身设计不同,Y7000p相对厚重,常规机身设计而Y9000p更轻薄,金属机身设计;2、处理器不同,Y7000p为英特尔i5-12500h处理器,Y9000p是英特尔i9-12900h处理器;3、显卡配置不同,Y7000p为rtx3050/3050ti显卡,Y9000p为rtx3060/3070显卡等等。
 联想y7000与r7000有哪些区别Aug 31, 2023 pm 04:25 PM
联想y7000与r7000的区别在外观设计、性能、存储和内存方面、功能等方面。详细介绍:1、外观设计,Y7000采用了一种更加现代和时尚的设计,具有金属外壳和较窄的边框,而R7000则更加注重实用性,采用了塑料外壳和更宽的边框,更加耐用;2、性能,Y7000配备了更高性能的处理器和显卡,以满足游戏玩家对于高画质游戏的需求,R7000搭载了较低性能的处理器和显卡等等。
 联想y460怎么切换显卡Jul 14, 2023 am 10:40 AM
联想y460显卡切换方法:1、打开联想Y460的电源,进入操作系统;2、双击打开联想能量管理程序;3、点击左侧的切换显卡;4、看到两个选项:省电模式和高性能模式;5、使用集成显卡以节省电能,可以选择省电模式;6、更高的图形性能,可以选择高性能模式;7、选择完成后点击应用即可。


Hot AI Tools

Undresser.AI Undress
AI-powered app for creating realistic nude photos

AI Clothes Remover
Online AI tool for removing clothes from photos.

Undress AI Tool
Undress images for free

Clothoff.io
AI clothes remover

AI Hentai Generator
Generate AI Hentai for free.

Hot Article
Hot Tools

SAP NetWeaver Server Adapter for Eclipse
Integrate Eclipse with SAP NetWeaver application server.

EditPlus Chinese cracked version
Small size, syntax highlighting, does not support code prompt function

Dreamweaver Mac version
Visual web development tools

Notepad++7.3.1
Easy-to-use and free code editor

VSCode Windows 64-bit Download
A free and powerful IDE editor launched by Microsoft

