Home >System Tutorial >Windows Series >How to install Win11 IPX protocol? Tutorial on how to add IPX network protocol to Win11
How to install Win11 IPX protocol? Tutorial on how to add IPX network protocol to Win11
- WBOYWBOYWBOYWBOYWBOYWBOYWBOYWBOYWBOYWBOYWBOYWBOYWBforward
- 2024-02-12 17:21:081273browse
The IPX protocol is a necessary protocol that allows us to play some online games in the local area network. However, many users do not know how to install the IPX protocol after upgrading the win11 system? Users can directly enter the network and Internet settings, and then click Advanced network settings to operate. Let this site give users a detailed tutorial on how to add IPX network protocol to Win11.
Win11 Add IPX Network Protocol Method Tutorial
1. First, right-click the [Network Icon] in the lower right corner of the taskbar, and then select [Network and Internet Settings].
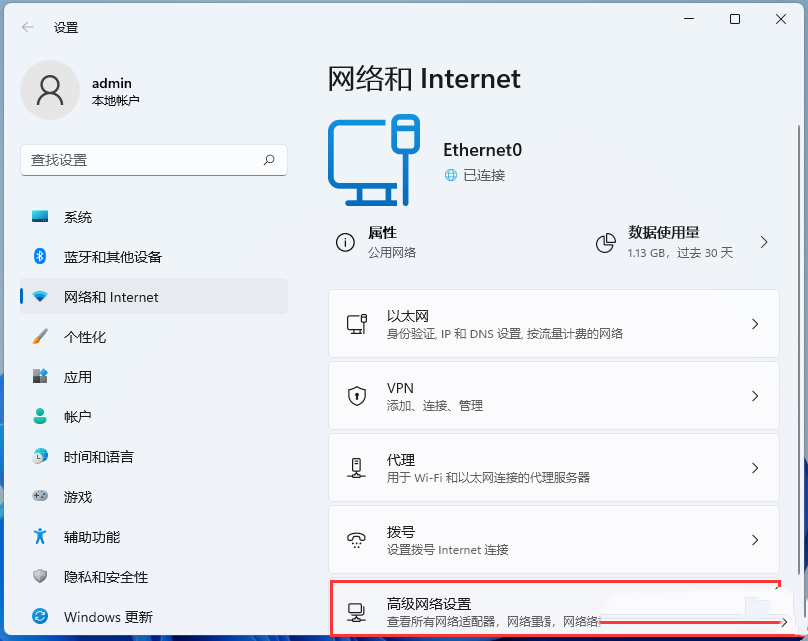
2. In the settings window, on the left sidebar, click [Network and Internet], and on the right click [Advanced network settings (view all network adapters, network reset)].
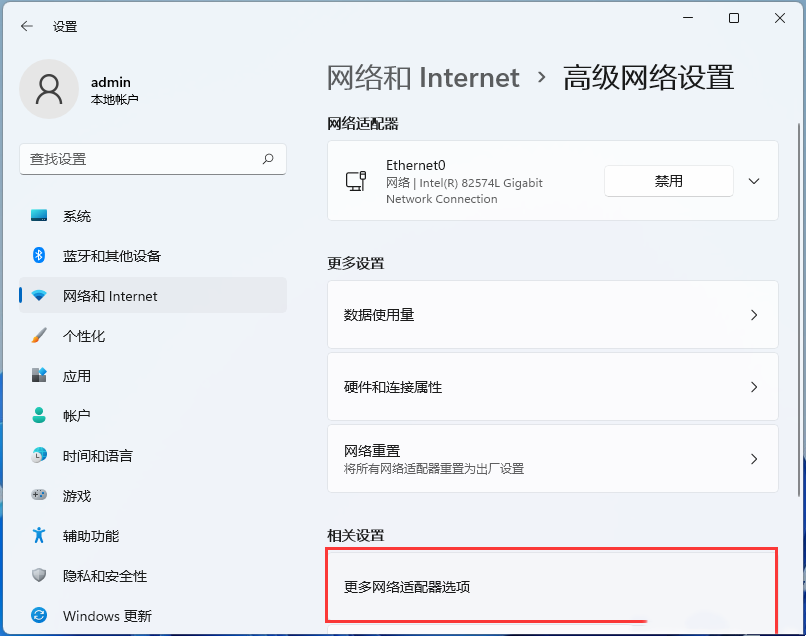
3. Under related settings, click [More Network Adapter Options].
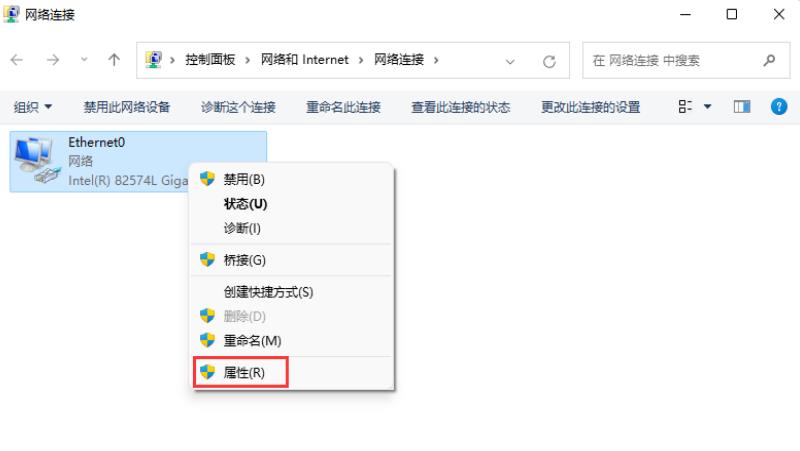
#4. In the network connection window, select the local connection, then click [right-click], and in the menu item that opens, select [Properties].
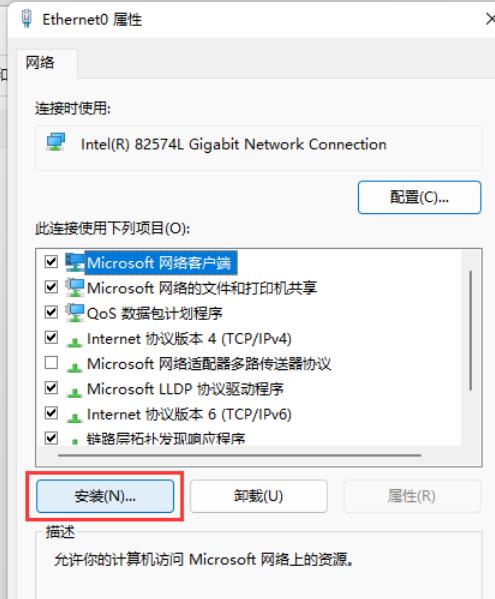
#5. In the network connection properties window, click [Install] at the bottom.
#6. Select the network function type window, select [Protocol], and then click [Add].
7. Select the network protocol window, select [Reliable Multicast Protocol], and then click [Have Disk].
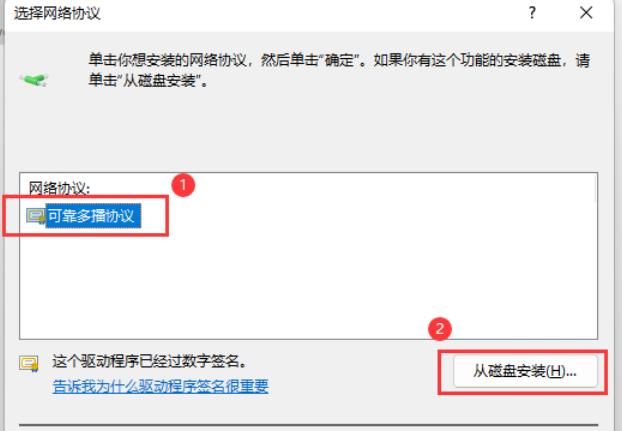
#8. From the disk installation window, click [Browse] to find the prepared driver assistance, then select the corresponding system version, and then click [OK].
The above is the detailed content of How to install Win11 IPX protocol? Tutorial on how to add IPX network protocol to Win11. For more information, please follow other related articles on the PHP Chinese website!

