Home >System Tutorial >LINUX >Six Linux system backup optimization applications and techniques
Six Linux system backup optimization applications and techniques
- PHPzforward
- 2024-02-12 17:20:171120browse
When you switch to using Linux, you may notice that the version of Linux you use comes with a backup tool by default. However, you may find that the tool is not configured correctly to back up all the important parts of your system. Additionally, using the default tool may result in a larger than expected backup data volume, thereby reducing backup efficiency. This article will introduce some alternative methods to use existing storage space to back up your Linux system.
Ensure that the backup is comprehensive and appropriate
The default backup tool dejá-dup on the Ubuntu desktop version is only set up to back up your home directory, so it ignores other important parts you need when you need to restore the system to a working state. Let's imagine that your system consists of the following three parts:
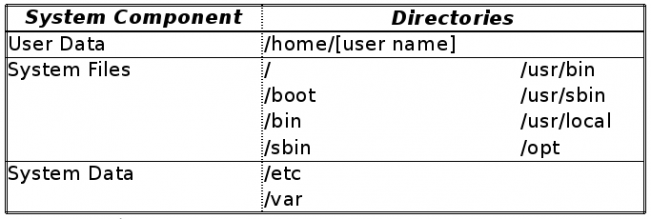
Then, you can easily set up the default tool to support everything in the above three sections. But this requires you to have a lot of storage space, or it may involve transferring a large amount of data over the Internet (if you are using network backup). Here are some apps and tips that can help you reduce the storage space you need and ensure you still have adequate backups in the event a system crash occurs.
1. Clone the partition to take a snapshot of the Home directory
Some data will be stored in the /home/[username] directory of your user account, which includes your personal configuration. They usually start with a "dot" (for example, /home/[username]/. local) files or directories, as well as music, pictures, and other types of files and folders (for example, the default document path or download folder). These are the areas where you may want to pay special attention to when backing up your data, and when dealing with "out-of-the-box" tools.
An important reason why you need to place the /home directory on a separate partition is that you can operate it independently from the main part of the system. Also, if you do this, you can back up your home directory by cloning the entire partition. It also enables precise disk-level recovery when you need it.
As I mentioned in my past article, one option is dd, which completely clones an entire disk or partition (this means that all partitions of the same size are backed up). Of course, you can also consider using Clonezilla. While backing up the overall structure of the disk/partition, it can omit unused disk space, so that your backup is only the partition size occupied by the actual data.
2. Use the file synchronization tool to store snapshots of the Home directory on multiple machines
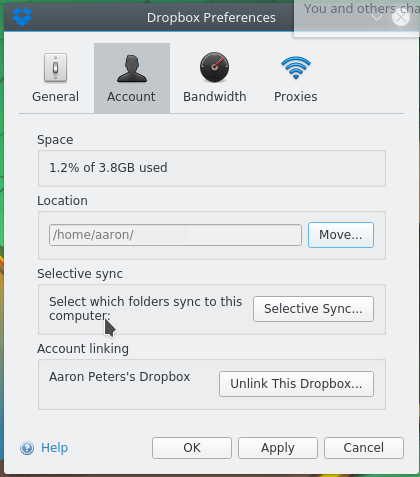
File synchronization tools are a good choice for you to take care of your personal files, especially when you use multiple devices. You can think of too many names for such tools, including simple file copying tools like rsync; online services like Dropbox; and local/peer-to-peer tools like Resilio Sync. Some of these will provide you with tracking and history services, although features that record minute-to-minute changes can be finicky and waste storage space.
3. Use archiving tools to retain historical snapshots of system data
In addition to your home directory, you may also need to include the following parts in your backup list:
- /etc, which contains various configurations, such as /etc/apt/lists, which descriptively lists newly installed program resources on your system.
- /var, which contains supplementary data used by various applications. Examples of this include various logs (such as /var/log/dpkg, which records package transactions based on .deb systems) and caches (such as /var/cache/dpkg, which holds copies of all installed packages), and /var/lib/dpkg (database used to store packages).
Standard "archive-style" backup tools can also handle these system directories. They usually check the file in the source directory to determine if a recent backup of the file exists, and if not create and update it. They can keep multiple copies (such as daily or weekly) and typically compress these copies to save disk space. There are many such tools, including the programs dejá-dup and backintime.
However, you may need to use the root user identity to set up and run such backup jobs, or use administrator (admin) privileges to use the tool's built-in functions.
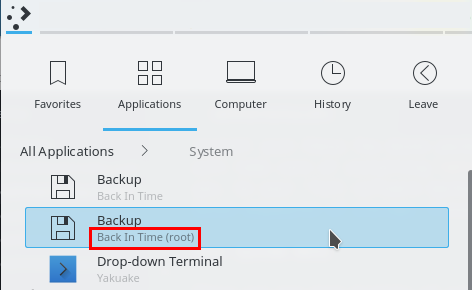
By using these applications (backintime is used as an example below), you can simply add the directories you need to a new or existing backup job:
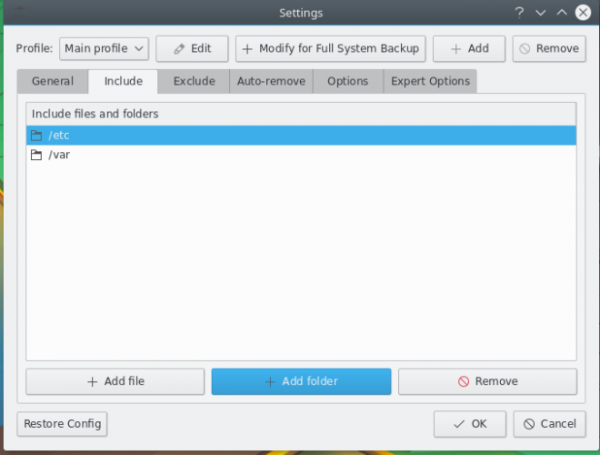
By filtering these directory backups appropriately, you can compare the disk space savings from a typical "full system" backup to see the effect. You can browse the following links for tips on which subdirectories of /var you may need and which ones you don’t. (https://unix.stackexchange.com/questions/1067/what-directories-do-i-need-to-back-up)
4. Use etckeeper to keep records of configuration changes
Let’s talk about the /etc directory specifically. The tool etckeeper uses source code level control to help you back up important configurations in the system. If you want to install it in Ubuntu you need
sudo apt-get install etckeeper
During the installation process, it will create a backup (actually a git repository) and put all the files under /etc into it.
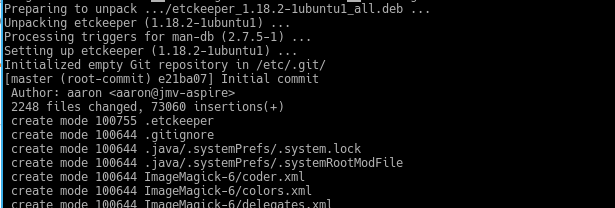
After this, you can use any git client to view the historical version of your system configuration. What's more, the software is also set up with a cron job that puts your configuration changes into it every day. Additionally, given that most configuration files are created in plain text, and since git (and other source code control systems) store changes on a line-by-line basis, the storage of multiple versions is Its capacity can still be kept quite small.
5. Use aptik to back up various configurations and software packages
aptik program integrates a large number of backup/restore tools on its friendly GUI interface:
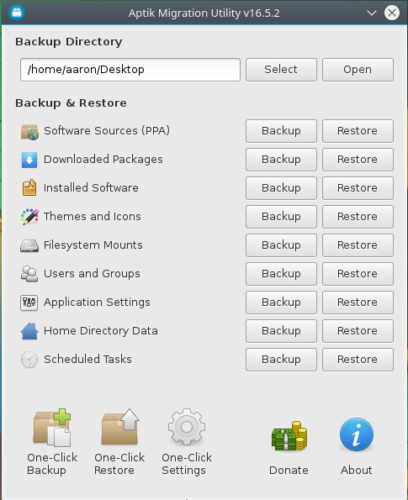
Its "Installed Software" feature will back up by default all software packages that you have explicitly installed. The image below is a very short list of examples:
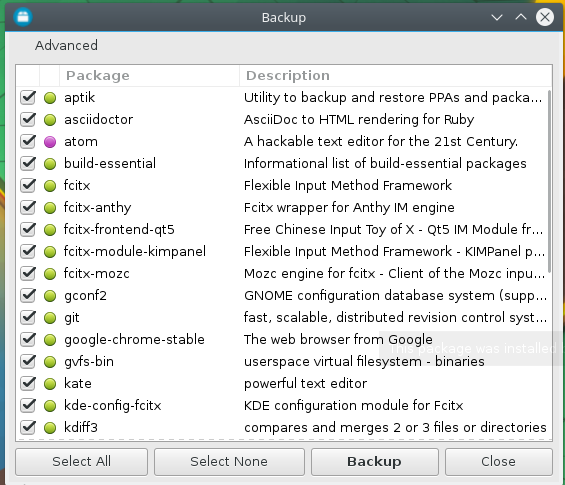
You may be curious: Why is it so short? This is because when you need to use this backup, you have obviously already installed a basic system, so it does not require those basic system packages . And if you need to install these dozens of listed packages, its package manager will automatically help you install all associated dependent packages. It can be seen that your "full software backup" will only consume a few tens of megabytes of storage space. Smart enough, right?
6. Use the package list to back up your packages
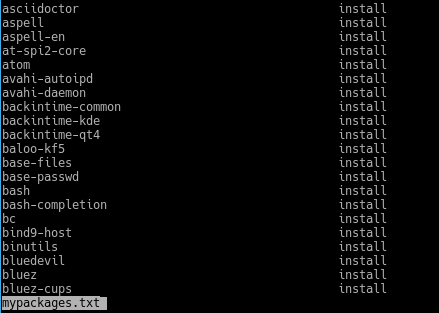
If you are familiar with command line operations, you may do better than aptik. To ensure that you can restore your system later, try the following command. Note that this command is not used to back up soft packages, but to record a list of packages. In other words, the following command will export the list of installation packages to a text file:
sudo dpkg --get-selections > my-packages.txt
In addition to giving you human-readable statistics of system software packages (as shown in the picture above), the following command can also allow you to reinstall these software packages in batches:
sudo dpkg - set-selections
sudo apt-get - u dselect-upgrade
Note that you still need to manually handle those programs that you installed yourself (they are likely to be stored in /usr/local and/or /opt). Other than that, the only difference between your old system and your newly restored system is whether various software needs to be manually updated to the latest versions. And these only take up a few more kilobytes of disk space.
Remember: Please do not stick to using one of the above-mentioned applications. You can use a combination of multiple applications to ensure that when the worst happens, you can still quickly backup and restore.
The above is the detailed content of Six Linux system backup optimization applications and techniques. For more information, please follow other related articles on the PHP Chinese website!

