Home >System Tutorial >Windows Series >How to cancel the remote access function setting in win10? How to cancel the remote access function setting in win10
How to cancel the remote access function setting in win10? How to cancel the remote access function setting in win10
- WBOYWBOYWBOYWBOYWBOYWBOYWBOYWBOYWBOYWBOYWBOYWBOYWBforward
- 2024-02-11 23:30:07633browse
php editor Yuzai will introduce to you how to cancel the remote access function settings in win10. Disabling the remote access function can increase the security of the system and prevent unauthorized access. It's easy to cancel remote access, just follow the steps below.
Win10 cancel remote access function setting method
Method 1:
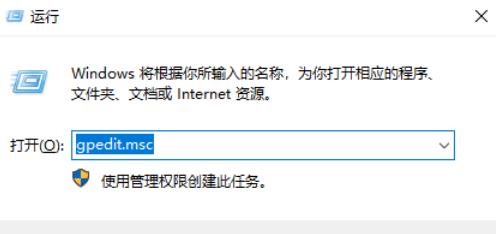
1. First, press the "win r" key to open the run window, enter "gpedit.msc" to open The Local Group Policy Editor interface is as shown in the figure.

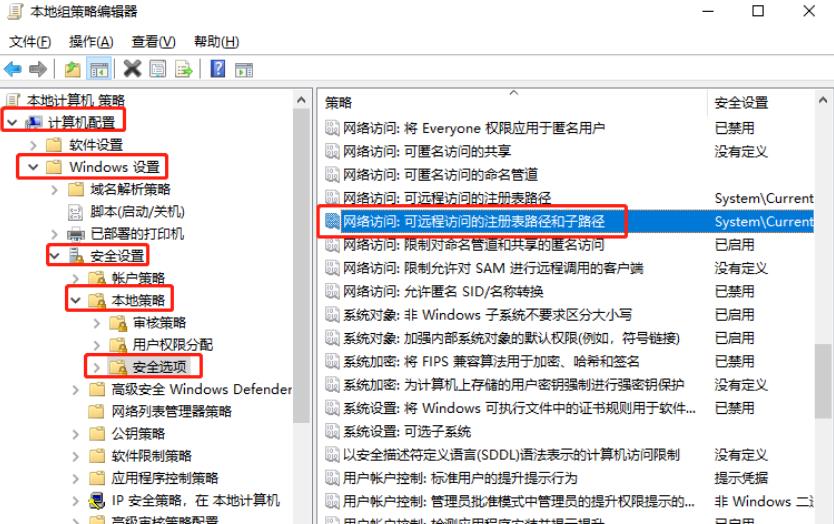
2. Then, in the opened interface, click to open "Computer Configuration/Windows Settings/Security Settings/Local Policy/Security Options" and double-click " Network Access: Remotely accessible registry paths and subpaths" as shown.

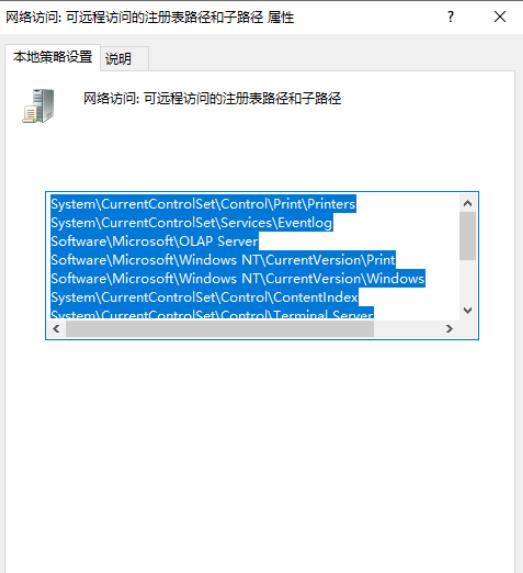
#3. Then, in the properties window that pops up, delete all the content in the text box and click OK, as shown in the figure.

Method 2:
1. First turn on the computer and find the My Computer icon on the desktop.
2. Right-click on the icon and select the Properties option in the menu that opens.
3. As shown in the picture, on the opened system page, click the Change Settings option in the lower right corner.
4. As shown in the figure, the system properties window will pop up, and switch to the remote option at the top.
5. In the remote desktop below, click on Do not allow remote connections to this computer, and finally click OK.
The above is the detailed content of How to cancel the remote access function setting in win10? How to cancel the remote access function setting in win10. For more information, please follow other related articles on the PHP Chinese website!

