Home >Computer Tutorials >Computer Knowledge >HP Shadow Elf win10 modification
HP Shadow Elf win10 modification
- 王林forward
- 2024-02-11 21:27:071318browse
php editor Xinyi brings you an introduction to the HP Shadow Elf Win10 system modification. The HP Shadow Elf series is a high-performance gaming laptop that is loved by players, and the Win10 system is an upgrade and optimization for this series of computers. By modifying the system, players can get a smoother and more stable gaming experience, and enjoy more powerful performance and more functions. Whether it is gaming or daily use, HP Shadow Elf Win10 modified system can bring you a brand new experience. Let’s find out together!
Special tools/raw materials:
Software version: windows10 system software
Brand model: HP Shadow Elf 6
Method/process:
Method 1: Log in to the system configuration interface "Correct Boot" to delete non-default system software
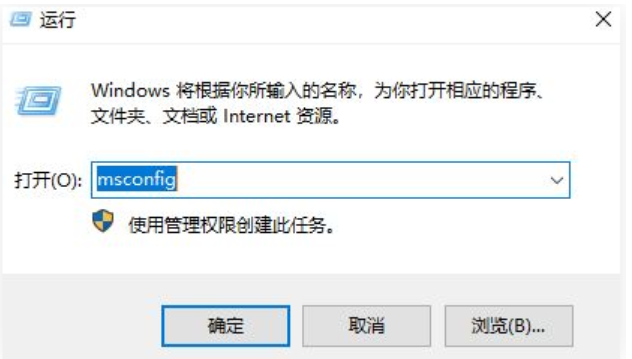
1. Press the winR key at the same time to open "Operation" and type the menu bar "msconfig" in the box to clearly open the system settings.
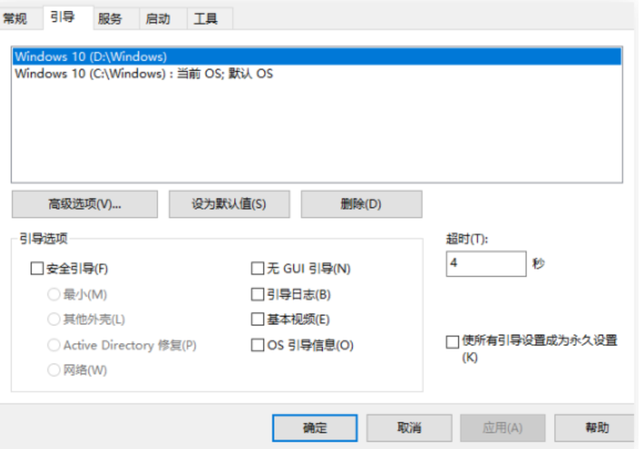
After reinstalling the system, enter the system software configuration interface. Under the correct boot, there are two options: Windows 10 system software selection and deletion of non-default Windows 10. Click "Delete" and then select "Clear" to complete the operation.
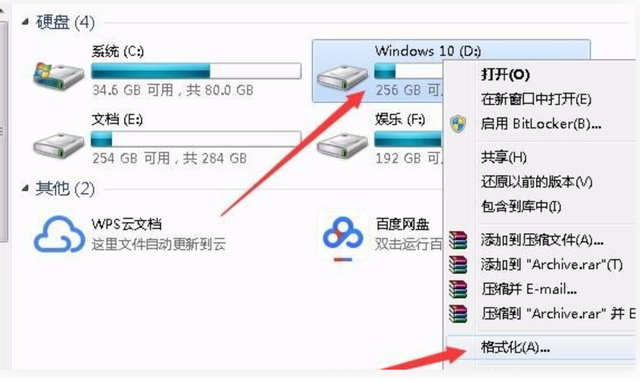
#3. After the above process is successful, return to win and double-click the mouse to open the 10 desktop software "This PC", find the hard disk partition where the system software was just deleted, right-click the mouse and "Format" "hard drive".
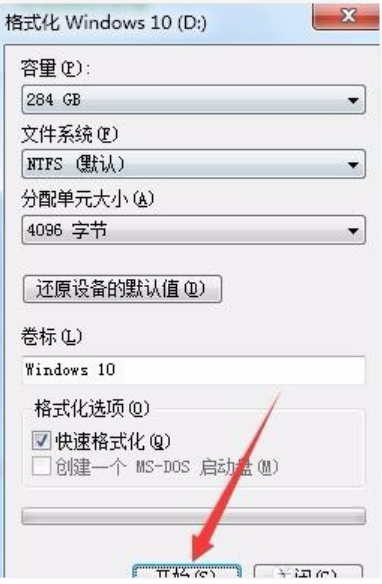
#4. Then click the "Gradually" button to delete the win10C disk, so that the system startup items are gone, and the dual system storage files can be deleted.
Method 2: Use Xiaobai to reinstall with one click and forcefully delete the boot menu bar
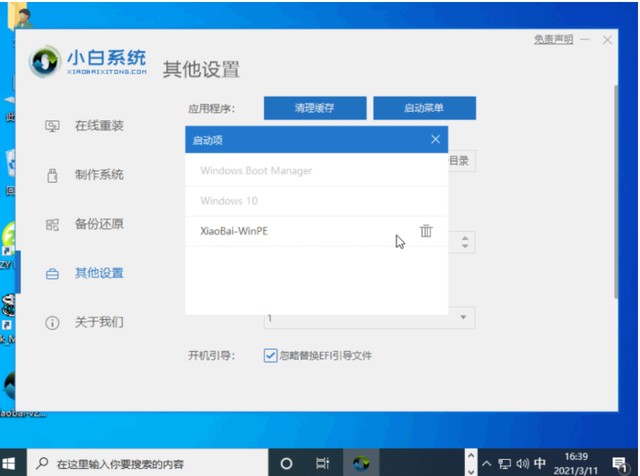
1. After Xiaobai reinstalled the system, there were two system problems plan. First, open the Xiaobai mobile software app. There is a startup menu in the other settings list, and the startup boot menu bar must be deleted.
The above is the detailed content of HP Shadow Elf win10 modification. For more information, please follow other related articles on the PHP Chinese website!

