Home >System Tutorial >Windows Series >How to turn off hard disk self-test in win7 system? How to turn off the hard disk self-test at startup in Windows 7
How to turn off hard disk self-test in win7 system? How to turn off the hard disk self-test at startup in Windows 7
- 王林forward
- 2024-02-11 11:00:371030browse
php editor Apple will introduce to you how to turn off the hard disk self-test function of win7 system. During the boot process, the win7 system will automatically perform a hard drive self-test to ensure the normal operation of the hard drive, but sometimes this process may slow down the boot speed. If you wish to turn off hard drive self-test, you can follow the steps below. First, open the "Start" menu, then enter "msconfig" in the search box and click "System Configuration" in the search results to open the tool. In the system configuration window, switch to the "Boot" tab and check the "Boot without GUI" option. Next, click "OK" to save the settings and restart your computer. In this way, the hard disk self-test function will be turned off the next time you turn on the computer. Hope this method can help you!
Win7 startup hard disk self-test shutdown method
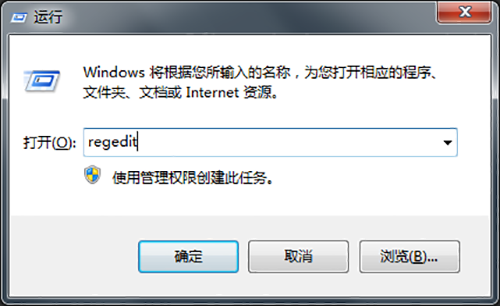
1. Press and hold the [windows R] key, enter [regedit] in [Run] and press Enter

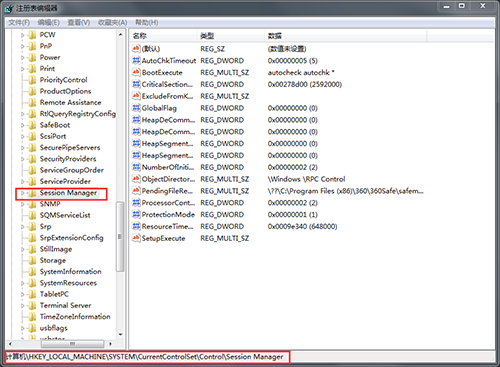
2. Then enter the following path in the opened registry editor interface to open [HKEY_LOCAL_MACHINE\SYSTEM\CurrentControlSet\Control\Session Manager]

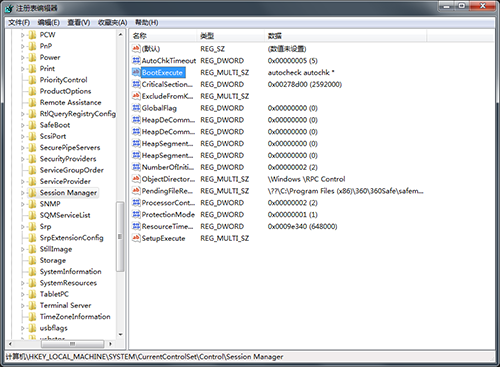
3. Then select [BootExecute] in the right interface of [Session Manager] and double-click

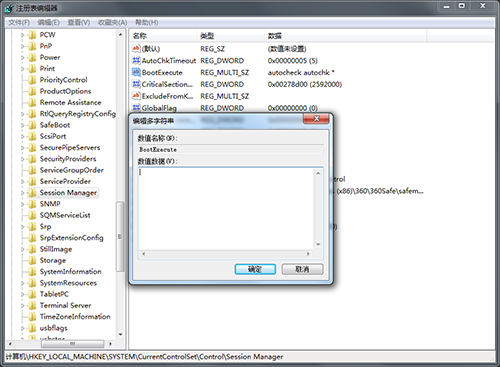
4. Finally, in the open editing string interface, select [Value Data] Delete all values and click [OK]

The above is the detailed content of How to turn off hard disk self-test in win7 system? How to turn off the hard disk self-test at startup in Windows 7. For more information, please follow other related articles on the PHP Chinese website!

