 Software Tutorial
 Computer Software
 How to change the resolution of lightning simulator Debugging method tutorial
php editor Yuzai brings you a tutorial on the debugging method of changing the resolution of the lightning simulator. Thunderbolt Emulator is a very popular Android emulator, but sometimes we may need to adjust the resolution to suit different application scenarios or game needs. This tutorial will introduce in detail how to change the resolution in the Thunderbolt Simulator, helping players solve resolution adaptation problems they may encounter during use, so as to obtain a better gaming experience. Whether you are a novice or an experienced user, you can easily master the resolution debugging skills of the lightning simulator through this tutorial.

1. After opening the simulator, find the three horizontal bar signs at the top of the homepage [More] Click to enter

2. Select [Software Settings] in the drop-down list and click to enter

3. In the [Software Settings] page, you can Change the resolution according to your own needs

The updated Thunder Simulator resolution is clearer than before, allowing players to have a smoother gaming experience. In addition to the resolution settings provided by the simulator itself, it also supports custom resolution settings, which requires users to debug slowly by themselves. The above is the relevant tutorial I brought to you, I hope it can help you.
The above is the detailed content of How to change the resolution of lightning simulator Debugging method tutorial. For more information, please follow other related articles on the PHP Chinese website!
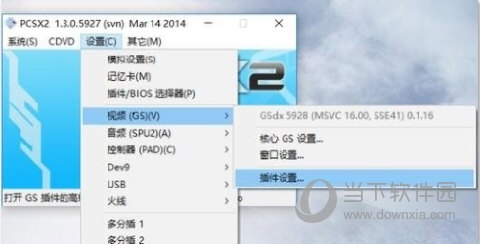 pcsx2怎么设置画质 画面模糊解决方法Feb 10, 2024 pm 05:12 PM
pcsx2是大家经常使用的一款PlayStation2模拟器软件。由于游戏设备的迭代速度较快,当年的游戏画质显然无法满足现在的我们。使用模拟器游玩的时候模糊的画面十分影响玩家的游玩体验,有没有办法可以调整游戏画质呢?接下来小编就给大家详细讲讲模拟器怎么调整画质吧。【具体操作如下】一、打开模拟器,选择右上角【设置】,在下拉列表中点击【视频】,点击子列表【插件设置】二、在【设置】界面,将【原始PS2分辨率】后的【原始】取消勾选三、在自定义分辨率处输入自己想要的数值四、在【硬性模式设置】下【各异向性过
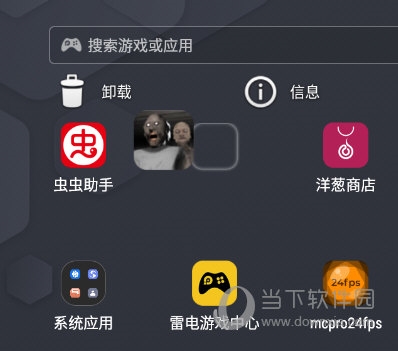 雷电模拟器9怎么删除游戏 两个方法卸载Feb 09, 2024 pm 08:09 PM
很多玩家会在雷电模拟器9中安装各式各样的手游来玩,但是玩过的手游不知道该如何删除,久而久之模拟器的空间也会被占用不少,那么下面就来教教大家如何在雷电模拟器9中删除游戏。【删除方法】进入雷电模拟器9主页,长按要删除的游戏图标,拖到桌面卸载图标。还有一种方法就是点击【系统应用】-【设置】。在设置页面中我们选择【应用和通知】。接着我们选择要卸载应用,点击里面的【卸载】即可。
 Cemu模拟器怎么用手柄 设置方法教程Feb 10, 2024 pm 04:00 PM
Cemu模拟器是一款非常好用的手机模拟器。近年来,因为手游对手机的要求越来越高,开始用模拟器游玩的人也越来越多,其中有不少的人喜欢用手柄游玩游戏。但是大多数模拟器默认的是键鼠模式,手柄模式需要玩家自己设置,这难到了不少人,接下来就由小编来给大家具体讲讲怎么设置吧。操作步骤如下:一、首先,打开软件点击上方【options】二、在下拉列表中点击【Inputsettings】三、在弹出窗口里找到【Emulatedcontroller】,在下拉列表里选择【WiiUGamePad】四、点击【control
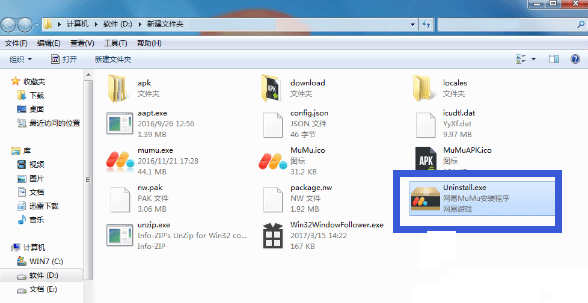 MuMu模拟器怎么卸载Feb 09, 2024 pm 09:39 PM
MuMu模拟器是一款专门针对游戏玩家们打造的模拟器软件,为用户们带来丰富的游戏下载资源,是很多小伙伴必备的游戏模拟器工具。我们想要卸载模拟器,要怎么操作呢?下面为大家带来三种卸载MuMu模拟器的方法介绍,不知道的小伙伴快一起来看看吧!MuMu模拟器怎么卸载方法一:网易MuMu的安装文件夹——Uninstall.exe卸载——网易MuMu。方法二:1、电脑左下角开始——控制面板;2、控制面板——卸载程序;3、卸载程序——网易MuMu——卸载。
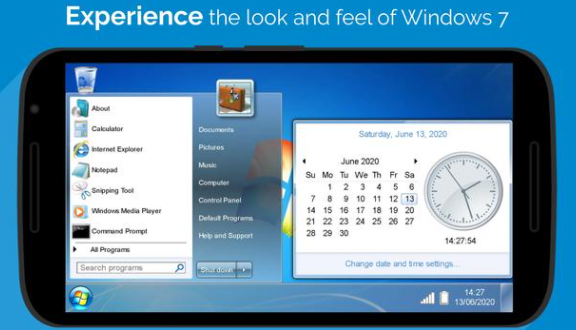 win7模拟器Jul 22, 2023 pm 01:01 PM
win7模拟器是什么?相信很多小伙伴都没有听说过,win7模拟器其实是一款为朋友们打造的在手机上模拟使用win7系统的软件,接下来就让小编给大家带来win7模拟器介绍,相信看完你们就会对win7模拟器有更深的了解。win7系统很多的朋友在电脑上都使用过了,但是你们有在手机上使用过win7系统吗?win7模拟器就是一款为朋友们打造的在手机上模拟使用win7系统的软件,让大家可以使用本款软件在安卓手机上来使用win7系统,体验经典的win7界面,可以点击使用我的电脑、开始菜单等各种模块,可以进行各种
 AIOEMU模拟器怎么运行游戏 操作方法介绍Feb 09, 2024 pm 09:33 PM
AIOEMU模拟器是一款十分优秀的世嘉红白机游戏模拟器软件,这款软件能够在手机上流畅地运行各种经典怀旧游戏,这款软件的兼容性非常强,且内存占用极低,完美运行各种游戏,接下来小编就来教教大家通过这款软件运行游戏的方法。方法介绍:下载并安装AIOEMU模拟器后,打开首页,如果手机已有游戏,点击选择目录找到游戏即可。即使没有预装游戏,也可以通过搜索下载,选择一个游戏格式并点击进入。3、在这其中就有非常多的游戏可以下载,选择一个游戏点击进入;4、然后点击红框内的按钮即可开始下载;5、下载完以后在系统系统
 实用工具 | Linux下分屏终端Feb 05, 2024 pm 06:30 PM
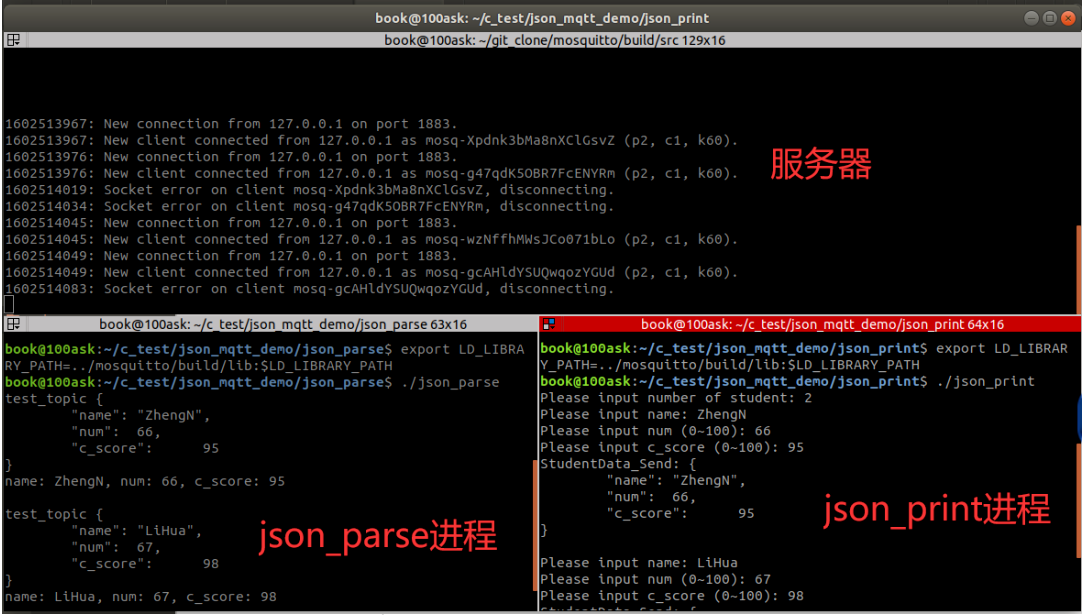
TerminatorTerminator是一款Linux终端模拟器,具备多个默认终端应用不支持的特性。它允许你在一个窗口中创建多个终端,从而提高工作效率。除了支持多窗口功能外,Terminator还允许你自定义其他特性,如字体、字体颜色、背景色等等。在Ubuntu系统下,你可以使用以下命令安装Terminator:sudoapt-getinstallterminator创建多个终端的方法:常用快捷键:Ctrl+Shift+E垂直分割窗口Ctrl+Shift+O水平分割窗口F11全屏Ctrl+Sh
 Android应用程序无法连接到socket.io Golang服务器Feb 08, 2024 pm 09:48 PM
我不知道我是否遗漏了一些东西,因为我的kotlin代码没有找到golang套接字服务器。我做了一个netstat-ano并且端口8000已经用于tcp,所以我认为套接字服务器运行良好。但我的安卓还是找不到。服务器和模拟器都在同一网络上。这是我的代码://服务器(golang)import("fmt""net/http"socketio"github.com/googollee/go-socket.io""github.com/googo


Hot AI Tools

Undresser.AI Undress
AI-powered app for creating realistic nude photos

AI Clothes Remover
Online AI tool for removing clothes from photos.

Undress AI Tool
Undress images for free

Clothoff.io
AI clothes remover

AI Hentai Generator
Generate AI Hentai for free.

Hot Article

Hot Tools

Dreamweaver CS6
Visual web development tools

ZendStudio 13.5.1 Mac
Powerful PHP integrated development environment

Atom editor mac version download
The most popular open source editor

SublimeText3 Mac version
God-level code editing software (SublimeText3)

Safe Exam Browser
Safe Exam Browser is a secure browser environment for taking online exams securely. This software turns any computer into a secure workstation. It controls access to any utility and prevents students from using unauthorized resources.


