Home >System Tutorial >Windows Series >How to cancel the automatic arrangement of desktop icons in Windows 10?
How to cancel the automatic arrangement of desktop icons in Windows 10?
- WBOYWBOYWBOYWBOYWBOYWBOYWBOYWBOYWBOYWBOYWBOYWBOYWBforward
- 2024-02-10 08:45:191737browse
php editor Banana is here to introduce how to cancel the automatic arrangement of Win10 desktop icons. The Win10 system automatically arranges desktop icons by default. Although this is convenient for some users, there are also some users who want to adjust the position of the icons themselves. Disabling auto-arrange is easy, just follow these steps.
How to turn off the automatic arrangement of desktop icons in win10
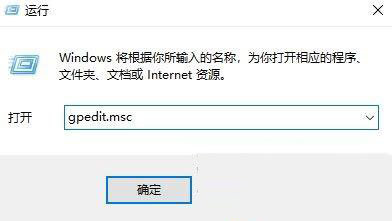
1. Turn on the "win R" shortcut key and enter "Gpedit.msc" and press Enter to open it.

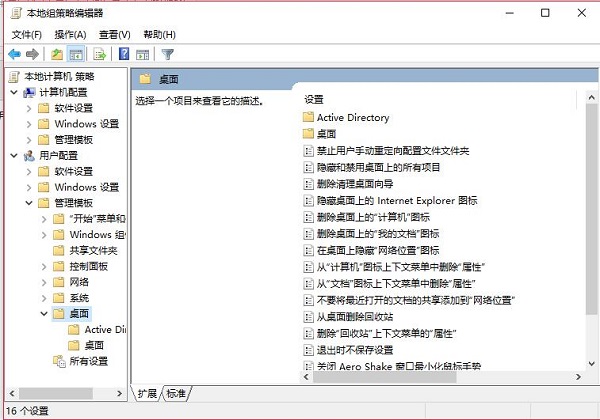
#2. After entering the Group Policy Editor, click "User Configuration--Administrative Templates--Desktop" in the left column.

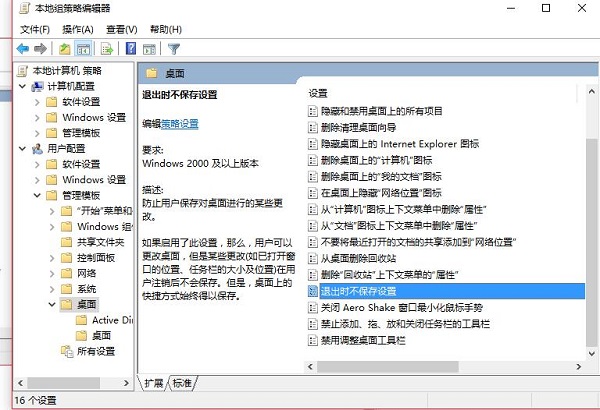
#3. Then find "Do not save settings when exiting" on the right and double-click to open it.

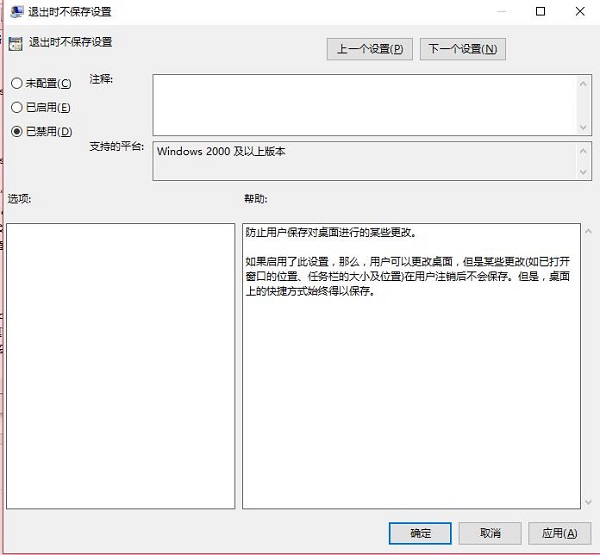
#4. Finally, in the window interface given, check "Disabled" and click OK to save.

The above is the detailed content of How to cancel the automatic arrangement of desktop icons in Windows 10?. For more information, please follow other related articles on the PHP Chinese website!

