Home >System Tutorial >LINUX >Manage Linux user accounts, from locked to unlocked
Manage Linux user accounts, from locked to unlocked
- 王林forward
- 2024-02-09 20:50:361455browse
In the Linux system, we can create multiple user accounts. For some special circumstances, such as employee resignation or account leakage, the administrator needs to lock the user account in a timely manner to protect the security of the system. At the same time, when necessary In this case, it is also necessary to unlock the locked user account. So as an administrator, do you know how to lock and unlock Linux user accounts? If you don’t know yet, this article will take you through the process in detail.
We will create the following three Shell scripts to lock and unlock multiple accounts and view account status.
- Create a script to lock users
- Create a script to view user status
- Create a script to unlock the user
List the list of users who need to be locked or unlocked, provided that the following users have been created:
[root@localhost ~]# cat user-lists.txt
u1
u2
u3
u4
u5
[root@localhost ~]# tail -5 /etc/passwd
u1:x:1002:1002::/home/u1:/bin/bash
u2:x:1003:1003::/home/u2:/bin/bash
u3:x:1004:1004::/home/u3:/bin/bash
u4:x:1005:1005::/home/u4:/bin/bash
u5:x:1006:1006::/home/u5:/bin/bash

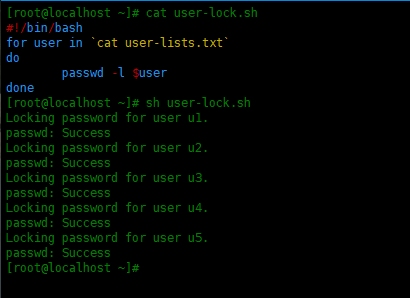
Script 1. Script to lock multiple users
Use the following shell script to lock multiple user accounts in Linux.
[root@localhost ~]# vim user-lock.sh

#!/bin/bash
for user in `cat user-lists.txt`
do
passwd -l $user
done
Finally, run the script to lock the user list in the file.
[root@localhost ~]# sh user-lock.sh
Locking password for user u1.
passwd: Success
Locking password for user u2.
passwd: Success
Locking password for user u3.
passwd: Success
Locking password for user u4.
passwd: Success
Locking password for user u5.
passwd: Success

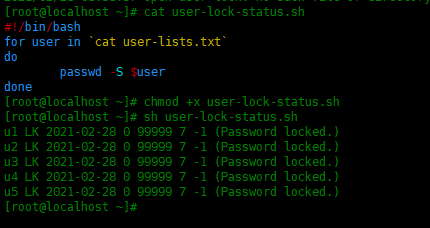
Script 2. Script to check user lock status
Use the following shell script to check the status of a locked user account:
[root@localhost ~]# vim user-lock-status.sh

#!/bin/bash
for user in `cat user-lists.txt`
do
passwd -S $user
done
Finally run the script to check the user lock status:
[root@localhost ~]# sh user-lock-status.sh
u1 LK 2021-02-28 0 99999 7 -1 (Password locked.)
u2 LK 2021-02-28 0 99999 7 -1 (Password locked.)
u3 LK 2021-02-28 0 99999 7 -1 (Password locked.)
u4 LK 2021-02-28 0 99999 7 -1 (Password locked.)
u5 LK 2021-02-28 0 99999 7 -1 (Password locked.)

If the above output shows LK after the username, then the user's password is locked.
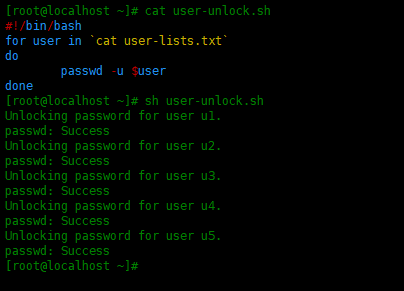
Script 3. Script to unlock multiple users
Use the following shell script to unlock multiple user accounts:
[root@localhost ~]# vim user-unlock.sh

#!/bin/bash
for user in `cat user-lists.txt`
do
passwd -u $user
done
Run this script to unlock user password:
[root@localhost ~]# sh user-unlock.sh
Unlocking password for user u1.
passwd: Success
Unlocking password for user u2.
passwd: Success
Unlocking password for user u3.
passwd: Success
Unlocking password for user u4.
passwd: Success
Unlocking password for user u5.
passwd: Success

If the above output shows PS after the username, then the user's password is not locked.
Through the introduction of this article, I believe that everyone has mastered the methods of locking and unlocking user accounts in the Linux system. In daily management, administrators need to always pay attention to account security issues and handle abnormal situations in a timely manner, which will help protect the security and stability of the entire system. At the same time, when locking and unlocking user accounts, we also need to pay attention to relevant permissions and operating specifications to ensure the correctness and effectiveness of the operations. Let us study seriously and practice together!
The above is the detailed content of Manage Linux user accounts, from locked to unlocked. For more information, please follow other related articles on the PHP Chinese website!

