
Home >System Tutorial >Windows Series >How to enable large and small core scheduling optimization in win11? How to open and analyze the large and small core scheduling in win11
How to enable large and small core scheduling optimization in win11? How to open and analyze the large and small core scheduling in win11

- WBOYWBOYWBOYWBOYWBOYWBOYWBOYWBOYWBOYWBOYWBOYWBOYWBforward
- 2024-02-09 20:03:392154browse
php editor Youzi will analyze for you how to enable large and small core scheduling optimization in Win11 system. Large and small core scheduling is an optimization strategy that improves system performance and power consumption balance by reasonably allocating tasks to large cores and small cores. To turn on large and small core scheduling optimization, first enable the relevant settings in the BIOS, then select the "Best Performance" mode in the power options, and finally set the application's running priority in the Task Manager. Through these steps, you can give full play to the optimization capabilities of the Win11 system and improve system performance and stability.
How to open the big and small core scheduling in win11 and analyze it
Method 1:
1. Open the "Task Manager". You can quickly open Task Manager by pressing the "Ctrl Shift Esc" key combination, or right-click on the taskbar and select "Task Manager."
2. In the Task Manager, click the "Performance" tab.
3. In the Performance tab, click the "CPU" section.
4. Under the CPU section, you will see "Processor Groups" which lists the cores and threads of your processor.
5. Click the drop-down arrow next to the processor group and select the "Assign" option.
6. In the allocation options, you will see the options "Cores allocated to this processor group" and "Threads allocated to this processor group".
7. Adjust the size of core scheduling by adjusting the number of cores and threads. You can change the settings for large and small core scheduling by increasing or decreasing the number of cores and threads.
8. After completing the settings, click the "OK" button.
Method 2:
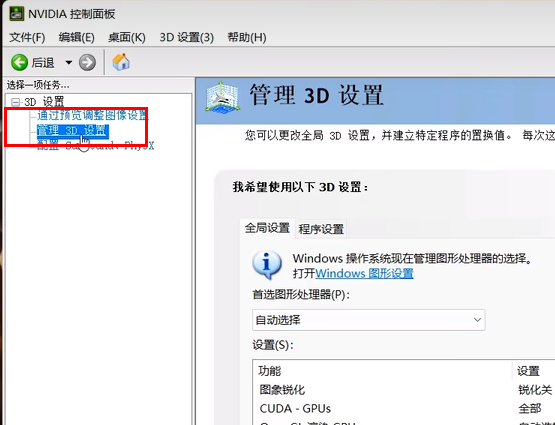
1. Find the graphics card driver in the taskbar in the lower right corner, right-click and select "NVIDIA Control Panel" in the option list.

#2. In the window interface that opens, click "Manage 3D Settings" in the left column.
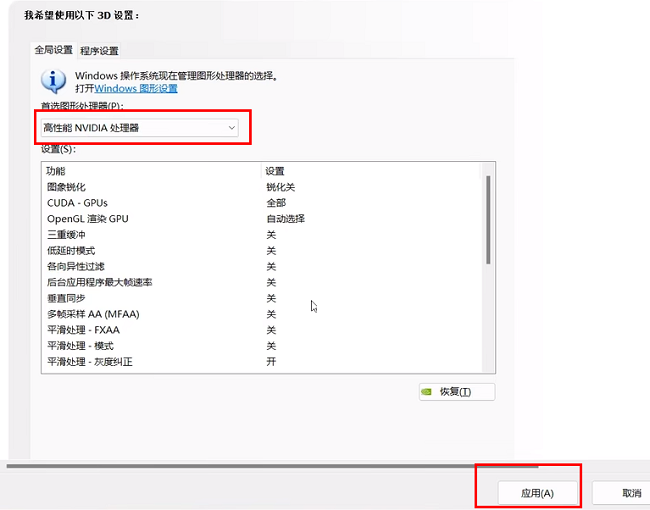
#3. Then click the drop-down button of the option box on the right, select "High Performance" in the list, and finally click "Apply".
The above is the detailed content of How to enable large and small core scheduling optimization in win11? How to open and analyze the large and small core scheduling in win11. For more information, please follow other related articles on the PHP Chinese website!