Home >System Tutorial >Windows Series >How to set win10ip address? Where is the win10 IP address set?
How to set win10ip address? Where is the win10 IP address set?
- WBOYWBOYWBOYWBOYWBOYWBOYWBOYWBOYWBOYWBOYWBOYWBOYWBforward
- 2024-02-09 17:24:322117browse
php editor Xigua introduces you to the method of setting IP address in Win10. In Win10, setting an IP address is a very common operation, which involves network connection and configuration. To set the IP address, first open the "Control Panel", then click "Network and Internet", then select "Network and Sharing Center". In the Network and Sharing Center interface, click "Change Adapter Settings" on the left, find the network connection for which you want to set the IP address, right-click and select "Properties", then select "Internet Protocol Version 4 (TCP/IPv4)", and finally click "Properties" button, you can set the IP address, subnet mask, default gateway, etc. in the pop-up window. After the settings are completed, click "OK" to save the settings.
How to set the computer IP address:
1. First, find the network icon in the lower right corner of the desktop, then right-click and select Network Settings.

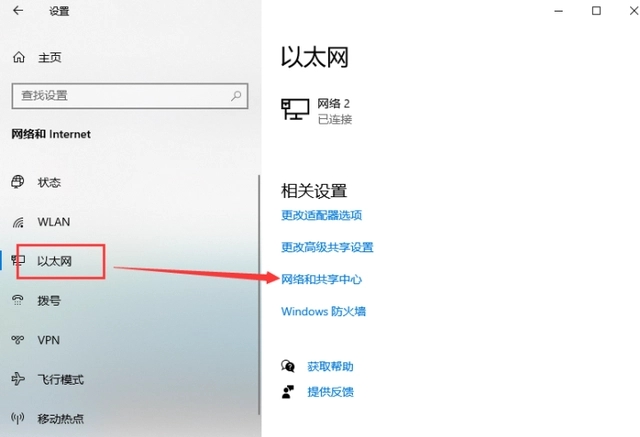
#2. In the Ethernet on the left, find the Network and Sharing Center.
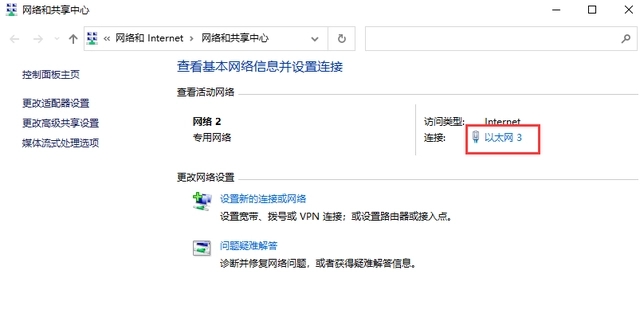
#3. Click Ethernet in the opened interface.
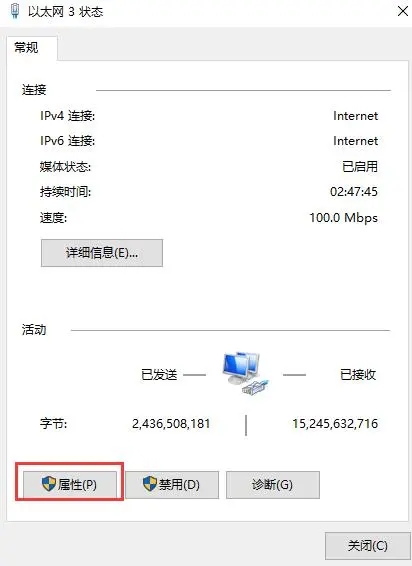
#4. Then when we come to this interface, we click Properties.
5. Find the internet protocol version and click to enter.
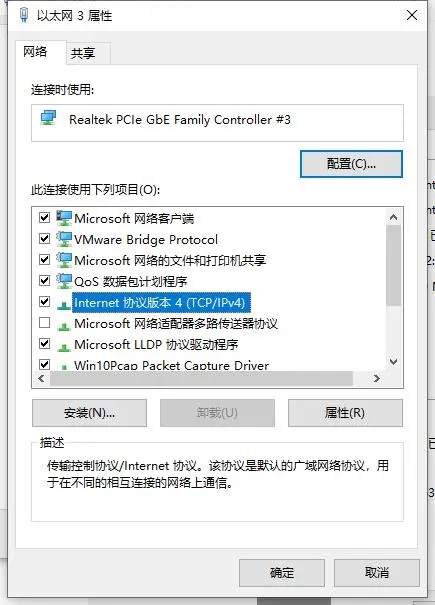
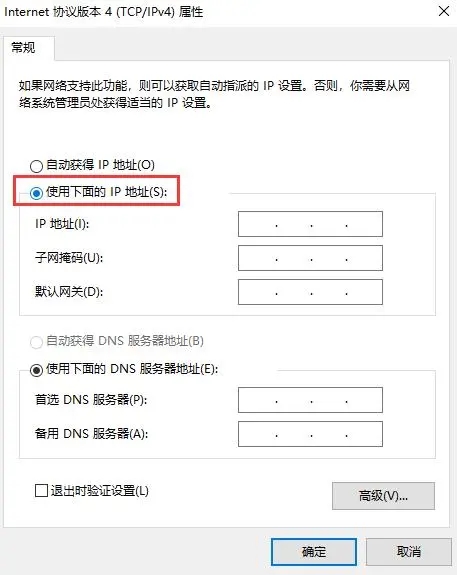
#6. Check Use the following ip address to manually set the computer’s ip address.
The above is the detailed content of How to set win10ip address? Where is the win10 IP address set?. For more information, please follow other related articles on the PHP Chinese website!

