


The motherboard battery is a small battery on the computer motherboard. It is used to provide power to keep system time, date and other information continuously updated. However, over time, the motherboard battery will gradually fail and need to be replaced. So, how to replace the motherboard battery? Below, PHP editor Zimo will introduce you in detail the steps to replace the motherboard battery. First, turn off the computer and unplug it to ensure safe operation. Then, open the case and find the battery on the motherboard, which is generally round or square, usually the CR2032 model. Use a screwdriver or corresponding tool to gently loosen the buckle on the battery holder and take out the old battery. Next, insert the new battery into the battery holder correctly, paying attention to the polarity direction and ensuring that the positive and negative poles correspond. Finally, gently press the buckle of the battery holder to ensure that the new battery is securely installed. After completing the above steps, close the case again, plug in the power plug, and turn it on. With simple steps, you can successfully replace the motherboard battery and ensure the normal operation of the system.

How to replace the motherboard battery?
The steps to replace the motherboard battery are as follows: 1. Replacing the motherboard battery requires following certain steps. 2. The motherboard battery is an important component used to save the computer's BIOS settings and system time. When the motherboard battery is low or damaged, it may cause the computer to fail to start normally or the time to be set incorrectly. 3. The specific steps to replace the motherboard battery are as follows: a. First, turn off the computer and disconnect the power cord to ensure safe operation. b. Open the computer main case and find the battery on the motherboard. The motherboard battery is usually a round coin-shaped battery, and the common model is CR2032. c. Using an appropriate tool, such as a screwdriver or your fingers, gently remove the battery from its socket. Be careful not to use excessive force to avoid damaging the socket or battery. d. Insert the new motherboard battery into the slot correctly, ensuring that the positive and negative poles are correctly aligned. Usually the positive side is up and the negative side is down. e. Reinstall the main chassis cover and reconnect the power cord. f. Turn on the computer, enter the BIOS setting interface, and check whether the system time and date are correct. If it is incorrect, manual adjustment is required. g. After completing the replacement of the motherboard battery, you can restart the computer and check whether it is working normally. Summary: When replacing the motherboard battery, you need to pay attention to safe operations and follow the correct steps to ensure the normal startup of the computer and the accuracy of time settings.
How to replace the computer motherboard battery?
Step/Method 1
First shut down the computer and cut off all relevant power sources to the computer.
Step/Method 2
Open the case and look for the battery (be sure to use metal to eliminate static electricity when touching parts of the case to prevent injury).
Step/Method 3
The battery is not difficult to find. You will see a coin-sized thing on the motherboard, which is the battery.
Step/Method 4
First remove the battery. After observation, you can see that there will be a small clip next to the battery. Use a screwdriver to push it and the battery will pop out (if If there are no small clips, use a screwdriver and gently pry it open).
Step/Method 5
After taking it off, you can install the prepared new battery. Just put it in according to the position of the original battery, but be careful not to Even if the installation is backwards, don't make it very loose.
How to replace the computer motherboard battery?
Steps to replace the computer motherboard battery:
The first step is, near the south bridge of the motherboard, there is a silver-white disc button battery with a plus sign on the back and about two centimeters in diameter.
The second step is to use a flat tool to press the latch on the CMOS battery holder.
The third step is to pop up the battery on the motherboard automatically and then take it out by hand.
Installing the battery: Place the side without the buckle first, then place the battery flat on the slot, press it with the side, and there will be a click. The battery replacement is completed.
How to replace the computer motherboard battery?
1. First buy a new motherboard BIOS battery. Make sure it is the same number as the battery on your computer. It is usually 2032. Go to the computer store to buy one with the same model
2. Turn off the power of the computer, open the case cover, and you will see a round battery. The battery is very bright and easy to find. The diameter is about 1.5-2.0CM. Take out the battery. There are batteries for each motherboard. The seats are different, so the battery removal methods are also different. Generally, they are divided into three types: external button type, top pressure type, and top button type. Take out the battery carefully!
3. At this time, take out the battery you bought Take out the new battery, be careful not to mistake the positive and negative directions of the battery (there are signs on the battery), press it, it is installed, and then close the chassis cover.
How to replace the battery on the computer motherboard?
1. First, open the computer case, and then find the motherboard battery on the computer's motherboard:
2. Then use a screwdriver to pry off the motherboard battery. Be careful not to use excessive force when it is tilted. , so as not to damage the motherboard:
3. Then you can remove the motherboard battery:
4. Before replacing the new battery, you can see the voltage and other models on the battery. Pay attention to Match the one on the old battery:
5. Finally, place the new battery into the battery slot, so that the desktop computer has successfully replaced the motherboard battery.
The above is the detailed content of How to replace the motherboard battery?. For more information, please follow other related articles on the PHP Chinese website!

 微星主板bios安全启动怎么开启?Feb 01, 2024 am 09:21 AM
微星主板bios安全启动怎么开启?1.以华为matebookx、windows10为例。以Z390为例,重启按DEL进入BIOS,按F7进入高级模式,点击进入Settings的选项,再进入TrustedComputing。2.有个安全设备支持(SecurityDeviceSupport),将其改为允许(Enable),TPM设备选择为PTT,设置完成后按F10保存重启。3.以B550M为例,重启按DEL进BIOS后选择左侧的SETTINGS以进入设置界面,同样进入安全选项里的TrustedCom
 进入华硕主板bios设置图解教程Jul 08, 2023 pm 01:13 PM
有很多操作都是需要进到电脑的bios系统进行操作,比如说调整启动项,磁盘模式,cpu参数,刷新bios等等。不过不同的电脑品牌主板的bios设置等界面会有不同,那么如何进入华硕bios?华硕主板bios设置界面又是怎么样的呢?下面小编就给大家分享下进入华硕主板bios设置图解教程。一、如何进入华硕bios1、首先重启华硕电脑,在开机的一瞬间并跳出ASUS的标志界面的时候,马上不断按“Delete”键进入bios界面。2、进入到bios界面后,就可以对bios系统进行设置了。二、华硕主板bios设
 asus安装win7找不到引导启动菜单的解决方案Jul 17, 2023 am 10:37 AM
在安装系统的过程中,许多网民可能会遇到一些问题,导致重新安装系统的失败。最近,一些网民报告说,他们的sus安装win7找不到引导启动菜单,安装后不能正常引导启动菜单进入新系统。下面的小边教你安装win7后找不到引导启动菜单的解决方案。asus安装win7找不到引导启动菜单的解决方案:1.进入华硕主板BIOS,F7进入高级设置。2.进入启动选项。3.修改CSM(兼容性支持模块)。打开CSM,完全支持非UEFI启动附加设备或WindowsUEFI模式。4.返回修改,修改安全启动菜单。5.修改其他操作
 win7怎样进去bios设置方式介绍Jul 11, 2023 pm 06:09 PM
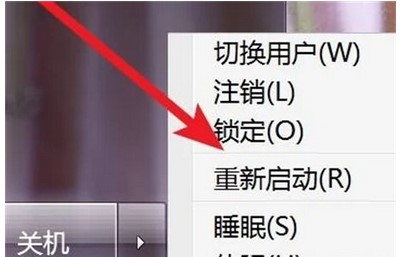
win7怎样进去bios设置呢,用户应用win17的时候如果碰到要进入bios的现象要怎么办呢,最先开机后重启,随后等候系统发生黑底白字时按着del,根据这个方式用户就可以很容易进入bios中,在这儿用户能够设置许多作用,非常的容易且便捷哦,下面就是具体的win7怎样进去bios设置方式介绍。win7怎样进去bios设置1、最先打开电脑以后,点击左下方的菜单栏。2、点击菜单里的‘重启’。3、在重启时,直到显示屏发生黑背景,白字时,就会见到进入bios的方法了,这儿提醒要按照del键。4、不停的按
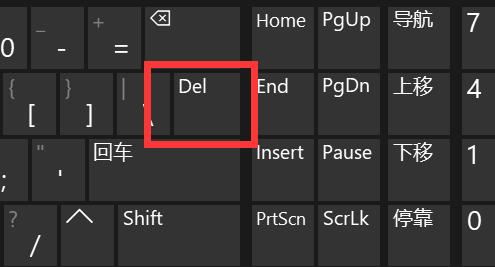
 如何进入华硕主板的BIOS设置界面?Jan 30, 2024 am 11:33 AM
华硕主板开机怎么进入bios设置?步骤/方式1工具/原料:系统版本:windows7系统品牌型号:华硕无畏14开机的时候按下键盘中的“Del”快捷键步骤/方式2即可进入BIOS界面。华硕主板怎么进入bios?1.启动华硕笔记本2.开机的时候按下键盘中的“Del”快捷键即可进入bios设置3.进入bios的主界面华硕主板进bios?进入华硕主板的BIOS有多种方法,以下是其中的两种常见方法:方法一:打开计算机,当出现华硕主板的logo时,按下“删除”键,直到进入BIOS设置页面。在BIOS界面中,
 解决win11关机后外设仍然亮的问题Dec 26, 2023 pm 10:37 PM
有时候我们关机要睡觉了,结果win11关机后外设还亮着灯,非常影响体验,这其实是由于关机后usb接口还在供电导致的,我们只要进入bios设置禁用它就可以了。win11关机后外设还亮:1、首先我们重启电脑,在品牌logo跳出时按下“DEL”进入bios设置。(不同电脑进入bios的方法不一定一样,可以查一下说明书)2、进入后,我们先将语言改到中文,方便操作。3、接着我们进入“高级”设置,打开“高级电源管理”4、然后在其中找到“ErP支持”5、随后将它改为“开启(S4+S5)”6、最后按下键盘“F1
 如何更改BIOS设置以在Win7上安装XP系统Jan 05, 2024 am 08:42 AM
我们在使用win7操作系统的时候,有的小伙伴们因为一些需要想要把自己的系统换成xp操作系统。那么在这个过程中一些小伙伴们可能就遇到了一些问题。对于win7换xp系统bios怎么设置,小编觉得首先通快捷键进入我们电脑的bios,然后找到相关选项跟着小编进行设置即可。具体操作步骤一起来看下吧~win7换xp系统bios怎么设置1.进BIOSThinkPad和联想VBKEM系列的笔记本进BIOS是按键盘的F1键(部分机型是按键盘组合键Fn+F1,Fn键按住不放,反复按F1键)。2.选择Restart标
 惠普bios设置U盘启动的教程Jul 16, 2023 pm 02:21 PM
在使用惠普的用户却不少,很多人要进入快启动pe系统进行维护的时候却不知道该怎么设置U盘启动,主要是惠普bios设置U盘启动的方法和平常的方法略有不同,那么,惠普电脑如何U盘启动呢,下面我们来看看惠普bios设置U盘启动的教程,大家快来看看吧。1、首先,将u盘插入hp台式机的USB接口处。2、开机快速断续的按F10键进入BIOS设置界面。3、进入BIOS设置后,将界面切换到“Boot”选项,将光标移到“BootDevicePriority”选项按回车键进入。4、选择“HDDGroupBootPri


Hot AI Tools

Undresser.AI Undress
AI-powered app for creating realistic nude photos

AI Clothes Remover
Online AI tool for removing clothes from photos.

Undress AI Tool
Undress images for free

Clothoff.io
AI clothes remover

AI Hentai Generator
Generate AI Hentai for free.

Hot Article
Hot Tools

ZendStudio 13.5.1 Mac
Powerful PHP integrated development environment

SAP NetWeaver Server Adapter for Eclipse
Integrate Eclipse with SAP NetWeaver application server.

EditPlus Chinese cracked version
Small size, syntax highlighting, does not support code prompt function

DVWA
Damn Vulnerable Web App (DVWA) is a PHP/MySQL web application that is very vulnerable. Its main goals are to be an aid for security professionals to test their skills and tools in a legal environment, to help web developers better understand the process of securing web applications, and to help teachers/students teach/learn in a classroom environment Web application security. The goal of DVWA is to practice some of the most common web vulnerabilities through a simple and straightforward interface, with varying degrees of difficulty. Please note that this software

Atom editor mac version download
The most popular open source editor

