 Software Tutorial
 Mobile Application
 How to divide disk partitions Attached: Disk partitioning tutorial
php editor Yuzai brings you a detailed tutorial on disk partitioning to help you understand how to partition the disk. Disk partitioning is to divide the hard disk into multiple logical partitions to better manage and utilize storage space. In this tutorial, we will introduce the basic concepts of disk partitioning, how to use partitioning tools, and provide practical cases to help you better understand and apply disk partitioning technology. Whether you are a beginner or an experienced user, this tutorial can provide you with useful guidance, allowing you to easily master the methods and techniques of disk partitioning.
How to divide disk partitions? Sometimes, we may find that our computer is slightly different from other people's computers. What is the difference? The partitions of the hard disk will be somewhat different, and there may even be partitions with only one or two hard disks, or there may be redundant hard disk partitions.


# It may bring some inconvenience to our daily entertainment and office file classification. But we don’t have to sit back and watch. Below I will introduce how to partition a computer disk and how to prevent data loss after partitioning the disk. I hope to be helpful!
Conceptual science: What is a disk partition?
How to divide disk partitions? Chen Min thinks that before understanding the method, let’s first know what disk partitioning is! Many users feel numb due to the trouble of this step of disk partitioning, but we must first understand what the concept of computer hard disk partitioning is and why partitioning is necessary. Hard disk partitioning refers to creating multiple independent logical units on a physical hard disk to facilitate file management and use. These logical units are the so-called c, d, e drives, etc. Hard disk partitioning is essentially a formatting of the hard disk.


#Operation method: How to divide disk partitions?
After understanding the explanation of what disk partitioning is, I believe that everyone has almost an understanding of the concept of hard disk partitioning! Now let’s take a look at how to divide disk partitions! Let’s take a look below!
Step 1: Right-click "This Computer (some computer systems show it as My Computer)" on your computer, and then click "Manage";
Step 2: Find and click " "Disk Management", right-click the disk that needs to be partitioned and click "Compress Volume";
Step 3: The system will pop up the interface to compress the disk size. This interface has four space size values, the first one is the disk The total size, the second is the size of the available disk space, the third is the size of the compressed space you need to enter, the compressed space size cannot exceed the available space, and the fourth is the size of the compressed disk. Enter the size of the compressed space and click [Compress];
Step 4: After the compression is completed, you will clearly see a new green disk in the window. This part of the memory space is the new one you just separated. Disk area, right-click to create a new simple volume;
Step 5: The hard disk partition instruction wizard will pop up. Select the size, hard disk name, format or not, and finally click Finish. This completes the hard disk partition, you will find that a new hard disk partition has been added when you open the computer again;


Prevention measures : Data recovery after disk partition?
We not only learned from the above what disk partitioning is, but also how to divide disk partitions. Now Chen Min wants to give you a preventive method: data recovery after disk partitioning! There are many cases of data lost due to disk partitioning. Many computer players don’t know what to do after such a situation occurs. Let’s take a look at how to retrieve lost data if this happens. Disk data!
Solution: Use software to retrieve data lost after disk partitioning
This situation is different from deletion. If you delete a file, you can try to find it in the recycle bin. Even if it cannot be found in the recycle bin, you can also use the registry to retrieve it, so you want to retrieve it. These data need to use some special methods, which can be done using the software - Data Frog Data Recovery Expert. Let’s verify it together!
Software functions:
Data Frog Data Recovery Expert is a professional data recovery software that supports the recovery of more than 300 file formats such as files, photos, and videos. Supported device types include: computers/notebooks, recycle bins, USB flash drives, hard drives, mobile hard drives, memory cards, digital devices, etc. The company has a professional recovery team that provides free technical support, preview before recovery, free scanning, and one-click recovery. Friends who need to recover data must give it a try. I hope it can help everyone successfully recover data!
Operation Instructions:
Step 1: After entering the Data Frog Data Recovery Expert, select the file type and file path to be scanned, and then click Scan;
Data Recovery Expert - Data Frog professionally provides computer and laptop data recovery software downloads!
Step 2: If you can’t find the file type you need after the scan, you can also perform a “deep scan”. Of course, if you can find it (on the left side of the software or search through the search), select it. You can click "Restore" directly!


How to divide disk partitions? And "Chen Min has shared with you the method of data recovery after disk partitioning. If data is lost after partitioning, use the preventive methods shared by Chen Min to try to retrieve it! Okay, this sharing is completed, if it succeeds To retrieve lost data, don’t forget to like and follow Chen Min!
The above is all the content of this article. It is a very happy thing to be able to help everyone. After reading this If you don’t understand how to divide disk partitions in "Attachment: Disk Partition Tutorial", I suggest you read it again. Please continue to check out other related content on this site’s learning network!
The above is the detailed content of How to divide disk partitions Attached: Disk partitioning tutorial. For more information, please follow other related articles on the PHP Chinese website!
 主板电源线插错会烧吗?Jan 30, 2024 pm 09:45 PM
主板电源线插错会烧吗?是的有可能,比如说你把USB插针接线插乱了,以后你插入USB设备时,就可能烧掉USB设备或者主板上的USB控制电路;再比如你把“重启”按钮的接线插在电源指示灯或者硬盘指示灯插针上了,你以后按下重启按钮时,可能会烧掉主板上的指示灯电路。但是这些故障发生的可能性比较小,即使发生了也只是烧坏主板上的某一小部分电路使它不能工作,不会造成整块主板都烧坏不能启动运行的故障。话说主板上的线如果插错了.会不会烧坏硬件?主板上的线如果插错了有可能会发生烧坏硬件的情况产生,这是因为一旦相关硬件
 教你如何回退到上一个版本的Win11 23H2Jan 29, 2024 pm 06:57 PM
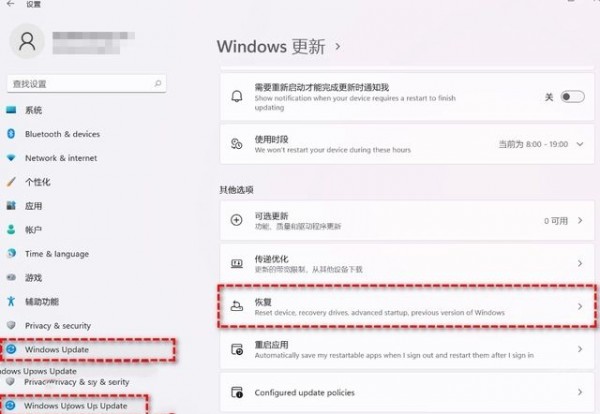
Win1123H2正式版就在近期推送啦,很多的用户们在升级完后觉得一些操作使用得不是很喜欢,那么Win1123H2如何退回上一个版本?下面就让本站来为用户们来仔细的介绍一下升级完Win1123H2退回上一个版本的三种教程吧。升级完Win1123H2退回上一个版本的三种教程方法一:从设置菜单退回1、点击任务栏的开始菜单,然后单击设置选项,选择Windows更新,然后点击恢复。3、选择退回的原因,然后点击下一步。4、你将看到检查更新的通知,选择不,谢谢。5、阅读需要了解的内容,然后点击下一页。6、阅
 解决win11无法安全弹出移动硬盘的方法Jan 30, 2024 pm 05:45 PM
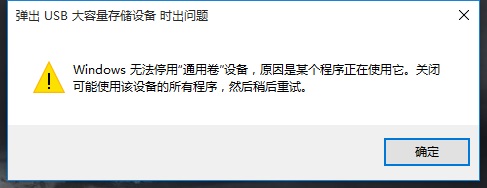
许多用户在连接Win11电脑后,发现无法安全弹出移动硬盘。他们尝试了多次但都失败了,最后只能强行拔出。那么,如何解决这个问题呢?在这里,本站小编为大家提供了两种解决方法,让我们一起来看看详细的操作步骤吧。3、在其中找到并右键Windows资源管理器,选择重新启动。2、打开后,输入MSConfig,回车运行。4、然后勾选隐藏所有Microsoft服务,点击全部禁用。
 Win11安卓子系统启动问题解决方法(已解决)Jan 30, 2024 pm 07:18 PM
Win11系统带来一项全新功能,即安卓子系统(WSA),用户不用通过安卓模拟器就能轻松运行安卓应用和安卓游戏。不过有时候也会遇到安卓子系统无法启动的情况,这要如何解决?下面就来看看小编整理的操作流程吧。
 硬盘全新安装mac(新硬盘安装macos)Jan 31, 2024 pm 05:00 PM
本站将分享有关硬盘全新安装Mac的内容,如果能解决您的问题,请关注。现在开始!如何在mac上安装固态硬盘?首先,使用专门拆卸产品的小号螺丝刀,将笔记本电脑机身下方的八个小型螺丝拆卸下来。这样就可以打开笔记本电脑的后盖了。需要特别注意的是,在打开的过程中要小心,避免用力过猛,以免损坏电脑内部的元件。拆下主板后,将主板电源接头旋转90度,然后取出电源。之后,拆下硬盘,使用T9螺丝刀拧掉螺丝,然后更换为你想要的SSD固态硬盘。最后,按照相反的顺序将之前拆卸的零件重新安装回去。苹果笔记本可以安装固态硬盘
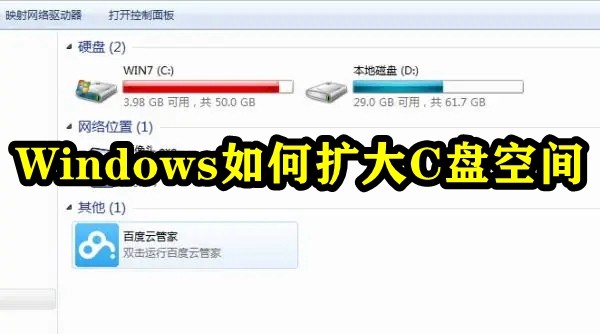 如何增加C盘的存储空间Jan 29, 2024 pm 04:48 PM
c盘是电脑的系统盘,c盘空间不足会导致电脑运行卡顿,进而影响到软件和游戏的程序运行,即便是将软件程序安装到其他盘软件仍会占用c盘的空间,使用时间久了,当遇到c盘空间不足的情况时最好的解决办法就是扩大c盘的内存空间,本期小编整理了四种扩大c盘的办法,轻松解决c盘内存不足的问题。Windows如何扩大C盘空间方法1.使用DiskPart扩展C盘DiskPart是一个Windows系统自带的程序,它通过脚本或输入命令来处理磁盘、分区或卷。简单地说,要扩大C盘,需要在diskpart命令中输入“list
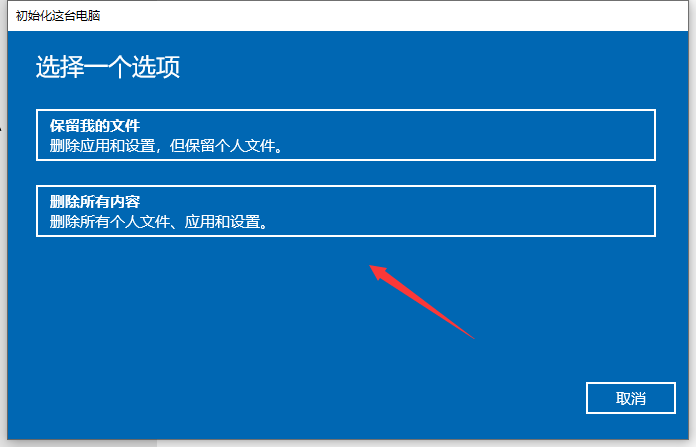 恢复Windows 10系统是否导致数据丢失?Dec 31, 2023 am 09:40 AM
我们在使用windows10系统的时候一定经历过还原,重装系统的经历。那么win10系统还原之后会不会丢失数据,win10系统还原会不会丢失文件数据,这个取决于你的选择。win10系统还原会丢失数据吗答:不会丢失个人数据以及文件夹的。如果电脑未正常运行,重置此电脑可能会解决问题。还原时,可以选保留个人文件或删除个人文件,然后重新安装Windows。对于这个问题,其实也简单,大家在Win10的「设置」→「更新和安全」-「恢复」中,就可以看到“重置此电脑”功能。从描述中可以看出,Win10重置电脑,
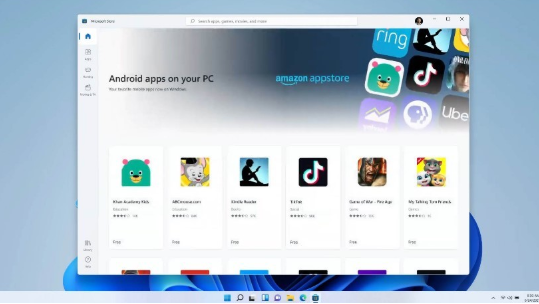 笔记本适合升级至Win11系统吗?探索笔记本升级至Win11系统的建议详解Jan 30, 2024 pm 05:27 PM
现在的win11系统越来越稳定了,很多小伙伴都在问说笔记本建议升级Win11吗?小编个人认为是可以升级为win11系统,但也可以保留现在的系统继续使用,那么今天就来和多好讲解一下为什么建议升级到win11,一起来看看都有哪些原因吧。


Hot AI Tools

Undresser.AI Undress
AI-powered app for creating realistic nude photos

AI Clothes Remover
Online AI tool for removing clothes from photos.

Undress AI Tool
Undress images for free

Clothoff.io
AI clothes remover

AI Hentai Generator
Generate AI Hentai for free.

Hot Article

Hot Tools

Atom editor mac version download
The most popular open source editor

mPDF
mPDF is a PHP library that can generate PDF files from UTF-8 encoded HTML. The original author, Ian Back, wrote mPDF to output PDF files "on the fly" from his website and handle different languages. It is slower than original scripts like HTML2FPDF and produces larger files when using Unicode fonts, but supports CSS styles etc. and has a lot of enhancements. Supports almost all languages, including RTL (Arabic and Hebrew) and CJK (Chinese, Japanese and Korean). Supports nested block-level elements (such as P, DIV),

SublimeText3 Linux new version
SublimeText3 Linux latest version

VSCode Windows 64-bit Download
A free and powerful IDE editor launched by Microsoft

ZendStudio 13.5.1 Mac
Powerful PHP integrated development environment


