

Asus motherboard first boot disk

php editor Youzi Asus motherboard's first boot disk placement means that when assembling the computer, the operating system installation file is placed in the first boot disk of the motherboard. The advantage of this is that it can ensure that the computer can automatically identify and load the operating system when it starts, which improves the startup speed. At the same time, placing the first boot disk of the motherboard can also avoid some problems during the system installation process and ensure the normal operation of the system. Therefore, when assembling the computer, be sure to put the first boot disk of the motherboard in place to ensure the stability and fluency of the system.
1. Download the Xinmaotao U disk boot disk creation tool and install it, and then make a U disk of 8G or above into a U disk boot disk.

During the production, the USB flash drive will be formatted, please back up important files. If you need to install the system on the C drive, do not store important files on the C drive or desktop.
Due to copyright issues, Xinmaotao does not provide system download services. Therefore, users need to search and download the required Win11 system image on the Internet themselves. Then, save the image to the USB boot disk to install the operating system.
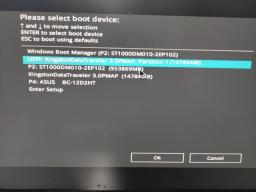
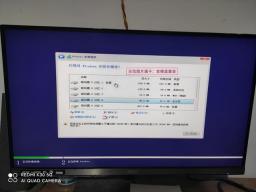
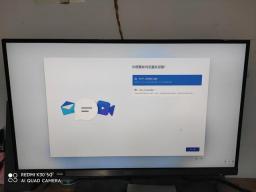
Step 1: Installation Taking the ASUS computer motherboard as an example: Press F8 to enter the installation interface - select UEFI _ - click OK [as shown in the picture]
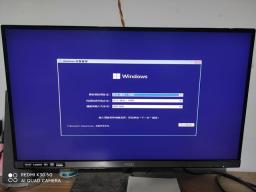
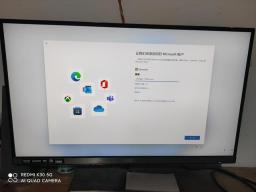
Step 2: Select I don’t have a product key-check the agreement-the next step is as shown in the picture
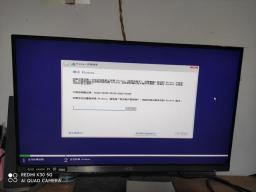

Step 3 : We choose custom installation as shown in the figure

The fourth step is to partition the hard disk. For hard drives with a capacity of 1TB and above, we can partition them in the following way: it is recommended to allocate 200GB space to the C drive, 200GB space to the D drive, 300GB space to the E drive, and the remaining space can be allocated to the F drive. . It should be noted that the calculation unit here is 1GB equal to 1024MB.
If the old hard disk needs to be repartitioned, please back up useful data: delete each disk in turn and then partition according to the above method.
Note: What the editor demonstrates here is an old hard drive. It is only installed on the C drive and is not repartitioned.
Please look carefully at the 4 drive letters in the red box in the example picture as shown.
Step 5: Select the drive letters in the red box and delete them one by one. [Press the delete key] to delete three of the drive letters. Finally, you will get a 0 partition, select it and click Next. For example As shown in the picture

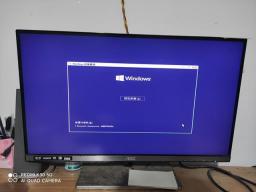
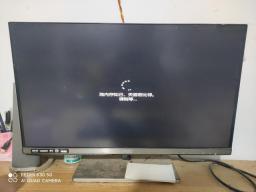
Step 6: Leave the task to the computer and take a rest for a while before coming back


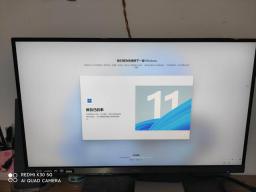
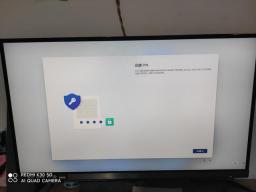
Step 7: Follow the system on-screen prompts to complete some simple settings


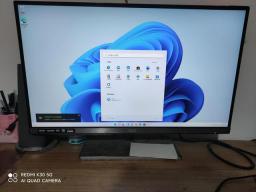
Step 8: Follow the prompts to create an account-name the calculation-set a password-add security questions to complete the installation


The above is the detailed content of Asus motherboard first boot disk. For more information, please follow other related articles on the PHP Chinese website!

![Atomic Heart The Game Is Not Ready to Load This Save [Solved] - MiniTool](https://img.php.cn/upload/article/001/242/473/174594541048769.jpg?x-oss-process=image/resize,p_40) Atomic Heart The Game Is Not Ready to Load This Save [Solved] - MiniToolApr 30, 2025 am 12:50 AM
Atomic Heart The Game Is Not Ready to Load This Save [Solved] - MiniToolApr 30, 2025 am 12:50 AMDue to some reasons, you may encounter the “Atomic Heart the game is not ready to load this save” error. In this post, php.cn collects the possible reasons for the issue and offers you 5 troubleshooting methods.
 Expert Windows X-Lite Optimum 11 24H2 Installation GuideApr 30, 2025 am 12:49 AM
If you need to enjoy Windows 11 24H2 on a lower configuration computer, you can download Windows X-Lite Optimum 11 24H2 Home or Pro. Here this post on php.cn Software aims to show you Windows X-Lite Optimum 11 24H2 download and install.
 Unsupported PCs Accidentally Receive Windows 11 22H2 - MiniToolApr 30, 2025 am 12:48 AM
Microsoft accidentally releases Windows 11 22H2 to the Windows Insiders in the Release Preview Channel. Some users think Microsoft has changed the hardware and system requirements for Windows 11. However, it is just a bug in Windows 11. You can follo
 How to Use the On-Screen Keyboard on Windows 11/10/8/7? - MiniToolApr 30, 2025 am 12:47 AM
On-Screen Keyboard is a virtual keyboard that is available on Windows 11/10/8/7. If you don’t know how to open and use it on your Windows computer, you can read this post from php.cn Software to get some related information.
 PrivadoVPN Free Download for Windows, Mac, Android, iOS - MiniToolApr 30, 2025 am 12:46 AM
PrivadoVPN is a free VPN service for Windows, macOS, Android, iOS, Android TV, etc. With this free VPN, you can access any content online without location restriction and stay anonymously when browsing the internet. Check how to download and install
 How to Unforget a Bluetooth Device on iPhone/Android/Laptop? - MiniToolApr 30, 2025 am 12:44 AM
Wireless Bluetooth brings people many conveniences in modern life. When you don’t want to keep the Bluetooth device connected, you can choose to forget it. But how to reconnect and unforget the Bluetooth when you want to re-establish the connection?
 10 Best VPNs for Netflix to Watch Movies and TV Shows - MiniToolApr 30, 2025 am 12:43 AM
To watch various Netflix movies and TV shows, you may use a VPN service. This post introduces some best free Netflix VPNs for your reference. For more useful computer tutorials and tools, you may go to php.cn Software official website.
 Discovery Plus Error 400 – What Is It and How to Fix It? - MiniToolApr 30, 2025 am 12:42 AM
Discovery Plus error 400 is a commonly seen issue when you watch your favorite TV shows and movies on Discovery Plus. This article on php.cn Website will introduce Discovery Plus 400 and some solutions for this issue.


Hot AI Tools

Undresser.AI Undress
AI-powered app for creating realistic nude photos

AI Clothes Remover
Online AI tool for removing clothes from photos.

Undress AI Tool
Undress images for free

Clothoff.io
AI clothes remover

Video Face Swap
Swap faces in any video effortlessly with our completely free AI face swap tool!

Hot Article
Hot Tools

MantisBT
Mantis is an easy-to-deploy web-based defect tracking tool designed to aid in product defect tracking. It requires PHP, MySQL and a web server. Check out our demo and hosting services.

EditPlus Chinese cracked version
Small size, syntax highlighting, does not support code prompt function

SublimeText3 English version
Recommended: Win version, supports code prompts!

SublimeText3 Linux new version
SublimeText3 Linux latest version

Notepad++7.3.1
Easy-to-use and free code editor

