


php editor Xiaoxin brings you a concise guide to solving Mac hard drive partition problems. When using a Mac computer, sometimes you need to allocate some space on your hard drive for other uses, such as installing other operating systems or creating backup partitions. This article will introduce you how to use Mac's own disk utility to easily complete this operation. There is no need to worry about complicated steps, just follow the simple guidelines below and you can successfully allocate a portion of hard drive space to meet your needs. Let’s take a look!
How to partition the hard disk of macbook?
The steps to partition the hard disk of Apple notebook (MACBOOK) are as follows: Find the Disk Utility column in the application options. After clicking to select the primary hard drive, find the partition function page on the right. Open the drop-down page of the partition layout button, select the partition to be added, and click the plus sign key to fill in the partition size.
Method 1: (Divide an F drive directly from the E drive) Right-click "This Computer" on the desktop---Manage---Disk Management---Select E drive---Compress volume ---Enter the size of the new partition (F drive) in the "Input compression space (MB) (E)" ---Compression---Put the Apple system disk into the new partition.
Click one to start, select another (or other options). Next, click Disk Utility to view the hard drive capacity. Determine the partition capacity to be created based on the remaining space (for example, 60G). If you need a 30G partition, click Volume and select the appropriate size quota (if no specific settings are required, just click Add).
Partitioning can be done through the "Disk Utility" that comes with MACBOOK. The specific steps are as follows: Click on the upper menu bar of the Mac system - Utilities - Disk Tools to open Disk Tools. Check the capacity of the hard disk in Disk Utility and determine the capacity of the partition to be created based on the actual available space.
When you encounter the error message "Your disk could not be partitioned", you can solve it by restarting your Mac computer. While restarting, hold down the Command R key on your keyboard until the Apple icon appears on the screen. Then, in the OS X tool list, select and open the "Disk Utility" option.
When "Remove Windows 7 or later" is selected, click the "Continue" button. If your Mac only has one internal disk, click the "Recover" option.

How to partition a mobile hard drive on a mac system
1. Open the "Disk Utility" application. Select the disk to partition. Click the Partition button at the top of the screen. Select the desired number of partitions and the size of each partition in the pop-up window and click the "Apply" button.
In Mac System Preferences, click to open the software and insert the hard drive to be modified to operate the NTFS disk.
The first partition needs to be in NTFS disk format to install Windows. Since NTFS is a Microsoft patent, in order to use Disk Utility to format it on a Mac, you need to install the Paragon NTFS plug-in. There are many ways to install it.
4. Let’s talk about how to partition the hard disk using 40G mobile hard disk partition. The best operating system is WindowsXP, Win2000 can also be used (basically the same as XP), 9ME does not have this partitioning method. Right-click the "My Computer" icon on the desktop and select "Manage".
5. Plug the mobile hard drive into the mac. Wait for a while and Disk Utility will list the connected mobile hard drives. On the right is the operation area for the hard disk. Click [Partition] to pull down the partition layout, select [2 Partitions], click the first partition, and the system will display a blue frame for the selected partition.
6. The steps are as follows: Open the Finder panel and select Disk Utility. Select the mobile hard disk, switch to the partition column, and set the partition layout and partition table mode (in the options). Click the Apply button and press the Partition button to partition.
How to partition an Apple computer hard drive
The first step is to right-click the [This Computer] icon, and then click the [Manage] option in the pop-up menu bar as shown in the figure below.
Find the Disk Utility column in the application options. After clicking to select the 500G primary hard drive, find the partition function page on the right. Open the drop-down page of the partition layout button, select a partition you want to add, and click the plus sign in the lower left corner to fill in the size.
Method 1: (Divide an F drive directly from the E drive) Right-click "This Computer" on the desktop---Manage---Disk Management---Select E drive---Compress volume ---Input the size of the new partition (F drive) to be split into "Input compression space (MB) (E)" ---Compression---. Insert the Apple system disk.
Click one to start, click another. Click this Disk Utility, then check the capacity of the hard disk, and think about the capacity of the partition to be created, for example, this remaining 60g. Then it is just appropriate to create a 30g partition. Then click on this volume, click on this size quota. (If not selected, click Add.
How to partition an Apple computer hard drive? In traditional disk management, a hard drive is divided into two major types of partitions: primary partition and extended partition. The primary partition can be installed The operating system is a partition that can be used for computer startup. Such a partition can be directly formatted, and then the system can be installed and files can be stored directly.
How to partition Apple dual system win7: After selecting the installation drive letter, do not select "Install System" immediately, select "Disk Utility" to partition. Select your computer's hard drive on the left panel, then select "Erase" on the right, and then select "Partition" to partition it.
How to partition the hard disk of Apple notebook (MACBOOK)???
The steps to partition the hard disk of Apple notebook (MACBOOK) are as follows: Find the Disk Utility column in the application options. After clicking to select the primary hard drive, find the partition function page on the right. Open the drop-down page of the partition layout button, select the partition to be added, and click the plus sign key to fill in the partition size.
Method 1: (Divide an F drive directly from the E drive) Right-click "This Computer" on the desktop---Manage---Disk Management---Select E drive---Compress volume ---Enter the size of the new partition (F drive) in the "Input compression space (MB) (E)" ---Compression---Put the Apple system disk into the new partition.
3. Usually Mac does not need to be partitioned, but after partitioning, important files should be stored in the partition. Then after the computer crashes, the files will not be lost. This seems to be very necessary. So how to partition? Click one to start, click another.
Partitioning can be done through the "Disk Utility" that comes with MACBOOK. The specific steps are as follows: Click on the upper menu bar of the Mac system - Utilities - Disk Tools to open Disk Tools. Check the capacity of the hard disk in Disk Utility and determine the capacity of the partition to be created based on the actual available space.
When you encounter the error message "Your disk could not be partitioned", you can solve it by restarting your Mac computer. While restarting, hold down the Command R key on your keyboard until the Apple icon appears on the screen. Then, in the OS X tool list, select and open the "Disk Utility" option.
6. Advantages of not partitioning: The disk capacity utilization is high, and the situation that the total remaining space is sufficient but each partition is not enough will not occur. Moving files will not cause a "copy data" operation. , because the physical address of the data will not change. Nowadays, hard disks are very cheap, so it is better to buy more hard disks.
Conclusion: The above is all the content that this site has compiled for you on how to divide a part of the hard drive to a Mac. Thank you for taking the time to read the content of this site. I hope it will be helpful to you. Don’t forget to learn more related content. Find it on this site.
The above is the detailed content of How to allocate part of the hard drive to mac?. For more information, please follow other related articles on the PHP Chinese website!

 Launch All Apps & Documents Related to a Project with Stapler for MacMay 13, 2025 am 10:37 AM
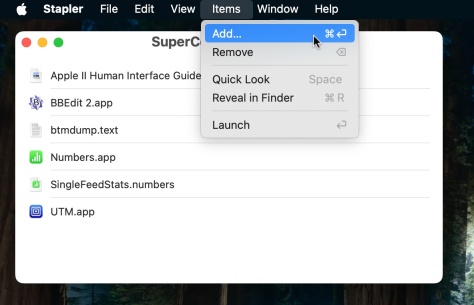
Longtime Mac users may recall a handy old shareware application for the Classic Macintosh called Stapler, which essentially helped manage projects by grouping a series of apps and documents into a single document that when opened would then launch al
 How to Get Apple Intelligence on Your iPhone, iPad, or MacMay 13, 2025 am 10:32 AM
Apple Intelligence is a set of AI features that Apple is rolling out in beta, and will debut to a larger set of Apple device owners in the fall. Apple Intelligence offers many features from writing and creating text and emails, to taking actions and
 MacOS Sonoma 14.6.1 & Ventura 13.6.9 Released with Bug FixesMay 13, 2025 am 10:25 AM
If you feel like you have spent a significant amount of your time updating system software on your Apple devices lately, you’re in for a treat; another round of system software updates! This time around, Apple has released MacOS Sonoma 14.6.1 alon
 MacOS Sequoia 15 Beta 6 Available for TestingMay 13, 2025 am 10:23 AM
Apple has issued the 6th beta version of MacOS Sequoia for users enrolled in the developer beta testing program. Usually a matching public beta build arrives soon after, which in this case dev beta 6 would be versioned as public beta 4. MacOS Sequoia
 MacOS Sonoma 14.6 Update Released with Bug Fixes & Security UpdatesMay 13, 2025 am 10:20 AM
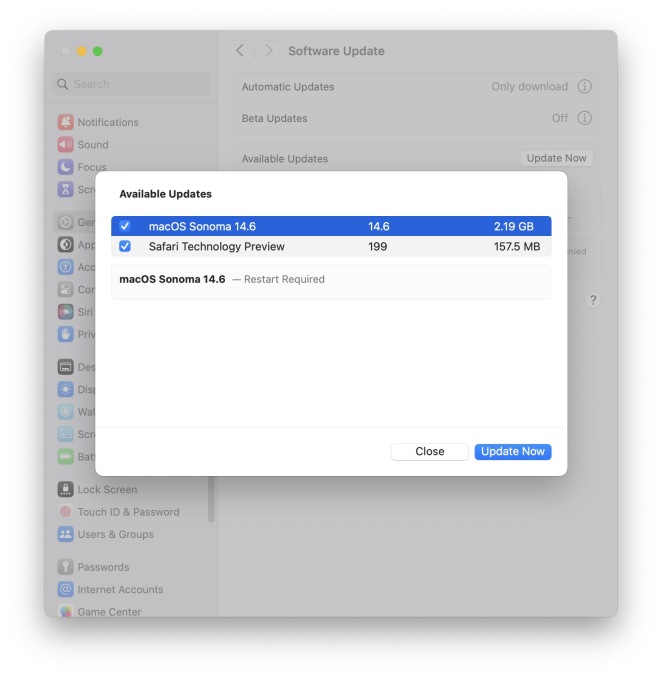
Apple has released macOS Sonoma 14.6 for Mac users running the Sonoma operating system. The MacOS Sonoma 14.6 software update primarily focuses on bug fixes and security updates for most Macs, however it does include a nice new feature specifically
 MacOS Sequoia 15 Beta 5 Available to DownloadMay 13, 2025 am 10:06 AM
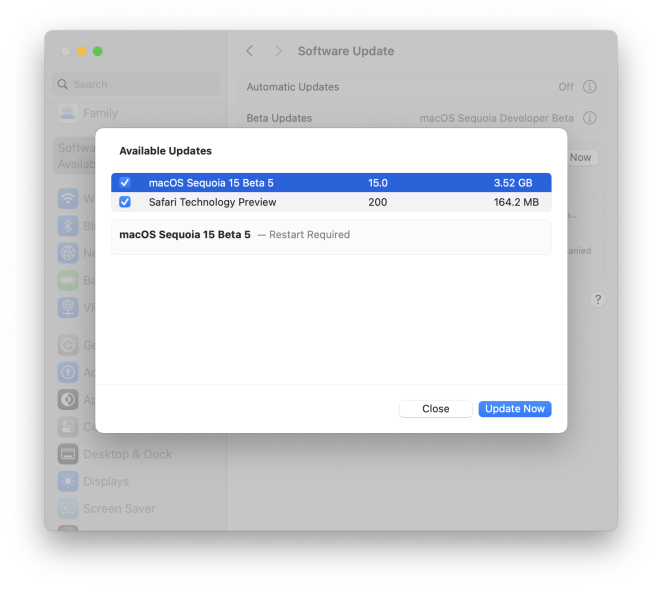
MacOS Sequoia beta 5 is now available for users enrolled in the developer beta testing program to download and install onto their Macs. MacOS Sequoia beta 5 carries the build of 24A5309e, and usually a new developer beta build is soon followed by a m
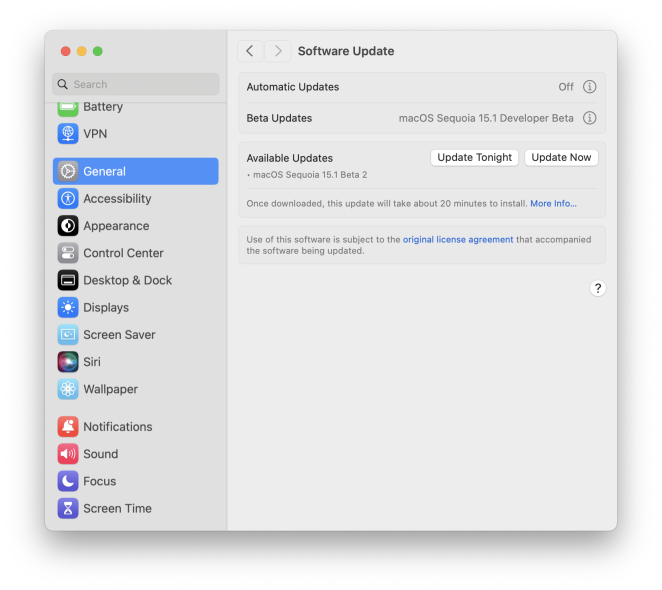 Beta 2 of iOS 18.1, MacOS Sequoia 15.1, & iPadOS 18.1 Released with Apple IntelligenceMay 13, 2025 am 09:49 AM
Apple has released the second beta of iOS 18.1, iPadOS 18.1, and MacOS Sequoia 15.1, each with support for Apple Intelligence AI features, on supported devices anyway. The release of these new beta updates is unusual in that they’re concurrent wit
 How to Uninstall VMWare Fusion on MacMay 13, 2025 am 09:44 AM
You might be aware that VMWare Fusion Pro is now free to download and install, and perhaps you installed it on a Mac to test virtual machines or to play around with, and now you’ve decided you no longer need VMware on the Mac. But VMware Fusion P


Hot AI Tools

Undresser.AI Undress
AI-powered app for creating realistic nude photos

AI Clothes Remover
Online AI tool for removing clothes from photos.

Undress AI Tool
Undress images for free

Clothoff.io
AI clothes remover

Video Face Swap
Swap faces in any video effortlessly with our completely free AI face swap tool!

Hot Article
Hot Tools

SublimeText3 English version
Recommended: Win version, supports code prompts!

SecLists
SecLists is the ultimate security tester's companion. It is a collection of various types of lists that are frequently used during security assessments, all in one place. SecLists helps make security testing more efficient and productive by conveniently providing all the lists a security tester might need. List types include usernames, passwords, URLs, fuzzing payloads, sensitive data patterns, web shells, and more. The tester can simply pull this repository onto a new test machine and he will have access to every type of list he needs.

Safe Exam Browser
Safe Exam Browser is a secure browser environment for taking online exams securely. This software turns any computer into a secure workstation. It controls access to any utility and prevents students from using unauthorized resources.

Atom editor mac version download
The most popular open source editor

Notepad++7.3.1
Easy-to-use and free code editor

