


In daily use of computers, we often encounter situations where we need to add or delete fonts. Whether it is to beautify document layout or meet specific needs, knowing how to add or delete fonts is essential. In this article, PHP editor Banana will introduce you to several common methods of adding or deleting fonts to help you easily cope with various font needs.
How to add or delete fonts
1. Win7 system
1. Click Start to open the Control Panel

2. Find Appearance and Personalization and open

3. Then click to enter the font

4. Download it Just copy and paste the font in.

2. win10 system
1. Open the C drive and enter the Windows/fonts directory

2. Just copy the font file to the following folder.

3. Or open the font software you downloaded and click "Install" on the font

3. win11
1. Right-click on the desktop and select "Personalize"

2. Scroll down to find the font

3. You can see an added function in the upper right corner. Just drag the fonts you downloaded here.

The above is the detailed content of How to add or remove fonts. For more information, please follow other related articles on the PHP Chinese website!

 win11添加新硬盘教程Jan 05, 2024 am 09:39 AM
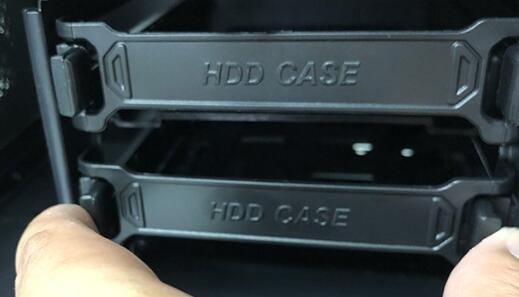
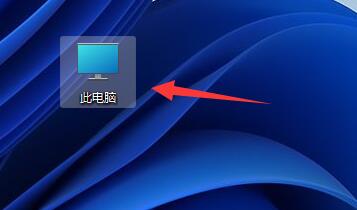
在购买电脑的时候,不一定会选择很大的硬盘,这时候如果我们想在win11添加新硬盘,可以先安装购买的新硬盘,然后在电脑里添加分区就可以了。win11添加新硬盘教程:1、首先,我们拆开主机,找到硬盘的插槽。2、找到后,我们先接上“数据线”,一般会有防呆设计,插不进去反个方向即可。3、随后将新的硬盘插入硬盘插槽。4、插入后,将数据线的另一头接到电脑的主板上。5、安装完成后,就可以装回主机,并开机了。6、开机后,我们右键“此电脑”,打开“计算机管理”7、打开后,点击左下角的“磁盘管理”8、随后在右边可以
 Win11快速创建桌面快捷方式的教程Dec 27, 2023 pm 04:29 PM
在win11中,我们可以通过添加桌面快捷方式的方法在桌面上快速启动软件或文件,而且只需要右键需要的文件就可以操作了。win11添加桌面快捷方式:1、打开“此电脑”,找到你想要添加桌面快捷方式的文件或软件。2、找到后,右键选中它,点击“显示更多选项”3、再选择“发送到”-“桌面快捷方式”4、操作完成后,就可以在桌面上找到快捷方式了。
 Vue中如何添加水印到图片中?Aug 19, 2023 pm 12:37 PM
Vue中如何添加水印到图片中?Vue是一种流行的JavaScript框架,被广泛使用于构建Web应用程序。有时我们需要在Vue应用程序中为图片添加水印,以保护图片的版权或者增加图片的可识别性。在本文中,我将向大家介绍一种在Vue中添加水印到图片的方法,并提供相应的代码示例。第一步,我们需要在Vue中引入一个用于添加水印的第三方库。推荐使用watermarkj
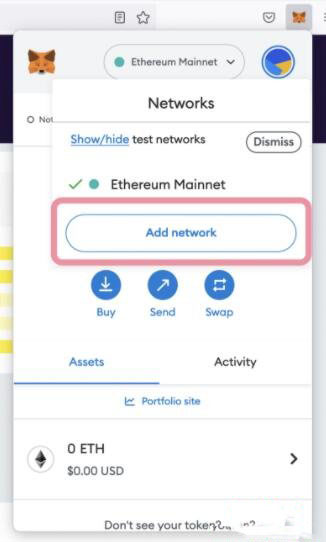 在MetaMask钱包中如何连接到Polygon网络?MetaMask钱包连接到Polygon网络的教程指南Jan 19, 2024 pm 04:36 PM
如何添加PolygonMainnet网络要将MATIC(Polygon)与Metamask链接使用,您需要添加一个名为“PolygonMainnet”的专用网络。使用错误的网络地址进行转入会导致出现问题,所以在转出$MATIC之前,请务必使用“PolygonMainnet”网络。Metamask钱包默认连接到以太坊主网,但是我们可以很简单地添加“PolygonMainnet”并使用$MATIC。只需简单的复制和粘贴几个步骤,就能完成。首先,在Metamask钱包中,点击右上角的网络选项,选择“C
 MetaMask小狐狸如何在2023年添加BSC网络?(2023最新版MetaMask小狐狸添加BSC网络教程)Jan 19, 2024 pm 05:39 PM
BSC网络是由加密货币交易所币安开发的高性能区块链,英文全称是BinanceSmartChain即币安智能链。BSC区块链兼容EVM网络,因此可以使用MetaMask钱包访问和交互。那么小狐狸钱包怎么添加BSC网络呢?下面和小编一起来看看吧。1、MetaMask直接添加BSC网络首先打开MetaMask钱包,依次点击右上角头像–设置–网络点击"添加网络"按钮进入小狐狸钱包的网络设置页面,最新版的Metamask已内置热门区块链网络,包括币安智能链。我们只需要点BNBSmartCha
 Java数组添加元素的常用方法Feb 21, 2024 am 11:21 AM
Java数组添加元素的常用方法,需要具体代码示例在Java中,数组是一种常见的数据结构,可以存储多个相同类型的元素。在实际开发中,我们经常需要向数组中添加新的元素。本文将介绍Java中数组添加元素的常用方法,并提供具体的代码示例。使用循环创建新数组一个简单的方法是创建一个新的数组,将旧数组的元素复制到新数组中,并添加新的元素。代码示例如下://原始数组i
 电脑win10桌面便签怎么添加Jul 13, 2023 pm 10:05 PM
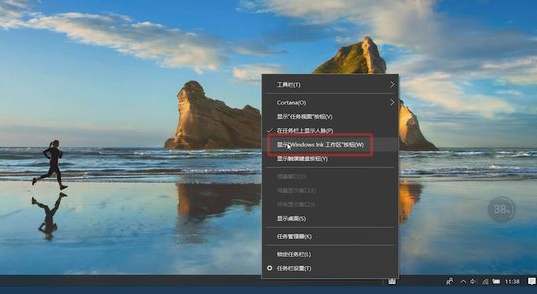
win10系统中我们可以给桌面添加便签,记录自己的工作计划,或者待完成项目等等,非常方便。那么电脑win10桌面便签怎么添加呢?很多朋友并不知道电脑win10桌面便签怎么用,所以下面来看看电脑win10桌面便签添加方法。电脑win10桌面便签怎么添加?具体方法如下:方法一:在桌面底部任务栏鼠标右键。点击显示“WindowInk工作区按钮”,点击右下角弹出的“WindowInk工作区按钮”。方法二:点击左下方的小娜,搜索“note”就可以看到便签了。以上就是小编带来的电脑win10桌面便签怎么添加
 Win11桌面小组件使用指南Jan 03, 2024 pm 05:06 PM
在win11系统中,微软为用户加入了很多有趣的小组件,用户可以自由选择是否开启他们并使用。但是有的朋友可能不知道这些小组件应该如何打开,其实我们只要在任务栏中就可以选择并打开它了。win11小组件在哪里打开1、首先右键点击任务栏空白处,选择“任务栏设置”2、然后展开其中的“任务栏项”,在将下方的小组件打开。3、打开按钮之后在任务栏中点击小组件选项。4、然后在左侧列表中就可以选择“添加小组件”5、然后在其中找到需要添加的小组件,点击右侧“+”号就可以添加了。


Hot AI Tools

Undresser.AI Undress
AI-powered app for creating realistic nude photos

AI Clothes Remover
Online AI tool for removing clothes from photos.

Undress AI Tool
Undress images for free

Clothoff.io
AI clothes remover

AI Hentai Generator
Generate AI Hentai for free.

Hot Article
Hot Tools

DVWA
Damn Vulnerable Web App (DVWA) is a PHP/MySQL web application that is very vulnerable. Its main goals are to be an aid for security professionals to test their skills and tools in a legal environment, to help web developers better understand the process of securing web applications, and to help teachers/students teach/learn in a classroom environment Web application security. The goal of DVWA is to practice some of the most common web vulnerabilities through a simple and straightforward interface, with varying degrees of difficulty. Please note that this software

EditPlus Chinese cracked version
Small size, syntax highlighting, does not support code prompt function

Dreamweaver CS6
Visual web development tools

SublimeText3 Chinese version
Chinese version, very easy to use

MantisBT
Mantis is an easy-to-deploy web-based defect tracking tool designed to aid in product defect tracking. It requires PHP, MySQL and a web server. Check out our demo and hosting services.

