

 Computer TutorialsTroubleshootingHow to set the motherboard to boot into the USB flash drive on a Gigabyte motherboard?
How to set the motherboard to boot into the USB flash drive on a Gigabyte motherboard?

php editor Baicao will introduce to you how to set up the Gigabyte motherboard to enter the bootable USB disk. During the computer startup process, we need to choose to use the U disk to boot through settings. First, we need to enter the BIOS setup interface. After booting, press the corresponding button (usually Del, F2 or F12) to enter the BIOS. In the BIOS interface, find the "Boot" or "Boot" option, and then select "Boot Priority" or "Boot Sequence". Select the USB flash drive as the first boot item in the boot sequence, save the settings and exit. In this way, when we start the computer next time, the motherboard will give priority to booting from the USB flash drive. This is an easy way to set up the motherboard to boot into a USB drive.

#How to set up the Gigabyte motherboard to enter the bootable USB flash drive?
1.
The key to enter the BIOS on Gigabyte motherboard is the del key. Keep pressing to enter BIOS.
2.
After entering the BIOS, press and hold the left and right keys to switch to the BIOS function options. Then select "Boot Priority #1" and hit Enter to enter.
3.
Then set the U disk as the first startup item and click Enter to confirm.
4.
Take Samsung U disk as an example, it will become the name of Samsung U disk.
5.
Finally click the F10 key to save and exit.
6.
Then when we turn on the computer, it will automatically recognize the U disk and enter the U disk boot disk.
How to set up USB boot for Gigabyte z790m Xiaodiao?
First, insert the U disk into the USB interface of the Gigabyte z790m Xiaodiao motherboard. Enter the BIOS setup interface and select the "Boot" option.
Select "USB Drive" or "Removable Drive" at "Boot Option #1" and set it as the first boot option.
Save the changes and restart the computer to boot from the USB flash drive. If you find that the computer does not boot from the USB flash drive, you need to check whether the USB flash drive is correctly made as a boot disk and ensure that the BIOS settings are correct.
How to set the Gigabyte motherboard to enter the bootable USB disk?
How to set the U disk boot in Gigabyte motherboard bios:
1. Insert the prepared U disk into the computer USB interface, then turn on the Gigabyte motherboard computer, and press DEL when the startup screen appears. key to enter the bios interface.
2. After entering the bios interface, if you cannot read English, you can set the language display in the upper right corner to "Simplified Chinese".
3. Click to select the "BIOS Function" setting, and then click the "Boot Priority #1" option.
4. The startup priority window will pop up. Click to select the USB disk name option.
5. The first startup item is changed to the USB boot disk plugged into the computer.
6. Finally, press the F10 shortcut key to save and leave the uefi bios settings. Click the "Yes" button in the pop-up window to complete the U disk boot settings.
How to set up BIOS for Gigabyte motherboard USB boot?
The main steps for Gigabyte to set up BIOS to boot from a USB disk: Quick boot menu - CD-ROM drive boot - BIOS settings - BIOS functions - Boot priority - Save and exit.
1. When starting the computer, when the screen prompts, quickly press F12 to enter the quick startup menu.
2. Then a quick startup menu window pops up, select the option with the name of the USB flash drive you inserted into your computer. After selecting, press the Enter key to boot from the USB disk. If you want to boot from the CD-ROM drive, select Show CD-ROM drive name to boot from the CD-ROM drive.
3. Or go to the logo screen when booting, choose to press the Del button, and enter the BIOS setting main interface. UEFI is a new BIOS that can support Chinese language. Click on the "Language" logo in English and a window will pop up. Select "Simplified Chinese" and the main interface will become Chinese.
4. Use the left and right arrow keys to move to "BIOS Functions", and then perform the boot settings of the U disk or CD under this option.
5. Select "Boot Priority #1" and press Enter. A window with the name of the USB flash drive will pop up. The optical drive will also be displayed here. If you want to boot from the optical disc, select the name of the optical drive here. After selecting, press the Enter key to confirm.
6. After confirming, exit the small window, and the U disk has been set as the first priority startup item.
7. Go to the "Save and Exit" option on the main interface to save settings, or directly press F10 to save and exit. Press "Yes" in the pop-up window, and the UEFI setup method for booting from a USB flash drive or CD is completed.
How to set up U disk boot on Gigabyte motherboard?
1. When the Gigabyte logo appears after the computer is turned on, immediately press the F12 hotkey quickly and continuously to enter the BIOS interface.
2. Find and select "Susten Infornation", find "Systen Language" at the bottom, and direction Move the key above and press Enter, then select "Simplified Chinese".
3. Move to the "BIOS Function" interface, use the arrow keys to find "Hard Disk Device BBS Priority" and press Enter to enter.
4. For the "Startup Priority #1" option, press Enter to see our startup options. We select "Kingston Datatraveler 3.0" and press Enter. We are using Kingston's U disk. Others need to see U Disk brand selection.
5. Press ESC to return, select "Startup Priority #1" and press Enter, then select the "KingstonDatatraveler 3.0" just now and press Enter to confirm.
How to set up U disk boot on Gigabyte motherboard?
Gigabyte motherboard settings U disk boot method:
1. First turn on the computer, click the delete key while the monitor is on, and then enter the bios setting interface.
2. Click the "Language" button in the upper right corner of the main interface and select "Simplified Chinese" inside.
3. Insert the U disk into the computer. After entering the bios, use the left and right arrow keys to move to the "BIOS Function" item. We need to perform the startup settings of the U disk or CD under this option.
4. Select the top item "Boot Priority #1", and then press the Enter key. A window will pop up, where you can see the name of the U disk. This one starts with TOSH... At the beginning, some USB flash drives start with king.... If there is a CD-ROM drive on the computer, it will also be displayed here. If you want to boot from the CD-ROM, select the name of the CD-ROM drive here. After selecting, press Enter to confirm.
5. After completing the above operations, exit the small window. At this time, the U disk has been selected as the first priority startup item.
6. The last work is to save the settings. There are two methods. One is to save the settings under the "Save and Exit" option on the main interface; but directly press F10 to quickly Save and exit.
The above is the detailed content of How to set the motherboard to boot into the USB flash drive on a Gigabyte motherboard?. For more information, please follow other related articles on the PHP Chinese website!

 Clipchamp Video Loss on Windows? 2 Ways to Recover Files!May 09, 2025 pm 08:12 PM
Recover Lost Clipchamp Videos: A Step-by-Step Guide Losing a video you've edited in Clipchamp can be frustrating. This guide provides effective methods to recover your lost Clipchamp video files. Finding Your Clipchamp Videos Before attempting recov
 7 Useful Fixes for Action Center Keeps Popping upMay 09, 2025 pm 08:07 PM
Action Center allows you to access quick settings and notifications. However, some users say that they encounter the “Action Center keeps popping up” issue on Windows 11/10. If you are one of them, refer to this post from MiniTool to get solutions.Qu
 Instant Ways to Restore Missing Google Chrome Icon on WindowsMay 09, 2025 pm 08:06 PM
Troubleshoot Missing Google Chrome Icon on Windows Can't find your Google Chrome icon on Windows? This guide offers several solutions to restore it. Why is my Chrome icon missing? Several factors can cause the Chrome icon to vanish from your desktop:
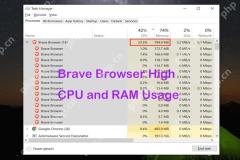 Brave Browser High CPU and RAM Usage: Best 5 Tips to ReduceMay 09, 2025 pm 08:05 PM
Brave browser CPU and memory usage too high? Under Windows 10/11 system, Brave browser's high CPU and memory usage problems have troubled many users. This tutorial will provide a variety of solutions to help you easily resolve this issue. Quick navigation: Brave browser high CPU and memory footprint Solution 1: Clear cookies and cache data Solution 2: Disable hardware acceleration Solution 3: Close the tab and update the Brave browser Solution 4: Disable the plugin Solution 5: Create a new user profile Optional: Run MiniTool System Booster System Optimization Tool Summarize Brave browser high CP
 Targeted Fixes for Xbox Error 0x87e0000f When Installing GamesMay 09, 2025 pm 08:04 PM
Troubleshooting Xbox Error Code 0x87e0000f: A Comprehensive Guide Encountering the Xbox error code 0x87e0000f while downloading games from Xbox Game Pass can be frustrating. This guide provides several solutions to help you resolve this issue and get
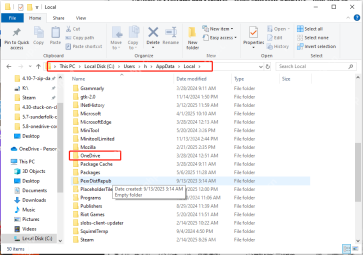 OneDrive Couldn't Start Files on Demand?Top 4 MethodsMay 09, 2025 pm 08:02 PM
OneDrive Files On-Demand troubleshooting: resolving the "OneDrive couldn't start Files On-Demand" error. This MiniTool guide provides solutions for the persistent "Microsoft OneDrive Couldn’t start files on Demand" error (codes 0x
 How to fix 'Microsoft Store is blocked' error in Windows?May 09, 2025 pm 06:00 PM
Microsoft Store is blocked error occurs when Windows prevents access to the Microsoft Store app, displaying the message Microsoft Store is blocked. Check with y
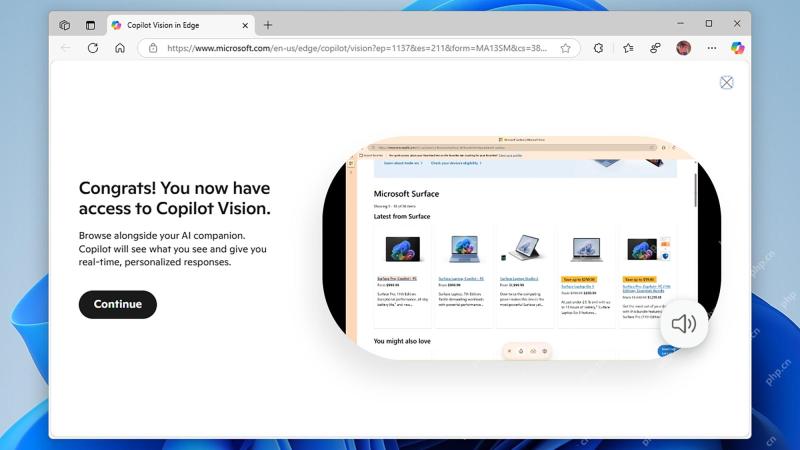 How to use Copilot Vision for free in Microsoft EdgeMay 09, 2025 am 10:32 AM
Staying current with all the new AI tools is a challenge. Many might even overlook readily available AI features. For instance, Copilot Vision is now free for all Microsoft Edge users – a fact easily missed if you don't regularly use Edge or haven't


Hot AI Tools

Undresser.AI Undress
AI-powered app for creating realistic nude photos

AI Clothes Remover
Online AI tool for removing clothes from photos.

Undress AI Tool
Undress images for free

Clothoff.io
AI clothes remover

Video Face Swap
Swap faces in any video effortlessly with our completely free AI face swap tool!

Hot Article
Hot Tools

Safe Exam Browser
Safe Exam Browser is a secure browser environment for taking online exams securely. This software turns any computer into a secure workstation. It controls access to any utility and prevents students from using unauthorized resources.

EditPlus Chinese cracked version
Small size, syntax highlighting, does not support code prompt function

ZendStudio 13.5.1 Mac
Powerful PHP integrated development environment

PhpStorm Mac version
The latest (2018.2.1) professional PHP integrated development tool

WebStorm Mac version
Useful JavaScript development tools

