Home >Computer Tutorials >Computer Knowledge >How to add desktop icon in win11? How to add icons to win11 system software
How to add desktop icon in win11? How to add icons to win11 system software
- WBOYWBOYWBOYWBOYWBOYWBOYWBOYWBOYWBOYWBOYWBOYWBOYWBforward
- 2024-02-01 17:21:132128browse
php editor Baicao introduces you how to add desktop icons in win11 system. In win11 system, adding desktop icons is very simple. You just need to right-click the application you want to add an icon and select "Show in Start Menu" or "Pin to Taskbar" and the application's icon will automatically appear on the desktop. In addition, you can add icons by creating shortcuts on your desktop. Just right-click on a blank space on the desktop, select "New Shortcut", then enter the path to the application, click "Next" and follow the prompts to complete the operation. I hope these methods can help you easily add desktop icons in win11 system!
Win11 system software icon adding tutorial
1. System icon
1. Right-click a blank space on the desktop and select the personalization option.
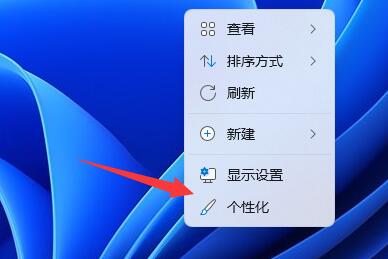
#2. Select theme options in the interface.

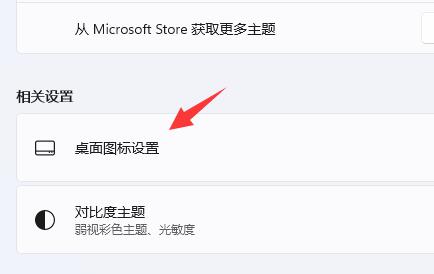
#3. Then click Desktop Icon Settings in the related settings.
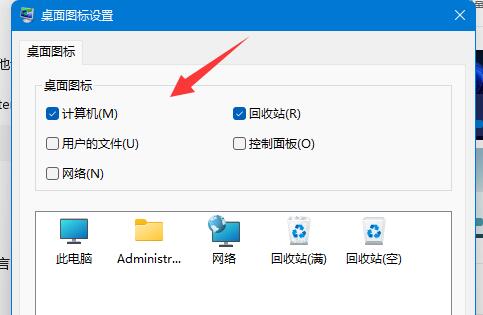
#4. Finally, check the box in front of the system icon you want to add to the desktop, and then click OK.
2. Software/File Icon
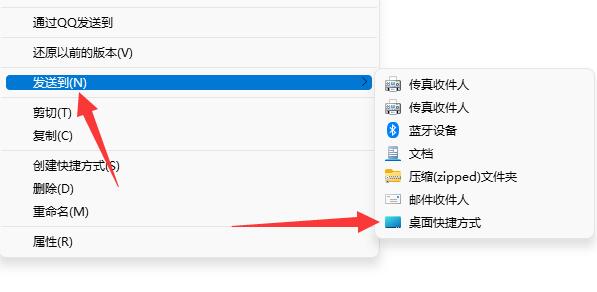
1. Find the file/software you want to add to the desktop, then right-click it and select Show more options.
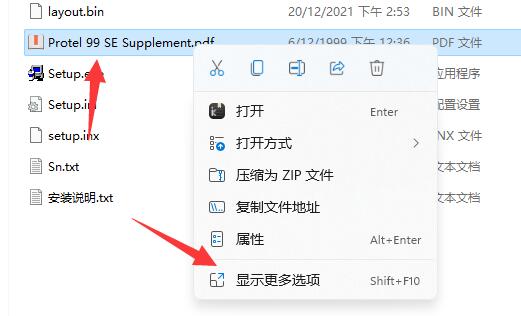
#2. Just select the shortcut method of sending to desktop among the options given.
The above is the detailed content of How to add desktop icon in win11? How to add icons to win11 system software. For more information, please follow other related articles on the PHP Chinese website!

