Home >Computer Tutorials >Computer Knowledge >How to turn off the power-on self-test function in win11? How to cancel the power-on self-test function in win11
How to turn off the power-on self-test function in win11? How to cancel the power-on self-test function in win11
- 王林forward
- 2024-02-01 14:30:271445browse
php editor Xinyi will introduce to you how to turn off the power-on self-test function in Win11. Power-on self-test is an important function in Windows systems. It is used to detect the integrity of hardware and software and ensure the normal operation of the system. However, sometimes we may feel that the power-on self-test takes too long and want to cancel this function. In Win11, the setting method to cancel the power-on self-test function is very simple. Let’s learn more about it below.
How to turn off the power-on self-test function in win11
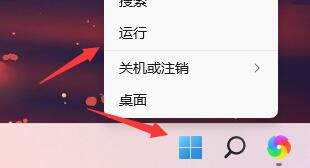
1. First, we right-click the start menu below, and then click run, or press win r on the keyboard to open it.
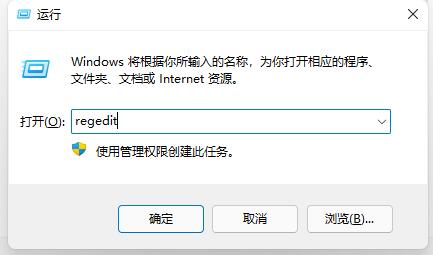
#2. Then enter regedit and press Enter to confirm.
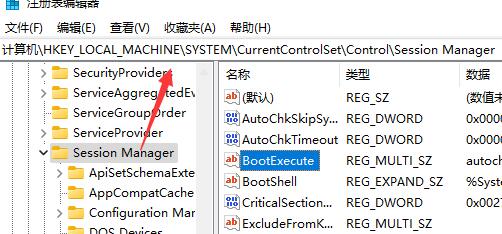
3. Then navigate to the following location in the registry: Computer HKEY_LOCAL_MACHINESYSTEMCurrentControlSetControlSession Manager.
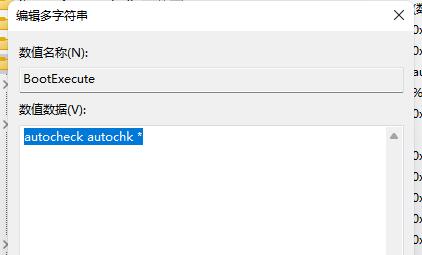
4. Then double-click to open the bootexecut file.
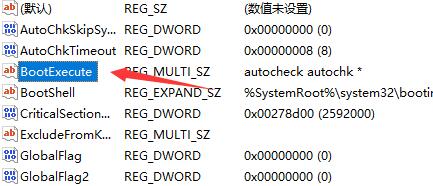
#5. Then delete the numerical data.
The above is the detailed content of How to turn off the power-on self-test function in win11? How to cancel the power-on self-test function in win11. For more information, please follow other related articles on the PHP Chinese website!

