


How to set up USB disk boot on Biostar motherboard?
1. Insert the prepared USB boot disk into the computer USB interface, restart the computer and press the del key continuously to enter the Biostar motherboard bios setting interface
2. Press the direction key → Move Cursor to the boot option, then press the direction key ↓ to move to the hard drive bbs priorities option, press the Enter key
3. Select the default first boot option #1 option and press Enter in the small window that pops up. Select the first option flash disk (here is the U disk model), and then press Enter
4. Press F5 to save and exit. Restart the computer and the U disk will start.
Yingtai, teach you Yingtai How to set up USB boot in motherboard bios?
The steps to set the Biostar motherboard bios and boot the USB disk are as follows:
1. Turn on the computer and enter the bios setting interface: First, you need to restart the computer and press the button designated by the Biostar motherboard when booting (usually del or f2) to enter the bios setting interface. You can see the corresponding prompt information on the screen.
2. Find the boot option: In the bios settings interface, use the arrow keys to switch to the "boot" tab. This tab is usually located at the top or bottom, but may vary between motherboards.
3. Set the USB drive as the boot device: In the "boot" tab, you will see a boot device list listing the available boot options. Use the arrow keys to select the USB drive and move it to the preferred position in the list. Normally, use the plus ( ) or minus (-) keys to move the order of options.
4. Save and exit bios: After completing the setup, you need to follow the prompts at the bottom of the screen to save the changes to bios. Typically, you can use the f10 key to save and exit the bios setup interface, but the exact operation may vary between different motherboards.
5. Insert the boot USB flash drive and restart: After the bios setup is completed, insert the USB flash drive into the computer’s USB slot and restart the computer. The computer will start from the USB flash drive and boot according to the operating system in the USB flash drive.
Please note that different models of Biostar motherboards may have slight differences, so the above steps are for reference only. If you encounter difficulties or have other questions, please consult the Biostar motherboard user manual or contact technical support.
How to set up U disk boot in Biostar motherboard BIOS?
To set up U disk boot in Biostar motherboard BIOS, you need to enter the BIOS setting interface and make corresponding adjustments. The following are general steps. Please note that due to different motherboard models and BIOS versions, the specific steps may be different:
1. Insert the U disk into the USB interface of the computer and ensure that the U disk has been created. Bootable operating system installation or recovery disk.
2. Restart the computer. During the power startup process, you usually need to press a specific key or key combination on the keyboard to enter the BIOS setup interface. Common keys or key combinations include: Delete key, F2 key, F10 key, Esc key, etc. You can find this information on the startup screen or in the computer manufacturer's documentation.
3. After entering the BIOS setup interface, use the arrow keys on the keyboard to navigate to the "Boot" (or similar) option. There may be different label names such as "Boot Menu", "Boot Sequence", "Boot Priority", etc.
4. Under the "Boot" option, find the "Boot Priority" (or similar) setting, and then select "First Boot Device" (or similar).
5. Set "First Boot Device" to "Removable Device" (or similar). This will cause the computer to first try to boot from the removable device (i.e. USB drive).
6. After confirming the settings, save and exit the BIOS settings by pressing the "F10" key (or similar) on the keyboard. After saving and exiting, the computer will restart.
7. When restarting, the computer will try to boot from the USB flash drive. If there is a bootable operating system installation or recovery disk in the USB flash drive, the system will load the contents of the USB flash drive.
Please note that due to different versions of BIOS and special settings of individual computers, the specific steps and names may be different. Therefore, it is recommended that you consult the motherboard manual or the relevant information on the official website for detailed steps and instructions for your specific model and version.
How to set up U disk boot on Biostar A880G motherboard?
My motherboard is the same as yours. Before booting, plug in the USB flash drive. After entering the BIOS, select the BOOT tab and select Hard disk drivers. At this time, you will see your hard disk model and U disk model, the U disk is the second boot at this time, set the U disk as the first boot, save the BIOS, and that's it.
How to set up USB disk boot on Biostar motherboard?
First, you need to copy the bootable operating system installation files to a USB flash drive. Then, please follow the steps below to set up the Biostar motherboard to boot from the USB flash drive:
1. Insert the USB flash drive into the computer and start the computer.
2. During the power-on self-test, press the preset key on the Biostar motherboard (usually the F12 or Delete key) to enter the BIOS setup interface.
3. In the BIOS setup interface, find the "Boot" tab and select "Boot Device Priority".
4. Move the U disk device to the first position so that the operating system files in the U disk are first detected during startup.
5. Save the settings and exit the BIOS setup interface.
6. The computer will load the bootable operating system files from the USB flash drive and start the installation process.
Please note that BIOS setup options may vary between different models of Biostar motherboards. If you cannot find the option you are looking for, please refer to your motherboard's user manual or contact Biostar customer service for assistance.
The above is the detailed content of How to set up USB boot for Biostar motherboard?. For more information, please follow other related articles on the PHP Chinese website!

 解决win11开机未能正确启动的方法Jan 29, 2024 pm 04:45 PM
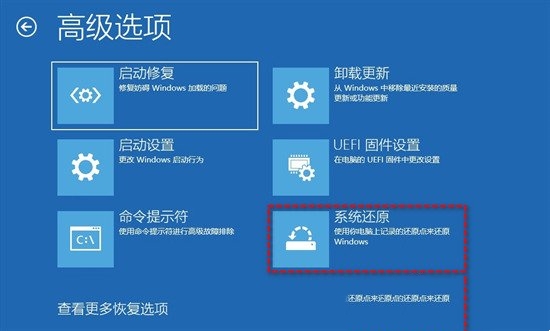
win11开机未能正确启动怎么办?我们在使用电脑的过程中会遇到电脑不能正常使用的问题出现,一般出现这种情况有很多,下面就让本站来为用户们来仔细的介绍一下win11开机未能正确启动解决方法吧。win11开机未能正确启动解决方法方法一:卸载新的应用程序如果电脑在安装新应用后未正确启动,可进入安全模式卸载它们以修复问题。1、在高级选项窗口中单击启动设置。2、在启动设置窗口中按F4以启用安全模式。3、成功进入安全模式系统之后按照正常流程卸载新安装的应用程序即可。方法二:执行系统还原之前我们提到了可能导致
 先装显卡还是先装驱动Jan 29, 2024 pm 10:51 PM
一台新组装的电脑,从安装系统到安装各个硬件驱动的顺序是怎么样的...首先是准备组装的零组件:CPU,CPU散热器,内存,主板,显卡,硬盘,光驱,电源,机箱,除了上述这些东西,你还需要一把大小长短适中且好转的十字螺丝起子,还有平坦的桌面。安装操作系统:首先需要安装操作系统,例如Windows、Linux等。可以使用安装光盘或者U盘进行安装。安装驱动程序:安装操作系统后,需要安装电脑硬件的驱动程序,例如主板驱动、显卡驱动、声卡驱动等。安装向导正在安装驱动程序中,请等待安装完成。部分驱动程序可能会需要
 win10系统安装卡在海内存知己怎么办Jan 04, 2024 pm 11:50 PM
如果我们准备给自己的电脑安装win10操作系统的话,对于安装的过程中发现安装进度卡在海内存知己显示界面的情况,很多小伙伴不知道应该怎么解决。我们可以在系统设置中找到系统恢复,然后将电脑系统重置再重新升级安装即可。详细步骤就来看下小编是怎么解决的吧~win10系统安装卡在海内存知己怎么办方法一:大部分的时候,我们只需要重启电脑就可以正常进入系统了,非常方便。方法二:1、如果我们重启之后无法解决问题,那么可以进入安全模式下的windows设置当中。2、接着点击windows“更新和安全”选项。3、然
 华为笔记本win11如何降级为win10系统?华为笔记本win11回退到win10的步骤Jan 30, 2024 am 08:33 AM
华为笔记本win11怎么回退到win10系统?不少的用户们在购买完华为笔记本后用不习惯win11系统就想着能不能更改为win10系统,其实是可以的,下面就让本站来为用户们来仔细的介绍一下华为笔记本win11改win10方法教程吧。华为笔记本win11改win10方法教程创建Windows10安装媒体的步骤如下:首先,你需要准备一个可引导的Windows10安装媒体。可以使用官方的Windows10安装媒体创建工具,也可以下载Windows10ISO镜像文件并制作USB安装盘。2、进入BIOS设置
 无需U盘,如何在全新电脑上安装操作系统Jan 30, 2024 pm 01:39 PM
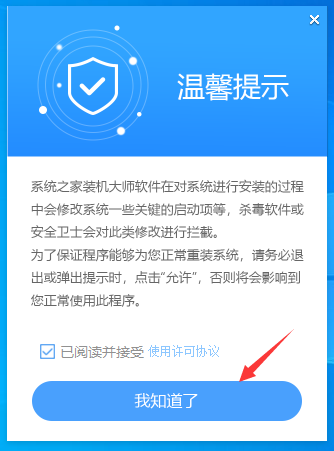
在现代社会,电脑已经成为我们生活中不可或缺的一部分。然而,当我们购买了一台全新的电脑时,我们通常需要使用U盘来安装操作系统。但是,有没有一种方法可以在新电脑上安装系统,而无需使用U盘呢?本文将介绍一种简单而有趣的方法,让您轻松在新电脑上安装系统。工具原料:系统版本:Windows10品牌型号:HPPavilion15软件版本:Windows10安装镜像文件一、使用网络共享安装系统1、首先,确保您的新电脑和另一台已经安装好系统的电脑连接在同一个局域网中。2、在已安装好系统的电脑上,打开文件资源管理
 在Win11系统中如何安装打印机驱动程序Jan 30, 2024 am 08:39 AM
Win11系统如何安装打印机驱动在Win11系统中安装打印机驱动可能会有一些新的步骤和注意事项。下面我将为大家介绍一种简单的方法来安装打印机驱动。首先,我们需要确保打印机与电脑连接正常。可以使用USB线缆将打印机与电脑连接,或者通过无线网络连接打印机和电脑。确保打印机已经打开,并且处于可用状态。接下来,我们需要找到打印机的驱动程序。通常情况下,打印机会随附一张光盘,里面包含了驱动程序和其他必要的软件。如果你没有光盘,可以尝试在打印机制造商的官方网站上下载最新的驱动程序。一旦你找到了驱动程序,双击
 Windows 7光盘系统的安装指南Dec 28, 2023 pm 08:41 PM
然后win10系统都已经出来很久了,但是win7系统依然是最受用户们喜爱的了,很多的用户们想要将电脑上的系统重装成win7系统,但是不知道怎么去操作,那就快来看看详细的教程吧~光盘系统安装步骤windows7:台式机win764位系统下载>>>台式机win732位系统下载>>>笔记本win764位系统下载>>>笔记本win732位系统下载>>>1.重启电脑,然后在开机界面出来的时候,按下U盘启动快捷键。点击查看你的电脑U盘启动键>
 台式电脑重装系统步骤图文说明Jul 19, 2023 am 11:41 AM
电脑是我们生活中和工作中的好帮手,电脑在使用了一段时间后,系统就会卡顿。此时,就需要重装系统来解决,那么台式电脑怎么安装系统呢?下面小编就和大家分享电脑如何安装系统的步骤吧。1、下后的系统格式ISO文件,将ISO文件和NT6安装器(可自行下载)复制到电脑除C盘以外的其他盘的根目录下,两个文件要在同一目录。2、打开NT6安装器,打开后出现如下图,选择模式2安装。3、重启后进入如下图,在启动选择菜单按下图选择进入。4、点击下一步进入,要全新安装,点击“自定义(高级)”选项。5、点击自定义高级后,出现


Hot AI Tools

Undresser.AI Undress
AI-powered app for creating realistic nude photos

AI Clothes Remover
Online AI tool for removing clothes from photos.

Undress AI Tool
Undress images for free

Clothoff.io
AI clothes remover

AI Hentai Generator
Generate AI Hentai for free.

Hot Article
Hot Tools

mPDF
mPDF is a PHP library that can generate PDF files from UTF-8 encoded HTML. The original author, Ian Back, wrote mPDF to output PDF files "on the fly" from his website and handle different languages. It is slower than original scripts like HTML2FPDF and produces larger files when using Unicode fonts, but supports CSS styles etc. and has a lot of enhancements. Supports almost all languages, including RTL (Arabic and Hebrew) and CJK (Chinese, Japanese and Korean). Supports nested block-level elements (such as P, DIV),

SublimeText3 Linux new version
SublimeText3 Linux latest version

Notepad++7.3.1
Easy-to-use and free code editor

PhpStorm Mac version
The latest (2018.2.1) professional PHP integrated development tool

Dreamweaver CS6
Visual web development tools

