Home >Computer Tutorials >Browser >How do newbies install plug-ins in Google Chrome?
How do newbies install plug-ins in Google Chrome?
- WBOYWBOYWBOYWBOYWBOYWBOYWBOYWBOYWBOYWBOYWBOYWBOYWBforward
- 2024-01-30 22:03:161802browse
How do newbies install plug-ins in Google Chrome? Many users like to add plug-ins to Google Chrome so that they can use more Google Chrome features. When novice users first come into contact with Google Chrome, they don’t know much about the various functions of the browser, so they don’t know how to add the required plug-ins. In order to help novice users use plug-ins smoothly, the editor has compiled graphic tutorials for quickly adding plug-ins to Google Chrome. Come and take a look at the specific steps.

Graphic tutorial on quickly adding plug-ins to Google Chrome
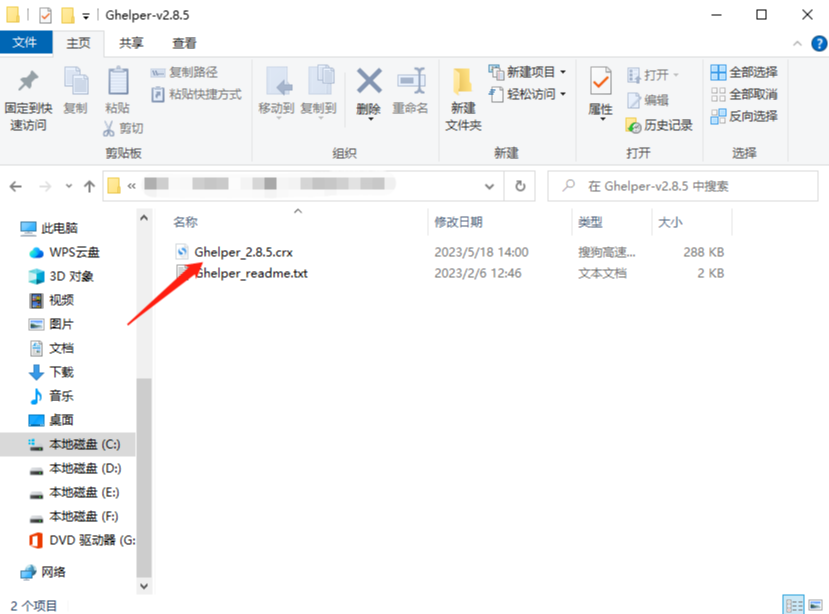
1. Download the plug-in compressed package in the browser, decompress it, and find the file with the suffix crx File, this is the plug-in.
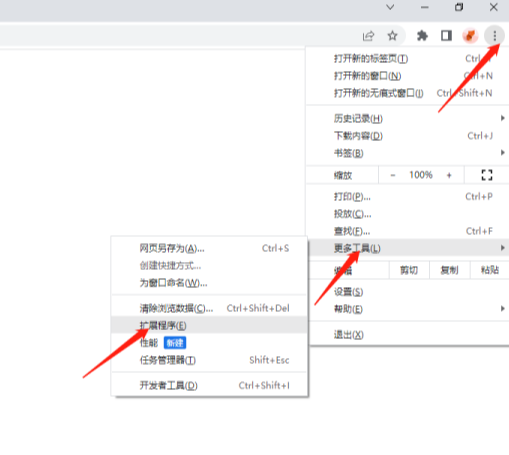
2. Open Google Chrome, click [Customize and Control], and select [Extensions] from the drop-down menu of [More Tools].
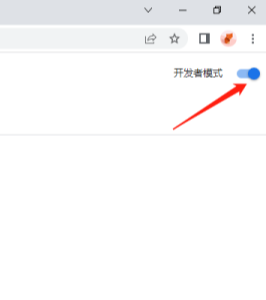
#3. In the [Extensions] interface, turn on [Developer Mode].
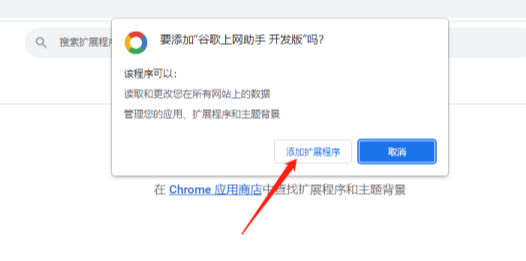
4. Find the Chrome offline installation file xxx.crx that you have downloaded, and then drag it from the folder to Chrome's extension management interface. At this time A dialog box will pop up in the extension manager, click [Add Extension].
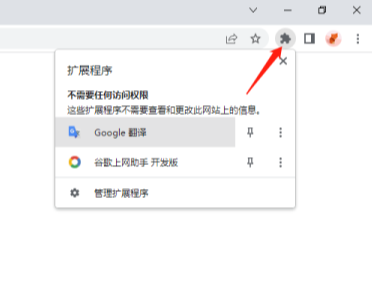
5. After successful installation, Google Chrome will automatically hide the newly installed plug-in icon in the toolbar. You can click on the extension management icon to expand and view it, and click on the extension Ready for immediate use.
The above is the detailed content of How do newbies install plug-ins in Google Chrome?. For more information, please follow other related articles on the PHP Chinese website!

