
Home >Computer Tutorials >System Installation >Steps to enable WMI service in WinXP
Steps to enable WMI service in WinXP

- WBOYWBOYWBOYWBOYWBOYWBOYWBOYWBOYWBOYWBOYWBOYWBOYWBforward
- 2024-01-29 14:24:051023browse
The way to open the wmi service in winXP is to double-click the service in the management tool, then find the WMI service on the service page, look at the startup type, preferably manual or automatic, click on the left to start the service. If you want more details, take a look at how to enable the wmi service in winXP system below.
How to open wmi service in winXP

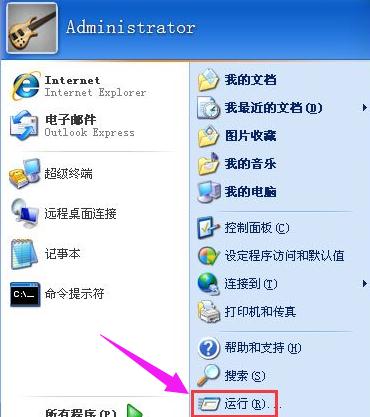
1. Open Start, and then select Run.
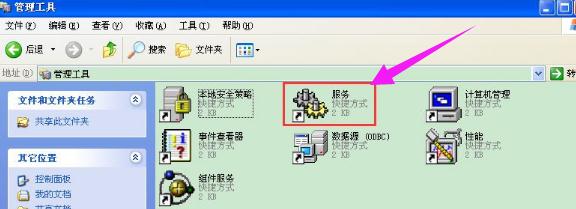
2. Enter services.msc, enter the service, in the control panel, select large icons as the view mode, and select management tools.

3. We double-click the service in the management tool.
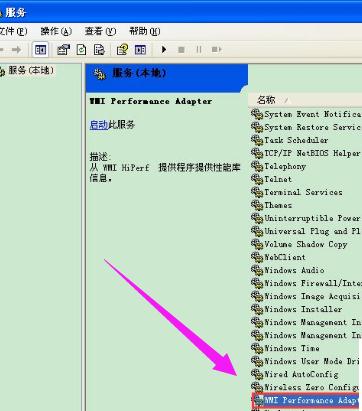
4. Then on the service page, find the WMI service, look at the startup type, preferably manual or automatic, click on the left to start the service.
The above is the detailed content of Steps to enable WMI service in WinXP. For more information, please follow other related articles on the PHP Chinese website!