Home >Computer Tutorials >System Installation >How to connect a wireless printer to a computer
How to connect a wireless printer to a computer
- WBOYWBOYWBOYWBOYWBOYWBOYWBOYWBOYWBOYWBOYWBOYWBOYWBforward
- 2024-01-29 12:21:052593browse
Printer is an office tool that many office workers use, but if you want to use the printer, you need to connect it to a computer. Wired printers are easier to operate, so how should a wireless printer be connected to a computer? The editor below will show you how to connect your computer to a wireless printer.
How to connect a wireless printer to a computer
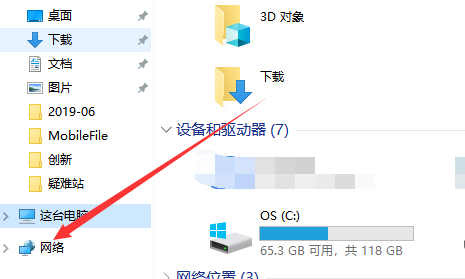
1. Open a folder or the computer directly, and click the Network tab in the left menu category.
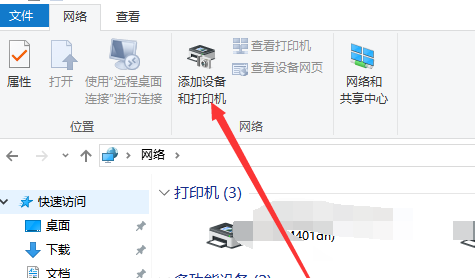
#2. Then display Network Neighbors on the network and click Add Devices and Printers in the menu bar above.
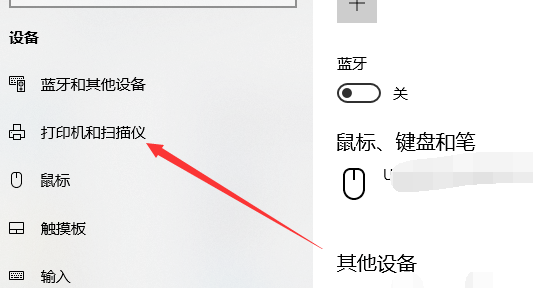
#3. Open the Bluetooth settings page by default and click on the printer and scanner options on the left.
#4. Next, in the printer interface, click the plus icon to add a printer and scanner.
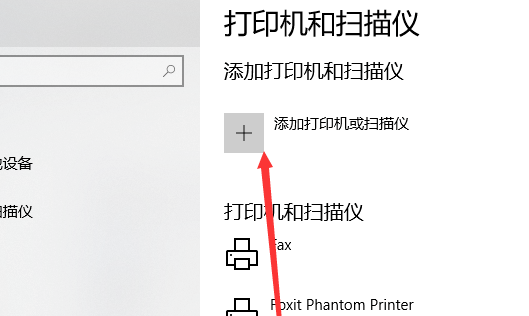
#5. A list of printers in the same workgroup wireless network will be refreshed. Of course, if you know the IP of the printer, you can add it directly.
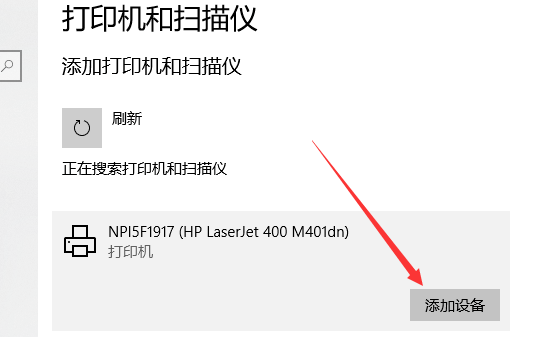
#6. Select a printer, click the Add Device button, and wait until the addition is completed. Go and try printing.

The above is the detailed content of How to connect a wireless printer to a computer. For more information, please follow other related articles on the PHP Chinese website!

