


php editor Youzi will answer your question on how to install the system on the ASUS h61 motherboard. ASUS h61 motherboard is a motherboard with stable performance and reliable quality, and the installation system is relatively simple. First, you need to prepare a bootable system installation disk or USB flash drive. Insert the installation disk or USB disk into the computer and enter the BIOS setup interface. In the Boot options, set the U disk or CD as the first boot item. After saving the settings, restart the computer and follow the prompts to install the system. After the installation is complete, remember to update the driver in time to ensure the normal operation of the system. Hope these simple and clear steps are helpful!

How to install the system on ASUS h61 motherboard?
Installing the system is one of the basic operations of computer use. The following is the detailed process of ASUS motherboard system installation:
1. Prepare the installation media: Before installing the system, you need to prepare the installation media. Such as operating system installation CD or USB flash drive, etc.
2. Enter the BIOS setup: After starting the computer, follow the motherboard prompts to enter the BIOS setup interface. The key prompts for this process may be slightly different, but generally press the power button and then press F2, Del or F10, etc. key to enter.
3. Set the startup sequence: In the BIOS setting interface, find the startup sequence setting item and set CD/DVD or U disk as the preferred startup item. In this way, the computer will start from the installation CD or USB flash drive first.
4. Save and exit: After completing the boot sequence settings, follow the BIOS prompts to save the settings and exit.
5. Start the installation: After inserting the operating system installation media, the computer will boot from this media. Follow the prompts to enter the system installation interface. Generally, you need to select the installation type, installation location, language and other options.
6. Format the hard drive: After selecting the installation location, you can choose to format the hard drive, clear it and create new partitions. Note: Formatting the hard drive will erase all data on it, so please back up important files in advance.
7. System installation: After formatting, you can start installing the system. Complete the various steps of system installation according to the prompts on the installation interface, including filling in system configuration information, setting up an administrator account, etc.
8. Update the driver: After installing the system, you need to install other drivers such as motherboard driver and graphics card driver to ensure the normal operation of the computer.
9. Install applications: After completing the driver installation, you can install other applications, such as browsers, office software, etc.
This is the detailed process of ASUS motherboard system installation. It should be noted that before installing the system, it is best to back up important files to avoid data loss when formatting the hard drive. At the same time, when installing drivers and applications, it is best to download them from official websites or trusted sources to ensure the security and stability of the software.
How to enter the system with a newly replaced ASUS motherboard?
1. The ASUS bios entry button is F2 or del to enter the operation interface. After turning on the computer, press these two buttons to enter the bios. The key for some laptop users may be esc;
2. After entering the bios interface, press the "F8" key, and there will be a boot menu selection interface;
3. Due to reinstalling the system The USB drive PE needs to be used as the startup item. We found in the startup items that "Kingston" was selected, which is the Kingston brand USB flash drive. After restarting, there is no need to enter the bios. The computer will enter the USB pe system when it boots up, and then you can choose to reinstall the system.
The above is the detailed content of How to install the operating system on ASUS H61 motherboard?. For more information, please follow other related articles on the PHP Chinese website!

 Clair Obscur: Expedition 33 Fatal Error? Fix with 4 WaysApr 28, 2025 pm 08:02 PM
Encountering a "Clair Obscur: Expedition 33" fatal error can be frustrating, preventing the game from launching. This guide offers four solutions to resolve this issue. Clair Obscur: Expedition 33 Fatal Error Solutions Many players experien
 Guide to Find the Dead: Our Darkest Days Save File LocationApr 28, 2025 pm 08:01 PM
This guide reveals the location of your Into the Dead: Our Darkest Days save files on your Windows PC and explains how to back them up. Into the Dead: Our Darkest Days, a single-player survival horror game, autosaves your progress at the end of each
 How to fix Windows update error 0xc1900403?Apr 28, 2025 pm 08:00 PM
Windows updates keep Windows up to date and secure by bringing vital security patches, bug fixes, and new features with constant releases. But the Windows updat
 Clair Obscur Expedition 33 Stuck on Syncing Data Screen: FixedApr 28, 2025 pm 06:02 PM
Clair Obscur: Expedition 33 Stuck on "Syncing Data"? Here's the Fix! Many players are encountering a frustrating issue with Clair Obscur: Expedition 33 – getting stuck on the "Syncing Data" screen. This prevents gameplay before i
 Oblivion Remastered Disk Full Save Failed, Best Tips to FollowApr 27, 2025 pm 08:02 PM
Frustrated by "Disk Full – Save Failed" errors in Oblivion Remastered? This guide provides solutions to get your game saving again. Oblivion Remastered's stunning visuals and gameplay can be ruined by save errors. This post focuses on fix
 Quick Guide to Finding Post Trauma Save File Location on PCApr 27, 2025 pm 08:01 PM
This MiniTool guide explains the Post Trauma save file location and how to back up and restore your game data, safeguarding your progress against loss. Quick Navigation: Post Trauma Save File Location (PC) Backing Up Post Trauma Game Data Recovering
 3 Ways to Troubleshoot SSD Recognized as HDD on WindowsApr 27, 2025 pm 06:13 PM
SSD displays as HDD? Don’t panic! MiniTool teaches you how to solve it easily! Is the SSD displayed as HDD in your disk management? Don't worry, this is common and will not affect the computer or data. This article will introduce several effective ways to solve this problem. Quick navigation: Why is an SSD recognized as an HDD? How to fix an SSD recognized as an HDD? Summarize Displaying an SSD as an HDD is often considered a minor problem, mainly manifested as visual errors in the operating system interface. This error indication does not usually affect the performance or functionality of the SSD, because the drive still operates at its expected speed and capacity. However, it may make it possible to rely on precise drive recognition to perform
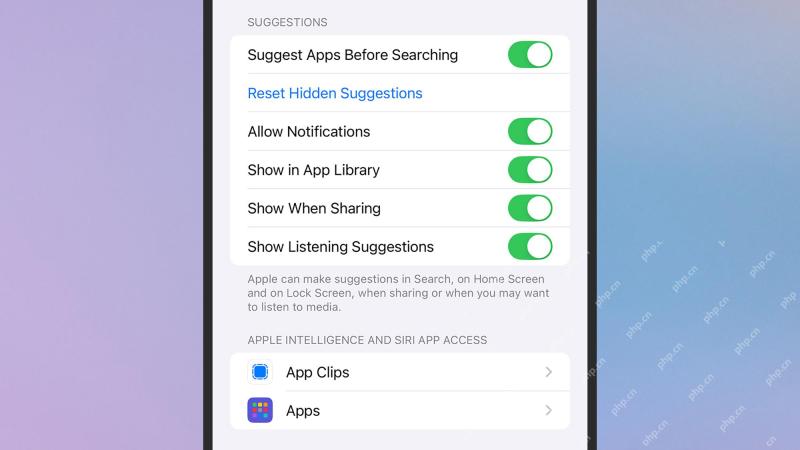 How to manage Siri Suggestions on your iPhoneApr 27, 2025 am 09:46 AM
Recent news highlights the potential pitfalls of Siri Suggestions, an iPhone feature that offers contextual assistance, even inadvertently adding unauthorized individuals to private group chats. This incident, dubbed "Signalgate," undersco


Hot AI Tools

Undresser.AI Undress
AI-powered app for creating realistic nude photos

AI Clothes Remover
Online AI tool for removing clothes from photos.

Undress AI Tool
Undress images for free

Clothoff.io
AI clothes remover

Video Face Swap
Swap faces in any video effortlessly with our completely free AI face swap tool!

Hot Article
Hot Tools

MantisBT
Mantis is an easy-to-deploy web-based defect tracking tool designed to aid in product defect tracking. It requires PHP, MySQL and a web server. Check out our demo and hosting services.

EditPlus Chinese cracked version
Small size, syntax highlighting, does not support code prompt function

SublimeText3 Chinese version
Chinese version, very easy to use

ZendStudio 13.5.1 Mac
Powerful PHP integrated development environment

SecLists
SecLists is the ultimate security tester's companion. It is a collection of various types of lists that are frequently used during security assessments, all in one place. SecLists helps make security testing more efficient and productive by conveniently providing all the lists a security tester might need. List types include usernames, passwords, URLs, fuzzing payloads, sensitive data patterns, web shells, and more. The tester can simply pull this repository onto a new test machine and he will have access to every type of list he needs.

