Home >Computer Tutorials >Computer Knowledge >Dear heroes, I would like to know how to segment photos using PS CS3. What are the specific steps?
Dear heroes, I would like to know how to segment photos using PS CS3. What are the specific steps?
- 王林forward
- 2024-01-24 17:00:191237browse
Heroes, how do I use PS CS3 to split the photos into the following photos? The specific method is
Wait a moment, I will write you the detailed method:
First, set the foreground color to "black" and the background color to "white"
1. Open the picture (background), unlock and add "Layer Mask"
2. Select: Path Tool>Shape Tool>Ellipse Tool, attribute "Shape Layer" and draw an elliptical shape filled layer
3. Hold down shift ctrl alt, move the mouse in parallel, copy the path, and make the intersection the part you need
4. Select the "Intersection Area" of the path attribute, and now you will see the shape you need
5. Right-click "Shape Layer" in the layer window and select Rasterize Layer
6.ctrl t "Free Transform" adjust the shape to the appropriate size and confirm
7.ctrl j "Quick Copy" layer, ctrl t again to bring up "Free Transform", hold down shift and translate the copied layer to make it suitable and confirm
8. Press shift ctrl alt t to continue copying until you are satisfied
9. Merge shape layers: Click on the top shape layer, hold down the shift key, and then click on the bottom shape layer to select all shape layers, ctrl e to merge
10. Hide the shape layer (the selection has been made at this time)
11. Use the selection tool, hold down the ctrl key, and click the shape layer to make it a selection
12. Select the background layer and activate "Layer Mask", ctrl del to fill the background color "white", press shift ctrl i to invert the selection, alt del to fill the foreground color "black"
13. At this time, the effect has come out, and the background can be added at will
ok, I believe you have mastered the method
You can use it flexibly on this basis
How to create such a font with pscs3
Hello, host!
Because your picture is too small, I can’t see clearly what font it is
Let’s take the thick font as an example
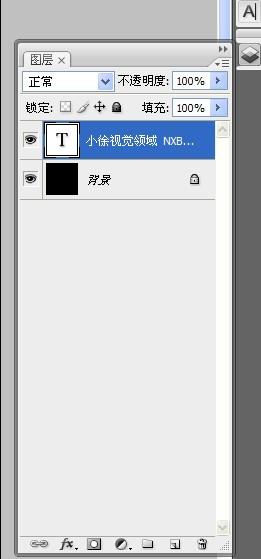
1. Create a new layer, enter the words "Xiao Xu Visual Field NXB Chief Designer" on it, and fill it with white
2. Create a stroke effect for these words,
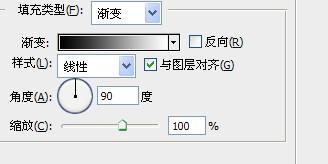
 There is a stroke item in "fx" on this panel,
 Usually we use color strokes, now we select "Gradient" and adjust the gradient color ourselves! like this
3. Then make the "pentagonal star". There is a "pentagonal star" pattern in the custom shape tool. After you select it, create a new layer and fill it with color. (If you don’t understand, ask me again)
Four, the last thing left is your "X"!
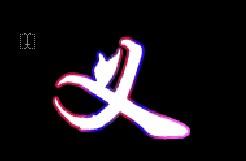
First write the word "righteousness" on the screen, preferably in regular italics  , like this.
Then delete the text, use the pen tool to remove the point above the word, and it will look like this
5. Now that all the content is out, you can adjust these contents to the same size and put them together and it's OK!  The effect I made is like this. It seems that the one that looks like "X" doesn't look like it!
Think for yourself whether the symbol looks like the one under the word "Jiao". Just change the fourth step to the word "Jiao"!
I hope I can help you!
The above is the detailed content of Dear heroes, I would like to know how to segment photos using PS CS3. What are the specific steps?. For more information, please follow other related articles on the PHP Chinese website!

