How to upgrade Django version: steps and considerations, specific code examples required
Introduction:
Django is a powerful Python web framework that continuously Updates and upgrades are made to provide better performance and more features. However, for developers using older versions of Django, upgrading Django may face some challenges. This article will introduce the steps and precautions on how to upgrade the Django version, and provide specific code examples.
1. Back up project files
Before upgrading Django, you must first back up the project files. This is an important step to prevent unexpected situations from happening. You can use the following command to back up the project folder:
$ cp -r myproject myproject_backup
2. Update dependencies
Before upgrading Django, you need to update the project's dependencies. You can use the pip command to update all dependencies:
$ pip freeze > requirements.txt
Then, you can use the following command to install new dependencies:
$ pip install -r requirements.txt
3. Upgrade Django
After completing the update of dependencies , you can start upgrading Django. Django can be upgraded using the following command:
$ pip install --upgrade Django
This command will automatically download and install the latest version of Django.
4. Modify the code
Once Django is successfully upgraded, some code may need to be modified to adapt to the new version of Django. The following are some common modifications:
- Modify URL configuration: The new version of Django may have some URL configuration changes. For example, in Django 2.0 and later, the URL configuration file (urls.py) requires the path() function instead of the url() function.
Old version code:
from django.conf.urls import url
from . import views

urlpatterns = [
    url(r'^hello/$', views.hello),
]
New version code:
from django.urls import path
from . import views

urlpatterns = [
    path('hello/', views.hello),
]- Modify model fields: In the new version, there may be certain field names or attributes The change. If you are using an older version of model fields, you will need to check the Django documentation to see if there have been any changes.
- Modify middleware: After upgrading Django, you may need to modify the project's middleware settings. New versions of Django may add new middleware or remove old middleware.
When modifying the code, you need to carefully consult the Django official documentation or upgrade log to understand the specific code changes and modification methods.
5. Run tests
After upgrading Django, you should run the project's test suite to ensure that the code runs normally under the new version. You can use the following command to run the test:
$ python manage.py test
If the test passes, you can be sure that the project has been successfully upgraded.
6. Rollback
If you encounter problems during the upgrade process, you can roll back to the backed up project folder. You can use the following command to restore the backup:
$ mv myproject_backup myproject
7. Notes
When upgrading the Django version, you also need to pay attention to the following:
- View the official Django documentation: Upgrading Django Before doing this, you should carefully check the Django official documentation to understand the features and changes of the new version.
- Dealing with third-party libraries: If the project uses third-party libraries, you also need to check whether these libraries are compatible with the new version of Django. If the library is incompatible, consider looking for alternatives or wait for the library to be upgraded.
- Run migrations: After upgrading Django, you may need to run database migrations. You can use the following command to run the migration:
$ python manage.py makemigrations
$ python manage.py migrate
Conclusion:
This article introduces the steps and considerations for upgrading the Django version. First, you need to back up your project files and update your project's dependencies. Django can then be upgraded via the pip command. After upgrading, some code may need to be modified to adapt to the new version of Django. You can consult Django official documentation or upgrade logs for specific code modification methods. Finally, run the project's test suite to ensure the code runs correctly under the new version. Upgrading Django can present some difficulties, but with careful planning and backups, the upgrade can be completed successfully and gain the functionality and performance benefits of the new version.
The above is the detailed content of How to upgrade Django version: steps and considerations. For more information, please follow other related articles on the PHP Chinese website!
 修复:任务栏溢出在 Windows 11 上不起作用Jul 18, 2023 am 09:41 AM
当Windows11任务栏溢出功能停止工作时,用户将丢失重要的自定义选项。这是因为该功能允许您将尽可能多的应用程序添加到任务栏并轻松启动它们。虽然这个问题可能令人沮丧,但并不是最难解决的。在本综合指南中,我们准备了万无一失的方法,以使任务栏溢出功能再次正常工作。为什么任务栏溢出在Windows11上不起作用?正如用户报告的那样,有几个因素可能导致任务栏溢出在Windows11上不起作用。以下是一些值得注意的原因:过时的PC:过时的操作系统是此问题的主要原因。如果您使用高于Windows11预览体
 轻量化版 Win 11 – Tiny11 2311 正式推出:只占 8GB 空间Nov 27, 2023 pm 02:06 PM
一款基于Windows11最新版本23H2的轻量化系统「Tiny112311」正式推出,提供了更精简的系统体验。该系统去除了许多不必要的组件和高硬件要求,使得安装后的占用空间仅需约8GB。Tiny112311集主要功能于一身作为基于最新Windows11版本23H2的产物,Tiny112311包含了微软引入的所有新功能,包括Copilot功能(需通过winget下载微软Edge,因为没有预装浏览器)、原生RAR支持、重新设计的音量滑块、设定应用中的RGB控制等。与之前的Tiny11版本相比,23
 如何解决Win11安装后显示为Win10版本的问题Dec 27, 2023 am 08:18 AM
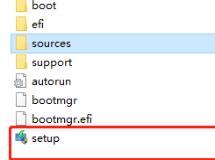
一些朋友在下载安装完win11系统后,发现自己的win11版本显示的却是win10,这可能是因为我们下载了错误的win11系统,也可能是因为微软win11自身的原因,下面就跟着小编一起来看看吧。win11安装后显示版本是win10怎么办一、下载了错误的win111、如果我们下载了错误的win11系统,就可能会在安装后显示win10。2、因此大家可以重新下载一个win11进行覆盖安装。3、我们不需要重新退回win10,只需要装载该系统,然后运行“setup”安装程序进行安装就可以了。二、系统错误1
 Stable Diffusion XL 现已推出—有什么新功能,你知道吗?Apr 07, 2023 pm 11:21 PM
3月27号,Stability AI的创始人兼首席执行官Emad Mostaque在一条推文中宣布,Stable Diffusion XL 现已可用于公开测试。以下是一些事项:“XL”不是这个新的AI模型的官方名称。一旦发布稳定性AI公司的官方公告,名称将会更改。与先前版本相比,图像质量有所提高与先前版本相比,图像生成速度大大加快。示例图像让我们看看新旧AI模型在结果上的差异。Prompt: Luxury sports car with aerodynamic curves, shot in a
 PHP8.0中的匿名函数May 14, 2023 am 08:31 AM
PHP8.0是当前最新版本的PHP编程语言。一项重要的更新是对匿名函数的改进和增强。匿名函数(也称为闭包)是一种特殊类型的函数,可以在运行时动态创建并传递给其他函数或存储在变量中。在PHP中,匿名函数对于高级编程和Web开发至关重要。PHP8.0提供了一些新的语法和功能,可以使匿名函数更加灵活和易于使用。其中一些更新如下:函数参数的类型声明在PHP8.0中,
 win101909和22h2对比,有什么区别?Dec 22, 2023 pm 04:09 PM
不少用户在使用电脑系统的时候都会比较纠结不知道该怎么选择win101909和22h2这两个版本,其实从版本迭代来看,建议是选择22H2更好,因为这个可以看成是一个版本更新。win101909和22h2哪个好答:win1022h2更好。Windows1022H2相较于先前的版本1909而言,虽然只是些许的更新改进,但这实际上算是一种微小的突破性进步。1、1909版乃是Windows10的第九款迭代版本,该产品在2019年的11月份正式浮出水面。2、此版本为功能升级,并非全新的Windows10版本
 Windows将在不久的将来停用TLS 1.0和TLS 1.1Aug 12, 2023 am 11:37 AM
Microsoft计划在Windows中禁用传输层安全性(TLS)协议版本1.0和1.1。该公司于1年2023月日在其技术社区网站上宣布了这一消息。这两个协议可以追溯到1999年(TLS1.0)和2006年(TLS1.1),此后被新版本TLS1.2和TLS1.3超越。Microsoft指出,在较旧的协议版本中发现了安全问题,并且“互联网标准和监管机构已弃用或不允许TLS版本1.0和1.1作为响应。多年来,TLS1.0和1.1的使用量显着下降,Microsoft认为禁用这两种协议的时候到了。Mic
 哪个版本的Windows10最稳定且使用体验最好Dec 27, 2023 pm 05:37 PM
许多用户在操作使用win10系统的时候会遇到一些系统版本比较慢或者卡顿,这个时候我们就可以选择下面几款非常流畅好用的系统版本了Windows10哪个版本最稳定好用1、win10通用版系统优化了不同电脑硬盘的使用,提高了兼容性。这样可以提高用户使用时的操作手感和各种流畅度2、win10家庭纯净版不用担心自动激活的系统不适合您的计算机。安装简单、占地面积小是该系统的特点3、win10轻量精简版在使用过程中,它会自动关闭特别大的应用程序进程,以减轻硬件的负担,从而使计算机保持在非常流畅的状态。4、wi


Hot AI Tools

Undresser.AI Undress
AI-powered app for creating realistic nude photos

AI Clothes Remover
Online AI tool for removing clothes from photos.

Undress AI Tool
Undress images for free

Clothoff.io
AI clothes remover

AI Hentai Generator
Generate AI Hentai for free.

Hot Article

Hot Tools

SublimeText3 Chinese version
Chinese version, very easy to use

MinGW - Minimalist GNU for Windows
This project is in the process of being migrated to osdn.net/projects/mingw, you can continue to follow us there. MinGW: A native Windows port of the GNU Compiler Collection (GCC), freely distributable import libraries and header files for building native Windows applications; includes extensions to the MSVC runtime to support C99 functionality. All MinGW software can run on 64-bit Windows platforms.

Zend Studio 13.0.1
Powerful PHP integrated development environment

SublimeText3 Mac version
God-level code editing software (SublimeText3)

WebStorm Mac version
Useful JavaScript development tools


