


Many people have doubts about selecting the hard drive when starting a Mac computer. This article will provide you with detailed answers and I hope it will be helpful to you. Please read on.
Where is the hard drive of the Apple system computer?
Question 1: Which folder is the startup disk of the Apple computer? The startup disk of an Apple computer is usually the "Startup Disk" application located in the "Utilities" folder in the "Applications" folder. The steps to clean the disk on Apple computers are as follows: First click the "Start" button, then select the "Applications" → "Utilities" → "Disk Utility" menu item to start Disk Utility. Next, select the disk you want to clean in the left panel, click the "Clean" button, then select the desired cleaning option, and finally click the "Clean" button to perform disk cleaning
Normally, connect the hard drive to After installing the Mac computer, the hard disk icon will automatically appear on the computer desktop, indicating that the hard disk has been successfully mounted. At this point, you can right-click the hard drive icon and select "Show Profile" to view detailed information about the hard drive, such as capacity and format.
We can find hard drive folders such as C drive and D drive through the following steps. First open Finder, click "Go" on the menu bar, and then select "Computer." In the window that opens, we can see the hard drive folder, which contains all the files and software.
To check which hard drive the Apple system is installed on, follow these steps: Click the Apple icon in the upper left corner, select "About This Mac", and then select "Storage". In the pop-up window, you will see the usage of all hard drives.
After entering the Apple computer desktop, click the Launchpad icon at the bottom of the screen to open the Disk Utility option. Select the disk you want to view in the pop-up window, and the disk data will be displayed on the right.
In Mac systems, how to set the startup CD as the preferred boot device
Hold down the C key to boot - boot from a bootable CD or DVD, such as the included Mac OS X installation CD. Hold down the D key to boot - if installation DVD 1 is inserted, boots to Apple Hardware Test (AHT).
Enter the Apple system, click the Apple in the upper left corner, select "System Preferences", and then press Enter. Then, find the "Boot Disk" and click to enter, as shown in the figure below. In the upper left corner you will see two systems.
You can use your mouse, trackpad, or left and right arrow keys to select the volume you want, then press Return to start your Mac on the volume you selected. If you have a CD-ROM drive on your computer, you can insert the installation CD and view it in Startup Manager.
Select the startup disk when booting: Press the power button, immediately press the option button, let go after the drive letter appears on the screen, and select Windows (BootCamp) or OS X (Macintosh HD) to enter.
Not only does it not have a BIOS, but the keys are also different, so how do you start your Mac from the CD? Let's take a look at the steps for booting a Macbook from the optical drive.

How to quickly set the default startup disk on Apple computers?
Select the startup disk, then select the default startup system you set, and restart.
How to set up the startup disk on Apple computers: Enter the Mac OS X system desktop, press and hold the system preferences icon (gray gear LOGO), and select Open. Click on Startup Disk. View the current boot disk. Select the target startup disk (take Windows as an example).
Turn on the computer, then press and hold the "Option button", and then the Mac will enter the system selection interface. After entering the system selection interface, if you want to set the Windows system in the external hard drive as the default startup system, select the external removable disk by pressing the left and right buttons, and then hold down the "Control key".
From the Apple menu, choose System Preferences. Click the startup disk icon in System Preferences or choose Show Startup Disk. Select the boot disk from the list of available volumes. The next time you start or restart your computer, your Mac will start using the operating system on the selected volume.
How to set up the system startup disk on Mac computers
1. The first step is as shown in the figure below, click on the [Apple] icon in the upper left corner. The second step is that in the pop-up menu bar, click the [System Preferences] option as shown in the figure below. Step 3: In the pop-up window, click the [Startup Disk] icon as shown in the figure below.
2. The steps are as follows: Insert the startup CD into the Mac computer, and then restart the computer. When your Mac restarts, hold down the "option" key and release it. The boot disk interface will appear on the screen. On the interface, select the boot CD you want to use and click the "arrow" to boot.
3. Press and hold the C key during startup - boot from a bootable CD or DVD, such as the Mac OS X installation CD that comes with the machine. Hold down the D key at startup - if you have the installation DVD 1 inserted, it will boot into Apple Hardware Test (AHT).
4. Turn on the computer, then press and hold the Option button, and then the Mac will enter the system selection interface. After entering the system selection interface, if you want to use the Windows system as the default startup system, select the Windows system by pressing the left and right buttons, and then hold down the Control key.
5. The details are as follows: The first step is to click the [Apple] icon in the upper left corner as pointed by the arrow in the picture below. The second step is to click on the [System Preferences] option in the pop-up menu bar as pointed by the arrow in the picture below. Step 3: In the pop-up window, click the [Startup Disk] option as indicated by the arrow in the picture below.
How to open a local hard drive on a Mac computer
1. Method 1: First, click the [Find] option in the upper left corner, and in the pop-up menu bar, follow the arrow in the figure below, Click [Preferences]. In the second step, after opening the [Preferences] window, find and check [Hard Disk] according to the arrow in the picture below.
2. Use a USB cable to connect the mobile hard drive to your Mac computer. Click the Apple icon in the upper left corner of the screen and select About This Mac to view the operating system version of your Mac computer. Find Finder from the desktop or application and click to open it.
3. How to use a mac to read a mobile hard drive. Use a USB cable to connect the mobile hard drive to a Mac computer. Click the Apple icon in the upper left corner of the screen and select About This Mac to view the operating system version of your Mac computer. Find Finder from the desktop or application and click to open it.
4. Double-click the mobile hard disk to open the hard disk and read the files stored in it. If you need to move the location of the hard disk files, you can directly drag the files in the hard disk to the specified location. You can also drag the files in the Mac computer to the mobile hard disk for quick copying. After using the mobile hard disk, push it out first and then remove it.
5. Click the Apple icon in the upper left corner of the screen and select About This Mac to view the operating system version of your Mac computer. Find Finder from the desktop or application and click to open it.
6. Enter the macbook pro support website; pull the page to the bottom and select download and update; enter the download and update page; find the corresponding driver or plug-in in the list to download and install, or enter it in the search box search. Just click to download.
Why are there three disk options when I install dual systems on my Apple computer and then switch it on?
The other of the three disk options is for backup and is used to restore the Apple system. Since Win7 has occupied two partitions by default (100MB hidden system reserved partition and system partition), for this reason, when selecting the installation location, please select the partition according to the actual situation.
Apple Computer MacBook Air (dual system) opens the startup disk and has disk selection when using the MAC system. However, in the WIN7 system, you can choose that the disk is caused by a setting error. The solution is: click on the launch pad of the Mac system, as follows. Click System Preferences, as shown below.
Dual system startup means booting up and selecting three disks. Our company's dual system has three disks at boot. As for the function of the middle one, if you don't know what it does, just don't use it. When you really need it It will naturally be used when it is there, and it will be abnormal if it is less.
Of course I can’t see it. Because there are 2 systems in your Apple computer. One is macos and the other is windows. Because Windows is installed through bootcamp, access to other disks is not allowed by default. If you are allowed to access it at will, if you accidentally delete the file with that drive letter, it may cause the macos system to crash.
Method to temporarily select the startup disk. If you use the above method to switch the system, you will always enter the set system in the future. Sometimes we may need to use another system temporarily. In this case, we can long press the option key during boot to select the startup disk. Then select the disk to boot.
The method to switch between dual systems of Apple computers is to restart the computer and open "System Preferences". Restart the computer. When turning on or restarting the computer, press and hold the Opiton key, which is the Alt key. Press and hold for 2 to 3 seconds, it will switch to the screen, select the Windows disk to start, and it is so simple to switch to the Windows system.
Conclusion: The above is what this site has introduced to you about selecting a hard drive when starting a Mac computer. I hope it will be helpful to everyone. If you want to know more about this, remember to bookmark and follow this article. stand.
The above is the detailed content of How to select the startup hard drive on a mac computer?. For more information, please follow other related articles on the PHP Chinese website!

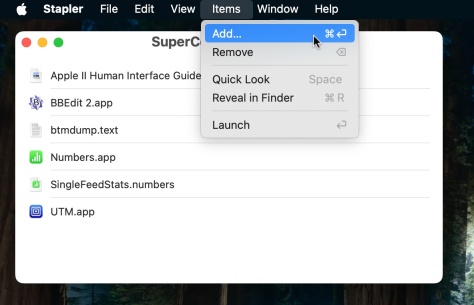 Launch All Apps & Documents Related to a Project with Stapler for MacMay 13, 2025 am 10:37 AM
Longtime Mac users may recall a handy old shareware application for the Classic Macintosh called Stapler, which essentially helped manage projects by grouping a series of apps and documents into a single document that when opened would then launch al
 How to Get Apple Intelligence on Your iPhone, iPad, or MacMay 13, 2025 am 10:32 AM
Apple Intelligence is a set of AI features that Apple is rolling out in beta, and will debut to a larger set of Apple device owners in the fall. Apple Intelligence offers many features from writing and creating text and emails, to taking actions and
 MacOS Sonoma 14.6.1 & Ventura 13.6.9 Released with Bug FixesMay 13, 2025 am 10:25 AM
If you feel like you have spent a significant amount of your time updating system software on your Apple devices lately, you’re in for a treat; another round of system software updates! This time around, Apple has released MacOS Sonoma 14.6.1 alon
 MacOS Sequoia 15 Beta 6 Available for TestingMay 13, 2025 am 10:23 AM
Apple has issued the 6th beta version of MacOS Sequoia for users enrolled in the developer beta testing program. Usually a matching public beta build arrives soon after, which in this case dev beta 6 would be versioned as public beta 4. MacOS Sequoia
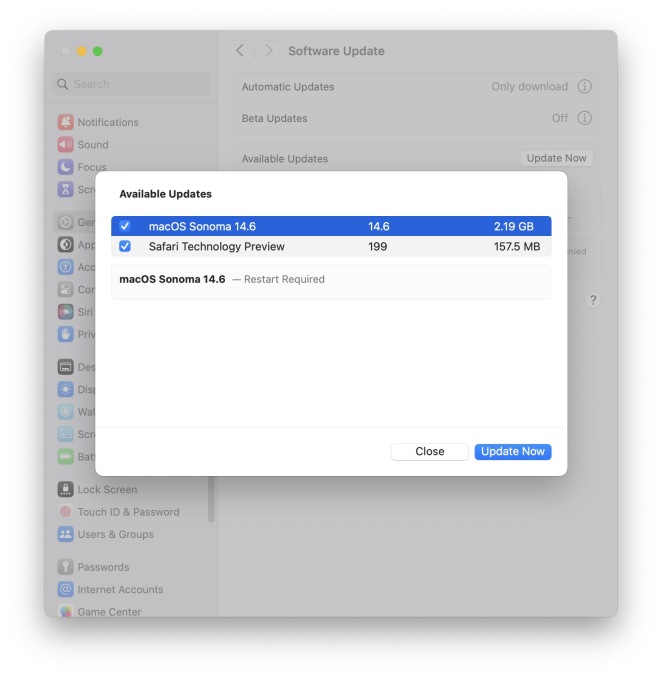 MacOS Sonoma 14.6 Update Released with Bug Fixes & Security UpdatesMay 13, 2025 am 10:20 AM
Apple has released macOS Sonoma 14.6 for Mac users running the Sonoma operating system. The MacOS Sonoma 14.6 software update primarily focuses on bug fixes and security updates for most Macs, however it does include a nice new feature specifically
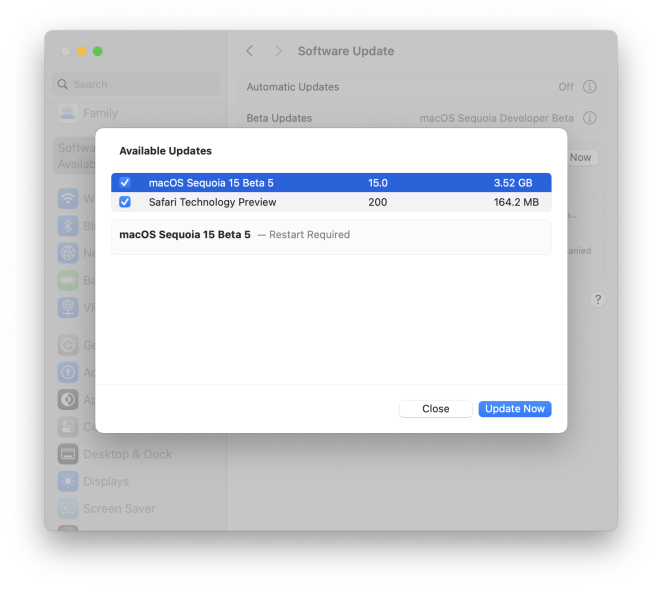 MacOS Sequoia 15 Beta 5 Available to DownloadMay 13, 2025 am 10:06 AM
MacOS Sequoia beta 5 is now available for users enrolled in the developer beta testing program to download and install onto their Macs. MacOS Sequoia beta 5 carries the build of 24A5309e, and usually a new developer beta build is soon followed by a m
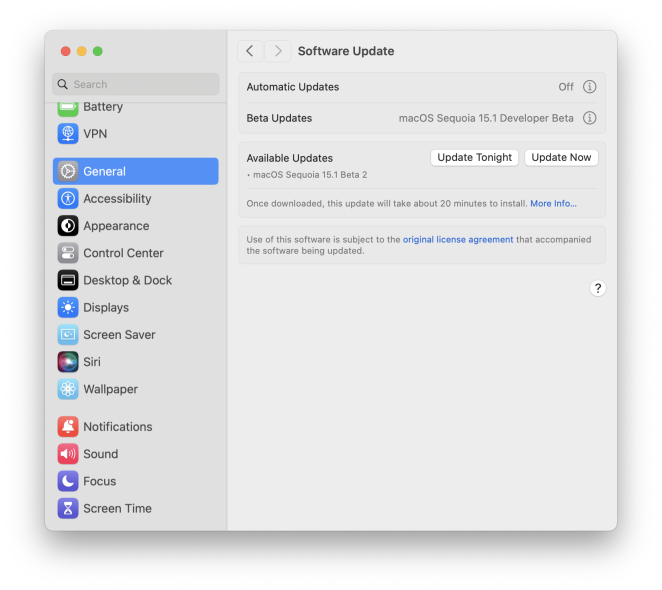 Beta 2 of iOS 18.1, MacOS Sequoia 15.1, & iPadOS 18.1 Released with Apple IntelligenceMay 13, 2025 am 09:49 AM
Apple has released the second beta of iOS 18.1, iPadOS 18.1, and MacOS Sequoia 15.1, each with support for Apple Intelligence AI features, on supported devices anyway. The release of these new beta updates is unusual in that they’re concurrent wit
 How to Uninstall VMWare Fusion on MacMay 13, 2025 am 09:44 AM
You might be aware that VMWare Fusion Pro is now free to download and install, and perhaps you installed it on a Mac to test virtual machines or to play around with, and now you’ve decided you no longer need VMware on the Mac. But VMware Fusion P


Hot AI Tools

Undresser.AI Undress
AI-powered app for creating realistic nude photos

AI Clothes Remover
Online AI tool for removing clothes from photos.

Undress AI Tool
Undress images for free

Clothoff.io
AI clothes remover

Video Face Swap
Swap faces in any video effortlessly with our completely free AI face swap tool!

Hot Article
Hot Tools

MantisBT
Mantis is an easy-to-deploy web-based defect tracking tool designed to aid in product defect tracking. It requires PHP, MySQL and a web server. Check out our demo and hosting services.

EditPlus Chinese cracked version
Small size, syntax highlighting, does not support code prompt function

VSCode Windows 64-bit Download
A free and powerful IDE editor launched by Microsoft

ZendStudio 13.5.1 Mac
Powerful PHP integrated development environment

PhpStorm Mac version
The latest (2018.2.1) professional PHP integrated development tool

