

 Computer TutorialsTroubleshootingHow to configure the hard disk boot in BIOS for MSI h410m motherboard?

How to set up the hard drive for MSI h410m motherboard?
MSI motherboard BIOS settings for solid-state boot require turning on or restarting the computer. When the logo appears on the screen, click the buttons in quick succession until you enter the BIOS interface. After entering the BIOS, use the mouse to double-click the option, double-click the option, double-click, find the solid-state drive and double-click it, and press save to exit. The specific operations are as follows:
This article uses MSI Haihuangji; Windows 10 as a case to explain.
1. Turn on or restart the computer. When the logo appears on the screen, click the keys quickly until you enter the BIOS interface.
2. Enter the BIOS interface and use the mouse to click to open the option (you can also use the arrow keys to select and the Enter key to confirm).
3. Enter - in sequence, find the name of the solid state drive in the list and select it.
4. Press and click Save to exit.
Note: If you cannot find the name of the solid state drive in the list, you can press the key to return to the menu. Find and double-click it, set it as a solid-state drive, and then perform the above operations.
How to set which hard drive to boot on MSI b460?
To set which hard drive to boot, you can follow the steps below:
1. Press the Del key or F2 key to enter the BIOS setting interface when booting.
2. In the BIOS setting interface, use the direction keys to select the "Boot" option and press the Enter key to enter.
3. In the boot options, you can see the list of hard drives. Use the arrow keys to select the option you want to set as your bootable hard drive and press Enter to enter.
4. In the selected hard disk option, you can see the boot sequence settings. Use the arrow keys to move the hard drive you want to set as the first boot option to the top and press Enter to confirm.
5. Save the settings and exit the BIOS interface. Normally, you can press the F10 key to save settings and exit.
After completing the above steps, your MSI B460 will boot from the hard drive you selected. Please note that different BIOS versions may vary, so the above steps may vary. If you encounter any problems, it is recommended that you refer to the MSI B460 user manual or contact MSI technical support for more detailed guidance.
Set the hard drive boot sequence for MSI b460?
MSI b460 sets the hard disk startup sequence by the BIOS. Turn on the MSI b460 computer, press the del key, enter the BIOS system, select the boot option, and select the startup disk sequence in the boot disk drop-down list
MSI b85 motherboard bios startup item settings?
The BIOS startup item setting method for MSI B85 motherboard is as follows:
1. Press the "Delete" key when booting to enter the BIOS setting interface.
2. Switch to the "Boot" menu and you can see "Boot Option Priorities".
3. Under this menu, you can select "Boot Option #1" (Startup Option 1), "Boot Option #2" (Startup Option 2), etc., select according to actual needs.
4. After selecting the corresponding startup item, press the "Enter" key, you will see a menu and select the device that needs to be started, such as hard disk, optical drive, U disk, etc.
5. After the startup item settings are completed, press the "F10" key to save the settings and exit the BIOS.
It should be noted that the interface and setting method may be slightly different for different BIOS versions, but the general steps are similar. If you are not sure how to set up the BIOS, it is recommended to consult the motherboard manual or consult after-sales service personnel.
How to set up the hard drive for MSI h410 motherboard?
1. Turn on or restart the computer. When the logo appears on the screen, click the buttons quickly until you enter the BIOS interface.
2. Enter the BIOS interface and use the mouse to click to open the option (you can also use the arrow keys to select and the Enter key to confirm).
3. Enter - in sequence, find the name of the solid state drive in the list and select it.
4. Press and click Save to exit.
Note: If you cannot find the name of the solid state drive in the list, you can press the key to return to the menu. Find and double-click it, set it as a solid-state drive, and then perform the above operations.
MSI motherboard settings startup sequence cannot find the hard drive?
Cause: The operation steps are incorrect.
Solution:
1. Restart the computer with a fixed hard disk and press the F2 button on the keyboard while restarting.
2. Enter the bios interface and select the boot option in the title bar.
3. Enter the boot interface. At the bottom of the interface, you can see the boot sequence and find the name of your solid state drive.
4. Then press the F5 or F6 button to adjust the solid state drive option to the first position.
5. After setting, press the F10 key on the keyboard, and then a small window to exit and save will pop up. Click the yes option here.
6. Finally, the computer will restart. If the system is installed on the fixed hard drive, it will start from the solid state drive first.
How to set the hard disk mode in MSI BIOS?
The answer is as follows
1. Turn on the computer and observe the key prompt to enter the bios displayed on the computer startup interface. Because computers with different motherboards have different keys to enter the bios, we can use this method to enter the bios. middle.
2. Enter the computer bios setting interface. Here we take the phoenix version of bios as an example.
3. Move the cursor to "main", then use the "↓ key" to move to "SATA Mode: [AHCI Mode]", and press the Enter key. You can see that the motherboard supports two modes. That is, "IDE Mode" and "AHCI Mode" types.
4. Then use the "→ key" on the keyboard to move to "exit", select "Exit Saving Changes" and press Enter,
5. In the pop-up "setup confirmation" Select "yes" and press Enter.
Different BIOS settings have different methods, so there are also differences in the methods of changing the hard disk mode in the BIOS, but it is not difficult as long as we find the basic solution through basic problems. In fact, the solution is the same. We You can also use the above ideas to solve the problem of changing the hard disk mode in other versions of bios.
MSI b450 hard drive startup settings?
1
Turn on the computer and press the or key to enter the bios interface when entering the startup screen
2
After entering the interface, click the drop-down language menu in the upper right corner. Set the language text to Chinese, then click
3
After clicking, find and click to enter
4
After entering, select the U disk, select Hard disk, so that the first startup item is the U disk
5
After setting, press (F10 is to save and exit), click, it will automatically restart after clicking, and enter the first startup item. That is, U disk
The above is the detailed content of How to configure the hard disk boot in BIOS for MSI h410m motherboard?. For more information, please follow other related articles on the PHP Chinese website!

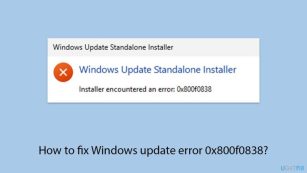 How to fix Windows update error 0x800f0838?Mar 11, 2025 am 12:00 AM
Windows updates are essential components delivered by Microsoft to enhance the functionality, security, and stability of the Windows operating system. These upd
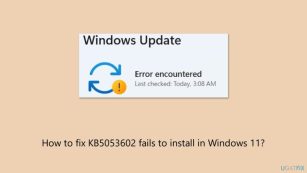 How to fix KB5053602 fails to install in Windows 11?Mar 13, 2025 am 10:00 AM
The KB5053602 patch, released on March 11, 2025, targets Windows 11 editions 22H2 and 23H2, elevating the OS to OS Builds 22621.5039 and 22631.5039, respectivel
 Spotlight on KB5053606 Not Installing for Windows 10, Exact StepsMar 13, 2025 pm 08:02 PM
Windows 10 KB5053606 Update installation failed? This guide provides effective solutions! Many users are having problems trying to install the Windows 10 KB5053606 update released on Tuesday of Microsoft's March 2025 patch, such as SSH connection interruption, Dwm.exe unresponsiveness, or input method editor (IME) issues. Updates may be stuck during downloading or installation, or error codes may appear, such as 0x800f0922, 0xd000034, 0x80070437 and 0x80072efe. KB5053606 installation failure is usually caused by a variety of reasons, including Windows update component failure, system file corruption, and disk
 What if KB5053598 Fails to Install on Windows 11? Fixes HereMar 13, 2025 pm 08:03 PM
Microsoft's March 11, 2025 update, KB5053598, is a crucial patch for Windows 11 24H2 (OS Build 26100.3476). This MiniTool guide covers everything you need to know, including troubleshooting installation problems. What's New in KB5053598? Released on
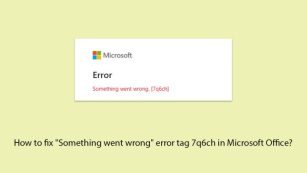 How to fix 'Something went wrong' error tag 7q6ch in Microsoft Office?Mar 15, 2025 am 02:00 AM
The “Something went wrong” error tag 7q6ch in Microsoft Office disrupts your workflow during essential tasks such as creating documents or handling emails it a
 GTA V Enhanced ERR_GFX_D3D_NOD3D12, Quick Fix in 4 WaysMar 14, 2025 pm 08:04 PM
GTA 5 Enhanced ERR_GFX_D3D_NOD3D12 Error Fix Guide Grand Theft Auto V Enhanced (GTA 5 Enhanced) is an upgraded game, but some players encounter the "ERR_GFX_D3D_NOD3D12: DirectX 12 adapter or runner found" error when starting. This article provides several solutions. Cause of the Error: This error usually indicates that your system is missing a DirectX 12 runtime library or a compatible DirectX 12 graphics card. Solution: Method 1: Install DirectX Runtime Library Inspection
 How to fix KB5053598 fails to install in Windows 11?Mar 13, 2025 am 10:01 AM
Windows 11 receives regular updates to enhance security, fix bugs, and introduce new features. One aspect of this update process is Patch Tuesday, which occurs
 AI LIMIT Save File Location & Saved File Protection-Full GuideMar 17, 2025 pm 10:05 PM
Mastering AI LIMIT's Save File Location and Protection: A Comprehensive Guide Planning to dive into the action-packed sci-fi RPG, AI LIMIT, launching March 27, 2025? Understanding your save file location and implementing robust protection methods is


Hot AI Tools

Undresser.AI Undress
AI-powered app for creating realistic nude photos

AI Clothes Remover
Online AI tool for removing clothes from photos.

Undress AI Tool
Undress images for free

Clothoff.io
AI clothes remover

AI Hentai Generator
Generate AI Hentai for free.

Hot Article
Hot Tools

SublimeText3 Mac version
God-level code editing software (SublimeText3)

MinGW - Minimalist GNU for Windows
This project is in the process of being migrated to osdn.net/projects/mingw, you can continue to follow us there. MinGW: A native Windows port of the GNU Compiler Collection (GCC), freely distributable import libraries and header files for building native Windows applications; includes extensions to the MSVC runtime to support C99 functionality. All MinGW software can run on 64-bit Windows platforms.

Atom editor mac version download
The most popular open source editor

Dreamweaver CS6
Visual web development tools

VSCode Windows 64-bit Download
A free and powerful IDE editor launched by Microsoft

