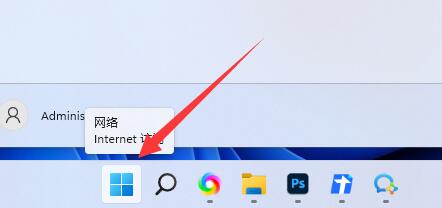
Dear Win 10 Home Edition users, the following will show you how to enable Telnet service. As the standard protocol and main method of Internet remote login service, Telnet is mainly used in Internet sessions. Sometimes we may need to use the Telnet function, but many users do not know how to operate it, so Telnet is usually turned off. Below, we will introduce in detail how to enable Telnet service.
How to activate telnet in win10 home version
1. Please enter "Control Panel" in the search bar in the lower left corner to open it.
2. Next, click the “Programs and Features” option here.

3. Then, click to start the Win function, find "Telnet Client", and click the OK button to open it.

4. Then, press the win R shortcut key and enter the cmd command.

5. Execute the Telnet command to test. If the interface shown in the figure below appears, it means that the Telnet service has been successfully started.

The above is the detailed content of How to enable Telnet function in Win10 Home Edition. For more information, please follow other related articles on the PHP Chinese website!
![Windows 11 中的 Telnet 完整教程 [安装/启用和故障排除]](https://img.php.cn/upload/article/000/000/164/168476253791019.jpg) Windows 11 中的 Telnet 完整教程 [安装/启用和故障排除]May 22, 2023 pm 09:35 PM
Windows 11 中的 Telnet 完整教程 [安装/启用和故障排除]May 22, 2023 pm 09:35 PM<p>Telnet是“终端网络”的简称。它是用户可以用来将一台计算机连接到本地计算机的协议。</p><p>这里,本地计算机是指启动连接的设备,而连接到本地计算机的计算机称为远程计算机。</p><p>Telnet在客户端/服务器主体上运行,虽然它已经过时,但在2022年它仍然被许多人使用。许多人已经转向Windows11操作系统,这是微软提供的最新操作系统。&
 教你如何启用win11的telnet服务Dec 27, 2023 am 10:23 AM
当我们在进行远程连接操作时,可能需要开启telnet服务才可以继续,但是在更新系统后,不少人找不到win11telnet服务怎么开启了,其实添加程序服务即可。win11telnet服务怎么开启:1、首先我们打开底部“开始菜单”,如图所示、2、接着打开其中的“设置”3、然后进入左边的“应用”设置。4、再打开右上角“可选功能”5、打开后,下拉到最底部,打开“更多windows功能”6、随后找到“telnet客户端”,勾选开启后点击“确定”7、最后等待系统完成更改就可以开启telnet服务了。
 telnet命令怎么用Nov 06, 2023 pm 02:58 PM
telnet命令用法:1、打开命令行界面;2、输入telnet命令,后面跟上要连接的目标主机的IP地址或域名;3、按下回车键,telnet将尝试与目标主机建立连接;4、如果连接成功,将看到一个欢迎消息或登录提示符;5、输入用户名和密码来登录到目标主机;6、成功登录后,可以执行各种命令和操作,就像在本地计算机上操作一样;7、完成操作后,可以使用特定的命令退出telnet会话。
 Win10 telnet命令无效Jan 09, 2024 am 08:25 AM
长期使用win10系统的用户们都遇到过系统在正常使用过程中会莫名其妙的弹出telnet不是内部或外部命令的提示,很多用户们都对这个不知道是啥的东西感到烦恼,要解决telnet不是内部或外部命令的问题其实很简单,今天小编就为大家带来了详细的图文详解一起来看看吧。win10系统解决telnet不是内部或外部命令的方法图文教程:操作步骤:1、在程序界面下,选择“打开或关闭Windows功能”,如下图所示:2、在打开的对话框中,找到“Telnet客户端”并勾选。最后点击“确定”,等待几分钟,系统将会为你
 cmdtelnet命令不被识别为内部或外部命令Jan 03, 2024 am 08:05 AM
cmd窗口中提示telnet不是内部或外部命令这个问题想必曾经也深深的困扰着你吧,这个问题的出现并不是因为用户们的操作哪里有什么不对用户们也不用太担心只需要一些小小的操作设置就可以让cmd窗口提示telnet不是内部或外部命令这个问题迎刃而解,一起来看看小编今天为大家带来的cmd窗口提示telnet不是内部或外部命令解决办法吧。cmd窗口提示telnet不是内部或外部命令解决办法:1、打开电脑的控制面板。2、找到程序和功能。3、找到左侧的启动或关闭Windows功能。4、找到“telnet客户端
 Windows中的telnet命令无法找到Dec 28, 2023 am 10:41 AM
因为在一般的情况下win10系统的telnet服务都是默认为关闭状态的,这是需要用户们自己进行设置任何手动来进行开启的,如果不对telnet进行开启有时候就出出现telnet不是内部或外部命令的问题,今天小编为大家带来的就是windows系统telnet不是内部或外部命令解决方法!让我们一起来看一看吧。windows系统telnet不是内部或外部命令解决方法:操作步骤:1、点击开始菜单,直接搜索“控制面板”,点击搜索结果中的“控制面板”应用。2、接着,在界面中弹出了“控制面板”窗口。点击窗口中的
 win10自带的看图软件叫什么Oct 18, 2022 pm 02:48 PM
win10自带的看图软件叫“Microsoft照片”,其下载方法是:1、打开win10电脑;2、在Microsoft Store中搜索“Microsoft照片”并下载;3、将照片查看器的默认软件设置为【照片】即可。
 解决CentOS下telnet退出问题的方法Dec 31, 2023 am 08:13 AM
最近有CentOS用户反映用telnet连接后发现是Windows防火墙的问题,可是用telnet命令连接成功后发现退不出去了,这该怎么办?下面小编就给大家介绍下CentOS下telnet退出失败的解决办法。一起去看看吧!怎样从Linux的telnet中退出1.ctrl+]quit经常要用到telnet来测试端口是否正常开放。但是有一个问题估计大家都会遇到,在telnet进入某个端口后无法退出,没办法,为了继续测试只好关掉这个dos(或其他)窗口,重新打开一个。这里有一个方法,按住ctrl+]就


Hot AI Tools

Undresser.AI Undress
AI-powered app for creating realistic nude photos

AI Clothes Remover
Online AI tool for removing clothes from photos.

Undress AI Tool
Undress images for free

Clothoff.io
AI clothes remover

AI Hentai Generator
Generate AI Hentai for free.

Hot Article

Hot Tools

SAP NetWeaver Server Adapter for Eclipse
Integrate Eclipse with SAP NetWeaver application server.

PhpStorm Mac version
The latest (2018.2.1) professional PHP integrated development tool

DVWA
Damn Vulnerable Web App (DVWA) is a PHP/MySQL web application that is very vulnerable. Its main goals are to be an aid for security professionals to test their skills and tools in a legal environment, to help web developers better understand the process of securing web applications, and to help teachers/students teach/learn in a classroom environment Web application security. The goal of DVWA is to practice some of the most common web vulnerabilities through a simple and straightforward interface, with varying degrees of difficulty. Please note that this software

SublimeText3 English version
Recommended: Win version, supports code prompts!

ZendStudio 13.5.1 Mac
Powerful PHP integrated development environment


