
Home >System Tutorial >LINUX >How to add a shortcut startup key for QQ in Linux?
How to add a shortcut startup key for QQ in Linux?

- WBOYWBOYWBOYWBOYWBOYWBOYWBOYWBOYWBOYWBOYWBOYWBOYWBforward
- 2024-01-16 12:27:161102browse
Linux cannot set the qq shortcut key to start in the properties, what should I do? Let’s take a look at the detailed setting method. Please see the detailed introduction below.
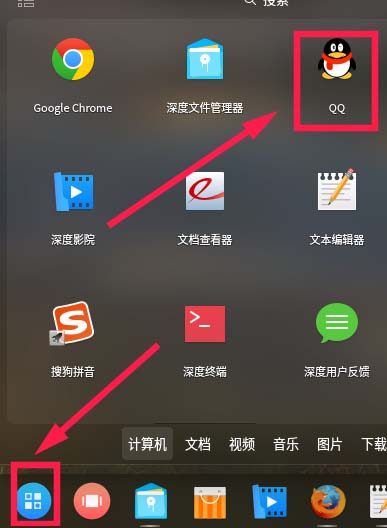
1. View the qq executable file
1. Click "Start" on the taskbar and find qq
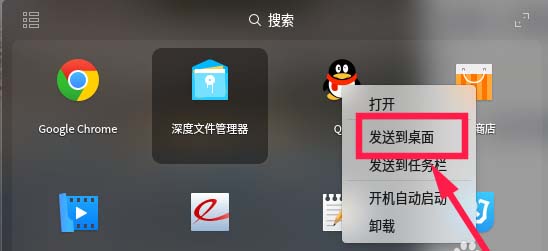
2. Then, right-click and select "Send to Desktop"
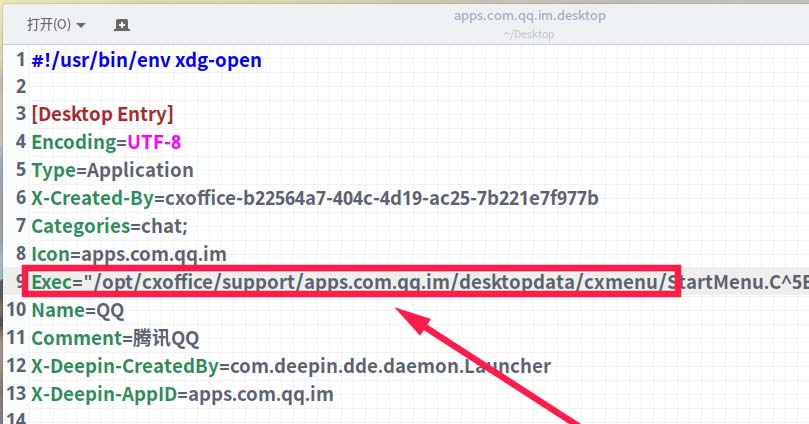
3. Next, on the desktop, right-click on the qq desktop shortcut and select "Open with" and select a text editor.

4. Find the line starting with exec. The content after the equal sign is the qq command line, and copy all the content to the right of the equal sign.
2. Set shortcut keys
1. Click "Control CenterHeart"
on the taskbar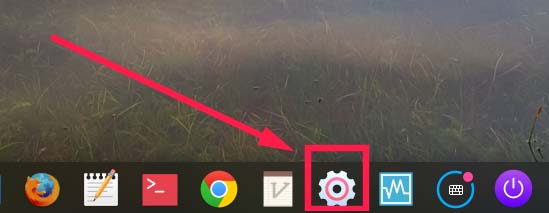
2. Select "Keyboard and Language"

3. Select “ Shortcut Key”.

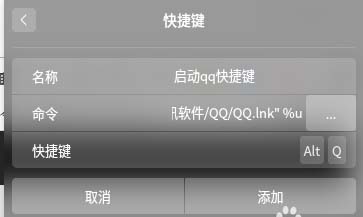
4. After entering the shortcut key settings, Add a custom shortcut key, As shown in the figure below, the command will fill in the content after exec obtained by the text editor above. Set the shortcut startup key to ALT Q (do not repeat it with other shortcut keys, set the shortcut key according to personal circumstances). For more specific shortcut key addition and modification operations, you can refer to the following experience.
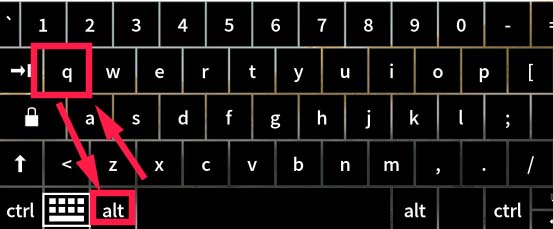
5. If you want to run qq in the future, just press the ALT Q key to open it.
The above is the detailed content of How to add a shortcut startup key for QQ in Linux?. For more information, please follow other related articles on the PHP Chinese website!