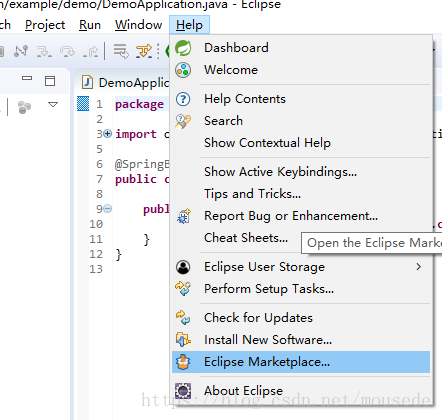
Configuration steps: 1. Make sure that the Tomcat server has been installed and know the installation path; 2. Open the "Window" menu in Eclipse, select "Preferences", select "Server" in the pop-up window, and click "Runtime Environments"; 3. Click the "Add" button, select "Tomcat" under "Apache", and click "Next"; 4. Select the installation path of Tomcat, and then click "Finish".

Operating system for this tutorial: Windows 10 system, Dell G3 computer.
To configure Tomcat in Eclipse, you can follow the following steps:
1. First, make sure you have installed the Tomcat server and know the installation path.
2. Open the "Window" menu in Eclipse, select "Preferences", select "Server" in the pop-up window, and then click "Runtime Environments"

3. Click the "Add" button, select "Tomcat" under "Apache", and click "Next".


4. Select the Tomcat installation path in "Tomcat Installation Directory" and click "Finish".

Now that the Tomcat server has been configured in Eclipse, you can create a Web project in Eclipse and deploy it to the Tomcat server for debugging and running.
The above is the detailed content of eclipse configuration tomcat. For more information, please follow other related articles on the PHP Chinese website!
 使用Eclipse进行Linux Shell脚本开发的基本配置指南Jul 06, 2023 pm 05:00 PM
使用Eclipse进行LinuxShell脚本开发的基本配置指南在Linux环境下,Shell脚本是一种强大且常用的编程语言,用于自动化执行各种任务和管理系统。Eclipse是一款功能强大的集成开发环境(IDE),可以帮助开发人员更高效地编写、调试和管理Shell脚本。本文将介绍如何在Eclipse中配置和使用Shell脚本开发环境。第一步:安装Eclip
 eclipse如何显示行号Dec 24, 2020 am 11:03 AM
eclipse显示行号的方法:1、直接输入快捷键“CTRL+F10”,勾选“show line numbers”;2、右键点击其侧边栏,勾选“show line numbers”;3、在Eclipse菜单栏中设置显示行号即可。
 eclipse怎么设置中文Jul 24, 2023 am 11:02 AM
eclipse设置中文方法:1、启动Eclipse,在启动界面的工具栏上点击"Preferences"按钮;2、弹出的首选项对话框中,点击"General"选项;3、在"General"选项下,点击"Appearance"子选项;4、点击"Language"选择框,选择“中文”即可设置成中文;5、关闭eclipse,重启即可使用中文。
 使用Eclipse进行Linux Shell脚本自动化的基本配置指南Jul 04, 2023 pm 06:49 PM
使用Eclipse进行LinuxShell脚本自动化的基本配置指南简介:LinuxShell脚本是一种强大的自动化工具,用于在Linux操作系统中执行一系列命令和操作。Eclipse是一种流行的集成开发环境(IDE),主要用于Java开发,但也可以用于编辑和执行Shell脚本。本文将介绍如何在Eclipse中配置和使用Shell脚本的自动化工具。安装Ec
 eclipse创建springboot项目的方式有哪些May 22, 2023 pm 07:19 PM
方法一安装STS插件安装插件导向窗口完成后,在eclipse右下角将会出现安装插件的进度,等插件安装完成后重启eclipse生效新建springboot项目项目启动方法二1.创建Maven项目2.选择项目类型3.选择项目4.编写项目组和名称-finish即可5.修改pom.xml文件org.springframework.bootspring-boot-starter-parent2.0.2.RELEASE6.pom.xml中添加依赖org.springframework.bootspring-
 eclipse左侧项目栏不见了怎么解决Feb 19, 2021 pm 05:14 PM
解决方法:首先打开eclipse软件,点击顶部导航栏中的“window”选项;然后在打开的下拉菜单中,点击“show view”选项;接着在打开的菜单中,点击“project Exlorer”选项即可调出左侧项目栏。
 Java错误:Eclipse错误,如何解决和避免Jun 25, 2023 am 09:09 AM
Java作为一种非常强大和流行的编程语言,被广泛应用于各种计算机应用和开发领域。在编写Java代码时,经常会遇到各种错误信息,这些错误信息可能会影响代码的正常编译和运行。其中,Eclipse是一种广泛使用的集成开发环境,而在Eclipse中遇到错误也是相当常见的。本文将探讨一些常见的Eclipse错误,并提供解决和避免这些错误的方法。一、常见的Eclipse
 怎么将eclipse语言设置为中文Jan 04, 2023 pm 03:50 PM
eclipse语言设置为中文的方法:1、打开浏览器找到语言包下载地址,并将最新的安装包地址复制;2、打开eclipse,点击“help”,然后点击安装新的插件;3、点击“Add”,在Location中粘帖网址;4、在下拉菜单中找到简体中文包,进行勾选,点击Next等待安装;5、重启eclipse即可。

Hot AI Tools

Undresser.AI Undress
AI-powered app for creating realistic nude photos

AI Clothes Remover
Online AI tool for removing clothes from photos.

Undress AI Tool
Undress images for free

Clothoff.io
AI clothes remover

AI Hentai Generator
Generate AI Hentai for free.

Hot Article

Hot Tools

EditPlus Chinese cracked version
Small size, syntax highlighting, does not support code prompt function

Dreamweaver CS6
Visual web development tools

WebStorm Mac version
Useful JavaScript development tools

SublimeText3 Mac version
God-level code editing software (SublimeText3)

DVWA
Damn Vulnerable Web App (DVWA) is a PHP/MySQL web application that is very vulnerable. Its main goals are to be an aid for security professionals to test their skills and tools in a legal environment, to help web developers better understand the process of securing web applications, and to help teachers/students teach/learn in a classroom environment Web application security. The goal of DVWA is to practice some of the most common web vulnerabilities through a simple and straightforward interface, with varying degrees of difficulty. Please note that this software


