
 System TutorialWindows SeriesHow to connect a printer to a host computer with Windows 8 and Windows XP operating systems
How to connect a printer to a host computer with Windows 8 and Windows XP operating systems

If the host win8 system and winXP system are connected to the printer
The printer is connected to win8, and the steps for XP to share the printer are:
1. Make sure the printer supports XP and WIN8 systems;
2. All clients are located in the same network segment, for example, they are all in the 192.168.1.* network segment (assuming that the router IP is 192.168.1.1);
Method: The client sets a static IP. For details, see: http://jingyan.baidu.com/article/b907e627e12ceb46e7891c88.html;
3. All clients are located in the same workgroup. If they are all in WORKGROUP, please refer to: http://jingyan.baidu.com/article/4d58d54133c9bd9dd4e9c0b7.html;
4. Cancel the default password sharing protection in WIN8. Method:
1) Click Network on the desktop;
2) Click on Network and Sharing Center;
3) Click to change advanced sharing settings;
4) Drag the right mouse button to the bottom and click to turn off password-protected sharing.

5. The printer is temporarily connected to XP, and search online to download and install the printer driver suitable for XP;
6. After the installation is completed, connect the printer to the original WIN7 machine;
7. WIN8 computer: Click Start - Devices and Printers, right-click the mouse and select Printer Properties;
8. Click the Sharing tab, check Share this printer, and click OK;
9. XP computer: Click Start-Run, enter\\the other party's computer IP (IP on the WIN8 computer), select the printer, right-click the mouse and select Connect;
10. Vice versa.
How to add a network printer on win8 on xp
1. In order to ensure that the printer is installed correctly, we must first check whether the printer is connected successfully.
2. Then press the WIN X key combination on the WIN8 desktop and select "Control Panel.
3. Click "View devices and printers" in the pop-up window.
4. Right-click the printer that needs to be shared and select "Printer Properties".
5. Switch to the "Sharing" tab and click the "Change Sharing Options" button.
6. Select "Share this printer", enter a name according to NETBIOS rules in "Share Name", and click "OK":.
7. To ensure successful sharing, you need to turn off the WIN8 firewall.
8. Step 2 XP installs a shared printer.
9. Press WIN R in XP and enter "\\the other party's IP".
10. Then click the "Start" menu and select "Printers and Faxes".
11. Drag the printer under WIN8 of the other party to the "Printers and Faxes" of XP.
12. Just click "Yes" in the pop-up dialog box:.
13. You can see the added shared printer under WIN8 under "Printers and Faxes" in XP.
How to share files between xp and win8
Through the following steps, you can share multiple computers in the LAN:
1. Multiple computers must share the same Internet connection, such as Netcom broadband access or mobile broadband access
2. They are all in the same network segment. Except for the last number of the IP address, the other numbers should be the same
3. Set the workgroup and calculation name. You must have the same workgroup name, but the computer names of each computer should be different.
4. Set up local users and groups. The settings in the General group remain unchanged. But the settings in the user should straighten out the relationship and enable the guest account (Guests)
Test example: Clean up all the user interface, and generally keep three users: such as:
Name Full Name Description
Wwbs wu wang bu seng for guests...
Zzy zhao zhi yi management plan…
Fnc fenf ning chao
Double-click wwwbs:
"Regular" card password never expires
"Affiliated to" administrators
Double click zzy:
"Regular" card password never expires
"Belong to" card administrators
Double-click fnc:
"Regular" card users cannot change their password, and the password never expires
"Belong to" Card Guests
Note: The number of users set by these methods is different from the number of users displayed in the control panel. Generally, one less user is displayed. As in this example, the wwbs user is not displayed in the control panel. It will only be displayed in the "Welcome Screen" after restarting the computer after zzy is accidentally locked. Of course, this kind of accident can also be realized manually by setting "Account Locked" in "Local Users and Groups" (the process of this realization: Group Policy - Computer Configuration - Windows Settings - Security Settings - Account Policy - Account Lockout Policy - Account Lock threshold - no lock or after several invalid logins, the account will be locked)
5. File sharing settings:
1. In the "Exceptions" "Tab" in Windows Firewall, select "File and Printer Sharing"
2. In the resource manager, uncheck "Tools - Folder Options - View - Use Simple File Sharing (recommended)"
3. The "Shared Document" that comes with XP is set to sharing. Right-click "Shared Documents" - Properties - Sharing - Share this folder and select it. Copy the document that needs to be shared to this "Shared Document".
6. Restart the computer
good luck!
The above is the detailed content of How to connect a printer to a host computer with Windows 8 and Windows XP operating systems. For more information, please follow other related articles on the PHP Chinese website!

 Open Source Video Editor Kdenlive 25.04 Is HereApr 30, 2025 am 06:07 AM
Kdenlive 25.04 streamlines video editing with enhanced features and improved workflow. This release focuses on easing the burden of basic effects and enhancing audio editing precision. A Refined Editing Experience Kdenlive 25.04 boasts significant i
 Too Many Passwords to Keep Track Of? Here's What to DoApr 30, 2025 am 06:02 AM
Never reuse passwords! While remembering unique passwords for every online account is challenging, reusing them significantly increases your vulnerability to hacking. Data breaches frequently expose passwords, and using the same password across mul
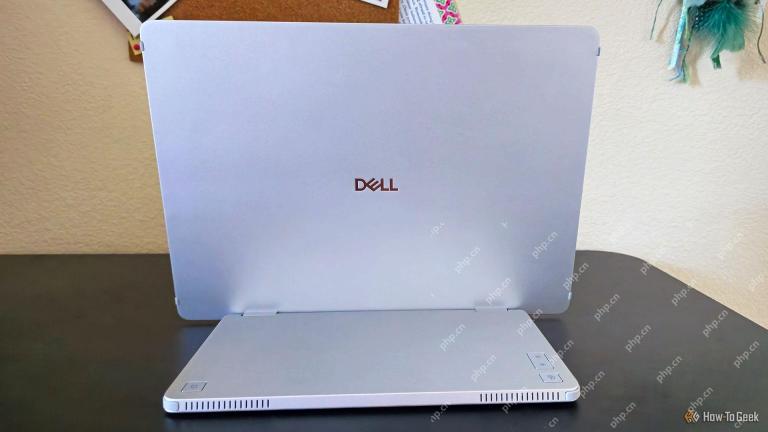 Dell Pro 14 Plus Portable Monitor Review: Convenient Portability for ProfessionalsApr 30, 2025 am 03:02 AM
The Dell Pro 14 Plus (P1425) portable monitor: a professional's practical choice, but with caveats. This 14-inch display shines with its brightness and resolution, making it ideal for on-the-go productivity. However, its lack of integrated speakers
 This Compact 1TB USB SSD Is Just $60 TodayApr 30, 2025 am 01:04 AM
SK Hynix Tube T31 1TB Portable SSD Special Offer! This compact USB-sized solid-state drive is currently priced at only $59.98 on Amazon, about 25% lower than the original price of $139.99! The SK Hynix Tube T31 has a fast transmission speed of up to 1000MB/s, adopts a compact USB drive design and supports USB 3.2 Gen 2 interface. Built-in DRAM ensures high-speed data transmission, backup and file transfer efficiency. It uses a standard USB-A interface, and if your computer only has a Type-C interface, you need to use a hub or an adapter. Compatibility-wise, it supports running Windows 10/11 and mac
 Your Next GPU Might Have a GyroscopeApr 30, 2025 am 12:58 AM
High-end GPUs are getting so heavy, they're now incorporating gyroscopes! The ASUS ROG Astral RTX 5090, a massive 3kg (over 6 pounds), includes a Bosch Sensortec BMI323 IMU to detect sagging. This is a direct response to the increasing weight of th
 How to Create a Timeline Filter in Excel Apr 30, 2025 am 12:54 AM
Excel has a variety of methods for sorting and displaying data, making it easy to sort dates and view entries in chronological order. But if you need a more comprehensive and dynamic display, you might as well organize the data into a timeline. The Excel Timeline tool is an excellent way to present projects and their milestones or visualize data trends over time. This article will guide you on how to create a timeline filter in Excel. Preparation Before creating a data timeline filter, it needs to be converted to a pivot table. PivotTables are a powerful tool for organizing large amounts of data for easy analysis, filtering, and (in this case) viewing on the timeline. The method of creating a pivot table is as follows: Select a cell in the spreadsheet. Navigate to the Insert tab
 How to Update Apps on Your PC with WingetApr 30, 2025 am 12:52 AM
Linux distributions offer users a wide range of options, one of which is the package manager. This article will explain three Ubuntu package managers, APT, Snap, and Flatpak, and explain when to use which one. Related Articles Manually updating Windows applications is cumbersome Windows provides users with a lot of freedom, including how to install and where to get the application. Therefore, there is currently no single location that can handle updates to all software on your PC. Microsoft Store handles its own updates. Some applications have their own built-in updates that run regularly or automatically when you start the application. Some content (usually drivers)
 Your Backblaze Backups Might Be in TroubleApr 29, 2025 pm 09:01 PM
Backblaze Faces Accusations of Financial Irregularities: Should You Switch Backup Services? A recent report from Morpheus Research alleges serious financial and operational issues at Backblaze, prompting concerns among users of its popular cloud back


Hot AI Tools

Undresser.AI Undress
AI-powered app for creating realistic nude photos

AI Clothes Remover
Online AI tool for removing clothes from photos.

Undress AI Tool
Undress images for free

Clothoff.io
AI clothes remover

Video Face Swap
Swap faces in any video effortlessly with our completely free AI face swap tool!

Hot Article
Hot Tools

Dreamweaver CS6
Visual web development tools

SAP NetWeaver Server Adapter for Eclipse
Integrate Eclipse with SAP NetWeaver application server.

PhpStorm Mac version
The latest (2018.2.1) professional PHP integrated development tool

Atom editor mac version download
The most popular open source editor

Safe Exam Browser
Safe Exam Browser is a secure browser environment for taking online exams securely. This software turns any computer into a secure workstation. It controls access to any utility and prevents students from using unauthorized resources.

