Home >System Tutorial >LINUX >How to display icons on Ubuntu 17.10 desktop
How to display icons on Ubuntu 17.10 desktop
- 王林forward
- 2024-01-10 21:06:401842browse
Today we will take a look at the tutorial on adding icons to the Ubuntu 17.10 desktop. There are icons on the desktop to quickly open the software. Please see the detailed introduction below.
1. Install Gnome Tweak optimization tool
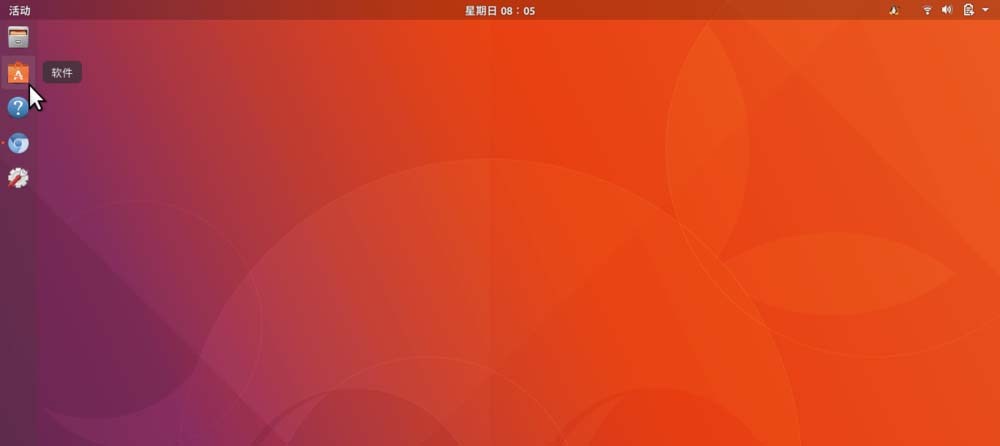
1. On the Ubuntu Dock on the desktop, click the software icon with the orange shopping bag icon to start the software window.
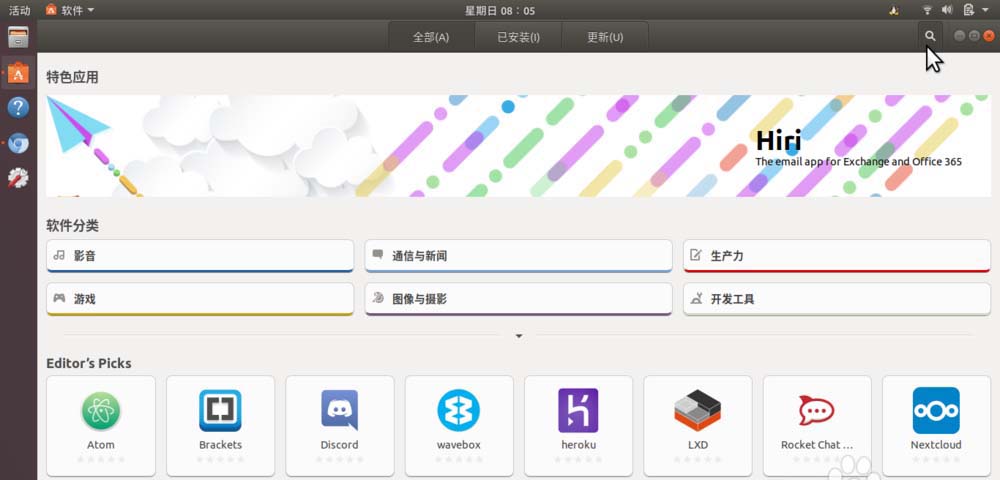
2. In the software window, there is a magnifying glass-style search button in the upper right corner. Click to enter the search window.
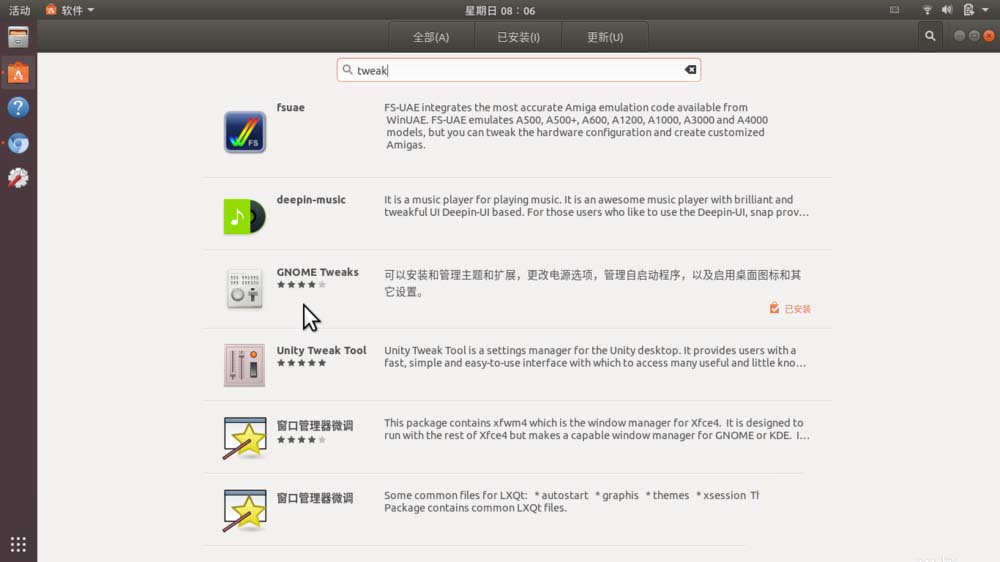
3. In the search window, enter "tweak" or "Optimization" to find "Gnome Tweaks" this software. Click to enter the details window, continue to click "Install" to complete the installation of the "Gnome Optimization" software.
2. Use "Gnome Optimization" to set whether to display desktop icons
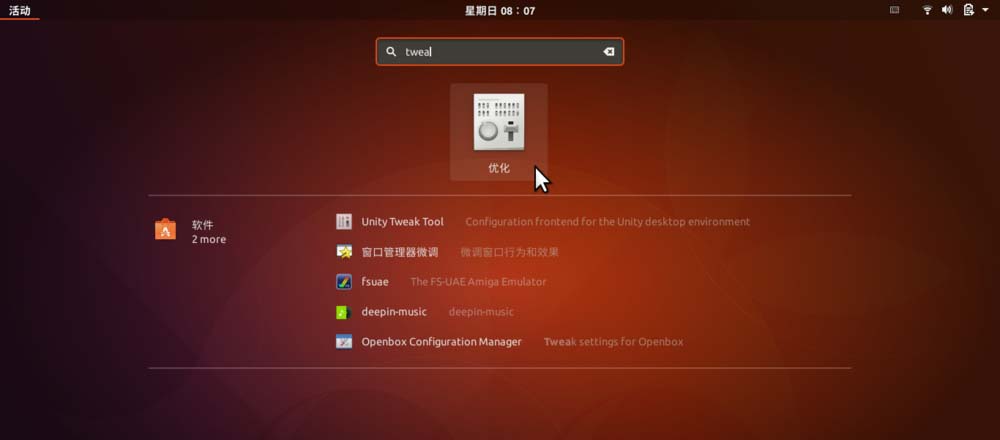
1. After installing the Gnome optimization software, press the Win key to enter the overview view, enter "tweak" or "optimization" in the search box, Gnome will appear below Click on the optimization icon to start it.
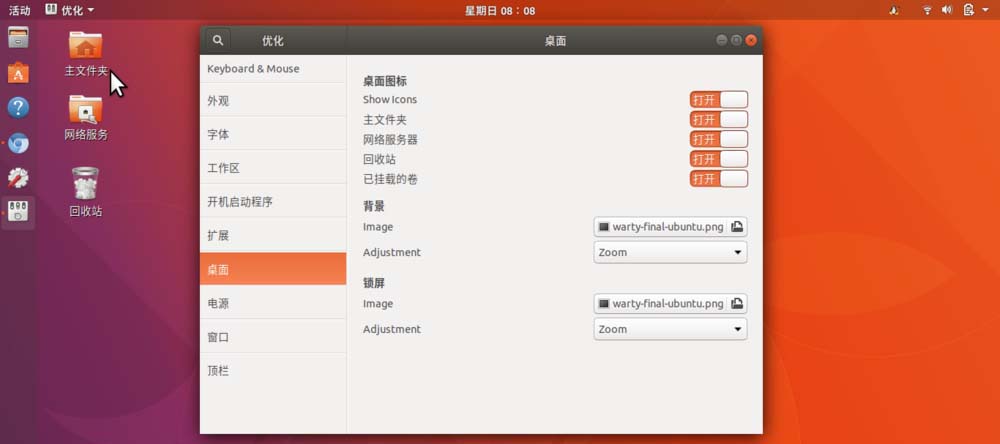
2. In the open Gnome optimization window, click "Desktop" in the left navigation list, and then open the " Show Icons” switch. Then, open or close "Home Folder", "Network Server", "Recycle Bin", "Mounted Volume" as appropriate " and other items switch.
You can see that in the blank space in the upper left corner of the desktop, the icons of "Main Folder", "Network Server", and "Recycle Bin" appear. .
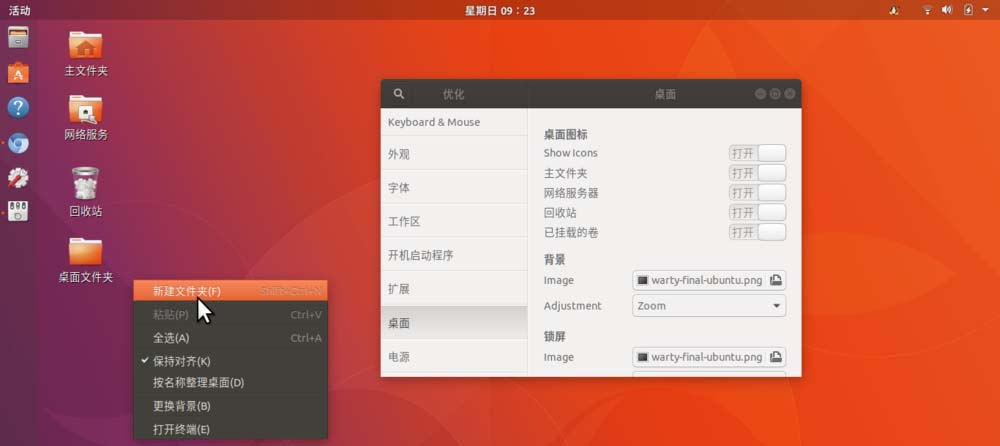
3. Right-click on a blank space on the desktop - create a new folder. The newly created folder will also appear on the desktop.
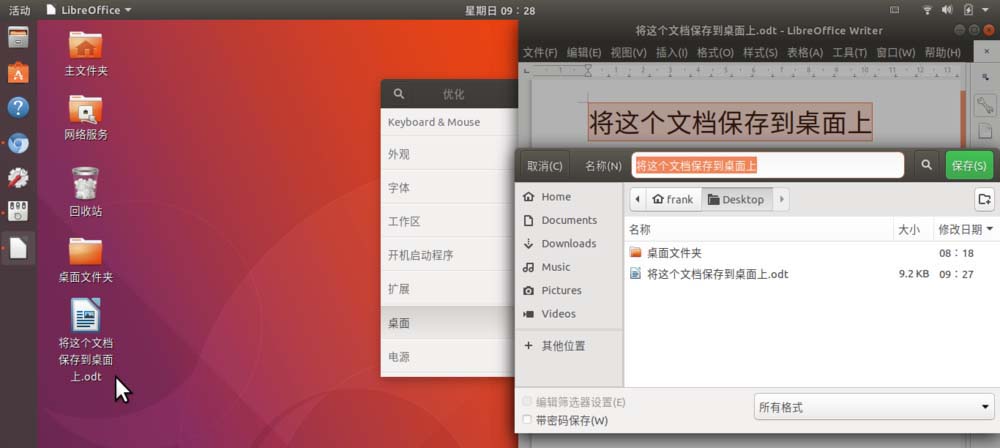
4. In the same way, you can also save documents and other files to the desktop.
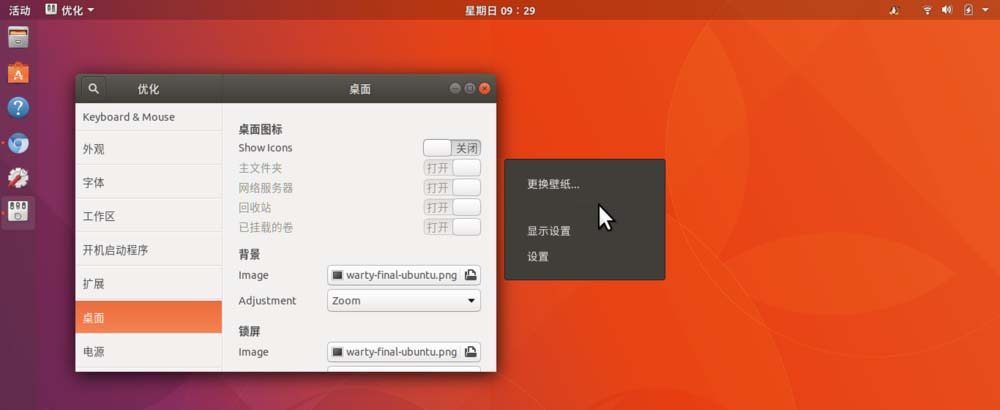
5. Of course, if the "Show Icons" switch is turned off, the icons on the desktop, including folders and files, etc., will disappear. Moreover, when you right-click on a blank space on the desktop, the "New Folder" menu item will no longer appear.
The above is the detailed content of How to display icons on Ubuntu 17.10 desktop. For more information, please follow other related articles on the PHP Chinese website!

