


We know that when we go on vacation or just hang out with friends, photos are all around them. This unforgettable moment is captured in the form of a photo. The best feature of iPhone is its camera, making it the only option for clicking our photos. iPhone's built-in advanced iSight camera provides us with high-quality photos. When you own both iPad and iPhone, there is always a need to transfer photos from iPhone to iPad. Transfer allows us to enjoy our photos on the iPad's big screen. The question arises - how to transfer photos from iPhone to iPad mini?
There are many different methods to choose from on how to transfer files to iPad, and here are the best methods we discuss: 1. Using iTunes: You can transfer files from computer to iPad via iTunes. First, connect your iPad to your computer and open iTunes. Then, select your iPad device in iTunes and click on the "File Sharing" option. In the "File Sharing" window, select the files you want to transfer and click the "Add Files" button. Finally, select the files and click the "Sync" button, and the files will be transferred to the iPad. 2. Use iCloud Drive: If you have an iCloud account, you can use iCloud Drive to transfer files to iPad. First, make sure your files have been uploaded to iCloud Drive. Then, open the Files app on your iPad and navigate to the location where you want to save the file. Click the " " button, select the "Import" option, and select the files you want to transfer. The file will be downloaded and saved to the iPad. 3. Use third-party file transfer apps: There are also many third-party apps available for transferring files to iPad. Some popular apps include Google Drive, Dropbox, and OneDrive. First, download and install the app of choice and log into your account. Then, upload the files you want to transfer into the app, and download and save the files on your iPad. The above are some of the best methods to transfer files to iPad, you can choose the method that suits you according to your needs and preferences.
Method 1: Transfer photos from iPhone to iPad in one click
If you want to transfer photos on iPhone to iPad, you can use Tenorshare phone transfer tool. This is a PC-based software designed to transfer photos from one phone to another iPhone. Use this tool to transfer photos from iPhone to iPad easily. Here are the steps to transfer photos:
The first step is to download, install and run the Tenorshare Phone to Phone Transfer software, and then connect your iPhone and iPad to the computer. Once the tool detects the device, you just need to click "Next".

Step 2: First, select the photos you want to transfer in the left pane. Then, click on the Start Transfer button. This will start the process of transferring photos to iPad.

Step 3: You can now find the transferred photos from iPhone to iPad. This method can also be used to back up photos without requiring iCloud space.

Method 2: Use Photo Stream to transfer photos from iPhone to iPad
Using Photo Stream, you can upload photos to iCloud. This way, uploaded photos can be accessed from any OS X device and connected iOS (using the same Apple ID). Note that this method can only be used if your devices (i.e. iPhone and iPad) are both connected to Wi-Fi.
To transfer photos from iPhone to iPad, you can follow the steps below: 1. Make sure your iPhone and iPad are connected to the same Wi-Fi network. 2. Open the Photos app on your iPhone and select the photos you want to transfer. 3. Click the share button in the upper right corner of the photo and select "AirDrop." 4. In the pop-up AirDrop menu, select your iPad. 5. A prompt box to accept the photo will pop up on the iPad, click the "Accept" button. 6. Open the Photos app on the iPad, and you will find that the photos you just transferred have appeared in the photo album. Through the above steps, you have successfully transferred photos from iPhone to iPad. This method is very easy and fast, suitable for transferring small amounts of photos. If you need to transfer a large number of photos or other types of files, you can consider using other methods such as iCloud or your computer for transfer.
The first step is to launch the Settings app on your iPhone. You can find the Settings icon on your phone screen and tap it to open it. In the Settings interface that opens, you will see different options. Please find and tap the "Sign in to iPhone" option.

The second step is to log into your account using your Apple ID and click on iCloud. Then select Photos and next just toggle My Photo Stream to On.
Step 3: Repeat the above steps on the iPad.
Method 3: Use AirDrop to transfer photos from iPhone to iPad
Using the AirDrop function can conveniently transfer photos from iPhone to iPad. But it's important to note that this only works on iPad 4 and iPhone 5 and above with iOS 7 and above. Here are the steps to transfer photos from iPhone to iPad using AirDrop: 1. Make sure your iPhone and iPad are both Wi-Fi and Bluetooth enabled and nearby. 2. Open the Photos app on your iPhone and select the photos you want to transfer. 3. On the photo preview page, click the share icon (a box with an upward arrow inside it). 4. Among the sharing options, you will see an AirDrop option. click it. 5. In the AirDrop menu, select the name of your iPad. 6. On iPad, you will receive a pop-up asking whether to accept photos from iPhone. Click "Accept". 7. Wait for a while and the photos will be displayed on the iPad. By following the above steps, you can easily transfer photos from iPhone to iPad, making it convenient for you to share photos between different devices. Remember to make sure your device meets AirDrop requirements and keep the distance between the two devices not too far during the transfer process.
The first step is to launch the control center. On both devices, simply swipe up on the device screen to launch Control Center.

Step 2: Open AirDrop and select the "Everyone" option. Then, launch the Photos app on your iPhone and select the photos you want to transfer. Finally, click the Share button in the lower left corner.
Step 3: Your iPad name will appear in the Tap To Share with AirDrop section. Now on your iPad, tap on the "Accept transfer of photos from iPhone to iPad" option.
Method 4: Use Messages to Transfer Photos from iPhone to iPad
Using Messages is another method to transfer photos from iPhone to iPad 2, which is a bit old-fashioned but still effective. Through Messages, you can send photos from iPhone to iPad, but it should be noted that Messages has certain limitations, you can only transfer a limited number of photos, and the transfer process may be time-consuming. If you want to know how to transfer photos from iPhone to iPad, please follow the steps below.
The first step is to open your iPhone and find the Photos app, whose icon is usually a colorful flower. After clicking on the icon, you will be taken to the home page of the Photos app. On the homepage you can see all your photos and albums. To send a photo, you need to select the photo you want to send, which you can find by swiping the screen or tapping the corresponding album. Once you find the photo you want to send, just click on it to open it.

Step 2: Click the Share button and select any other photos you want to send. Now click on the “Message” option.
Step 3: Provide your iPad’s phone number and click Send.
Step 4: Open the Messages app on your iPad and long press on the attached image. Next, select the save option to save the photo to your iPad’s storage.
The above article discusses several simple methods to transfer photos from iPhone to iPad. If you want to transfer photos conveniently, we recommend using Tenorshare Phone To Phone Transfer tool. Let us know in the comments below which method works best for you to transfer your photos.
The above is the detailed content of How to transfer photos from iPhone to iPad. For more information, please follow other related articles on the PHP Chinese website!

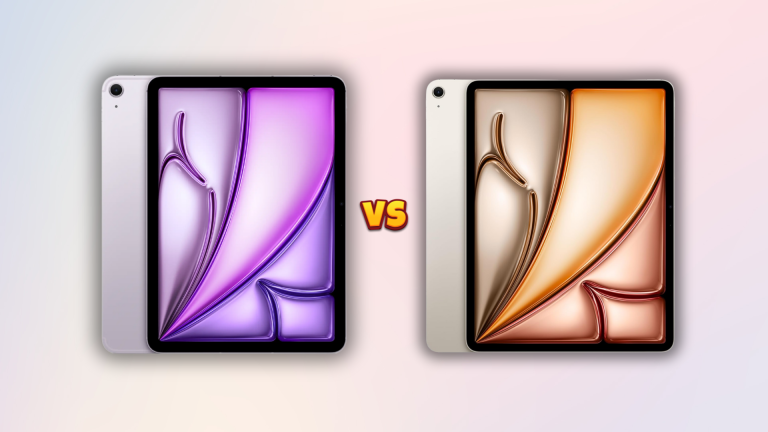 M3 iPad Air vs. M2 iPad Air: Spot the Difference (If You Can)Mar 11, 2025 am 03:08 AM
In-depth comparison between the 2025 iPad Air (M3) and the 2024 iPad Air (M2): Is the upgrade worth it? Apple has released a new iPad Air equipped with an M3 chip. The new tablet balances ease of use and economy and brings performance improvements to veteran users. But how is it different from the previous generation M2 iPad Air? Let's find out. Appearance design: Completely consistent The appearance of the new iPad Air is almost exactly the same as the M2 iPad Air released in 2024, and it is also exactly the same as the M1 iPad Air in 2022. 11-inch and 13-inch screen sizes (symmetrical bezels), size, weight and even color
 iOS 18.4 Finally Brings RCS Messaging to Google Fi and Other T-Mobile CarriersMar 07, 2025 am 06:01 AM
summary iOS 18 eventually added support for RCS messaging, benefiting many users, but initially excluded T-Mobile-based carriers. The second iOS 18.4 beta now brings RCS messaging capabilities to Google Fi on iPhone and other T-Mobile-based carriers. The update also includes new features such as priority application notifications, visual smart shortcuts, new emojis, and Apple app shortcuts. Apple released iOS 18 in September 2024, and with it comes the long-awaited RCS messaging feature – at least for some
 Apple Intelligence Keeps Turning on After iPhone UpdatesMar 14, 2025 am 03:01 AM
New iPhone iOS updates are automatically reactivating Apple Intelligence, even for users who previously disabled it. This unexpected behavior, whether a bug or intentional, is causing frustration among users. The recent iOS 18.3.2 update, primarily a
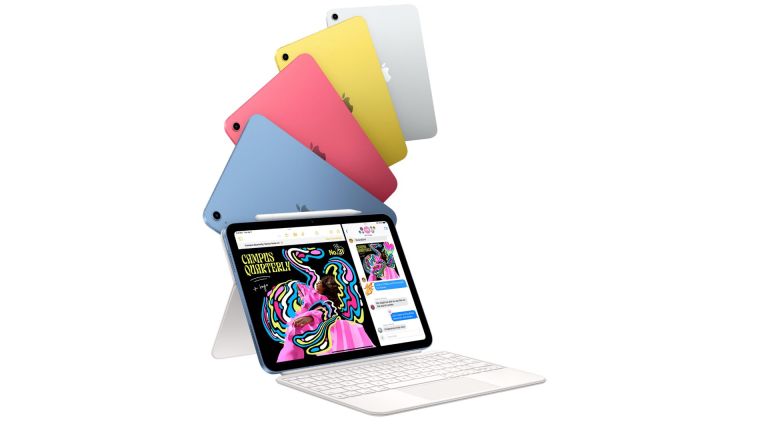 Apple's Base iPad Now Has Double the StorageMar 06, 2025 am 03:03 AM
Apple's new iPad (11th generation) review: performance upgrade, but lacks AI capabilities Apple finally updated its entry-level iPad after more than two years. While the entire iPad product line is still a bit confusing, the latest 11th-generation iPad doubles storage space while maintaining its original price, but it also lacks an important feature set. Apple today released the new iPad Air equipped with a powerful M3 chip and a new Magic Control keyboard, and focused on its AI capabilities. However, the company also quietly updated its entry-level iPad. If you're looking for an affordable iPad, the 11th-generation model that will be available next week may be exactly what you're looking for. Interestingly, the new entry-level iPad has made a good upgrade
 8 iPhone Apps I'm Using to Try and Live ForeverMar 16, 2025 am 12:19 AM
Maximize Your Lifespan: iPhone Apps for a Healthier, Longer Life Groucho Marx famously aspired to live forever, or die trying. While immortality remains elusive, we can significantly extend both our lifespan and healthspan (the length of time we enj
 The Best 11-inch iPad Air Cases of 2025Mar 19, 2025 am 06:03 AM
Top iPad Air 11-inch Cases: A Comprehensive Guide (Updated 03/14/2025) This updated guide showcases the best iPad Air 11-inch cases available, catering to various needs and budgets. Whether you own the new M3 or the M2 model, protecting your investm
 The Simple Reason I Don't Use Apple Family Sharing (However Good It Is)Mar 22, 2025 am 03:04 AM
Apple's Family Sharing: A Broken Promise? Ask to Buy's Failure to Protect Against Redownloads Apple's Family Sharing, while convenient for sharing apps, subscriptions, and more, has a significant flaw: its "Ask to Buy" feature fails to pre
 InfinaCore T3 Pro Review: Fast, Low-Cost Charging with Limited CompatibilityMar 08, 2025 am 09:01 AM
The InfinaCore T3 Pro: A Budget-Friendly 3-in-1 Wireless Charger The InfinaCore T3 Pro offers a convenient 3-in-1 wireless charging solution for a surprisingly affordable $39.99. While charging speeds are slower than wired alternatives, its attracti


Hot AI Tools

Undresser.AI Undress
AI-powered app for creating realistic nude photos

AI Clothes Remover
Online AI tool for removing clothes from photos.

Undress AI Tool
Undress images for free

Clothoff.io
AI clothes remover

AI Hentai Generator
Generate AI Hentai for free.

Hot Article
Hot Tools

MinGW - Minimalist GNU for Windows
This project is in the process of being migrated to osdn.net/projects/mingw, you can continue to follow us there. MinGW: A native Windows port of the GNU Compiler Collection (GCC), freely distributable import libraries and header files for building native Windows applications; includes extensions to the MSVC runtime to support C99 functionality. All MinGW software can run on 64-bit Windows platforms.

mPDF
mPDF is a PHP library that can generate PDF files from UTF-8 encoded HTML. The original author, Ian Back, wrote mPDF to output PDF files "on the fly" from his website and handle different languages. It is slower than original scripts like HTML2FPDF and produces larger files when using Unicode fonts, but supports CSS styles etc. and has a lot of enhancements. Supports almost all languages, including RTL (Arabic and Hebrew) and CJK (Chinese, Japanese and Korean). Supports nested block-level elements (such as P, DIV),

WebStorm Mac version
Useful JavaScript development tools

Atom editor mac version download
The most popular open source editor

ZendStudio 13.5.1 Mac
Powerful PHP integrated development environment

