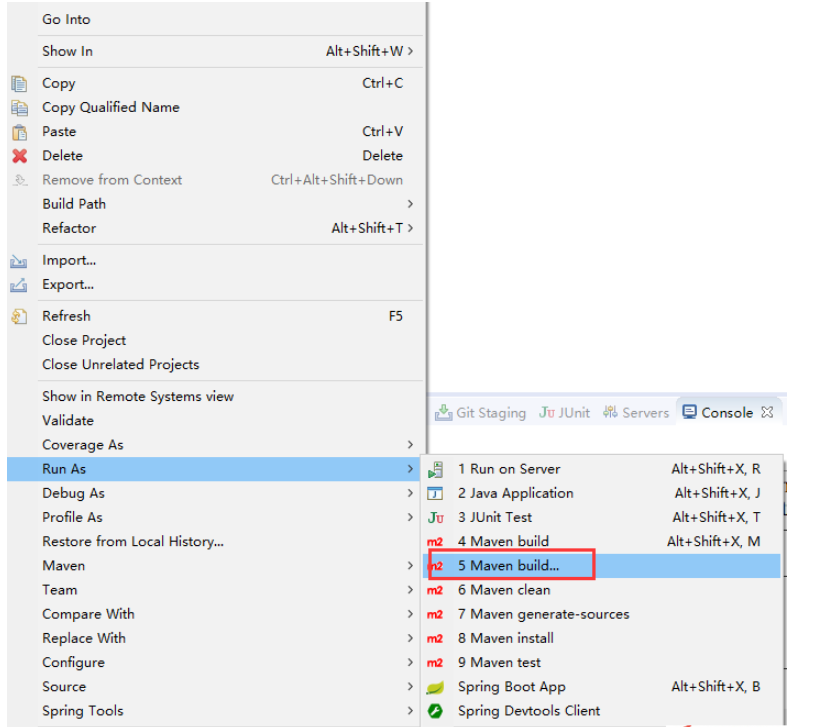
The steps for maven to import jar packages: 1. Download the jar package; 2. Create a Maven project; 3. Add dependencies; 4. Add dependency elements; 5. Save the pom.xml file; 6. Build the project; 7 , verify the import. Detailed introduction: 1. Download the jar package. First download the required jar package from the relevant website or source code warehouse. Make sure that the downloaded jar package is compatible with your project and meets the required version requirements; 2. Create a Maven project. If There is no Maven project yet, you need to create one first and so on.

The operating system for this tutorial: Windows 10 system, DELL G3 computer.
To import the jar package into the Maven project, you can follow the steps below:
1. Download the jar package: First, download the jar package from the relevant website or source code repository. Required jar package. Make sure the downloaded jar package is compatible with your project and meets the required version requirements.
2. Create a Maven project: If you don’t have a Maven project yet, you need to create one first. Projects can be created using the Maven command line tool or integrated development environments (IDEs) such as Eclipse, IntelliJ IDEA, etc.
3. Add dependencies: In the root directory of the Maven project, find the file named pom.xml. This is the configuration file of the Maven project, which is used to define the project's dependencies, build configuration, etc.
4. Add dependency element: In the pom.xml file, find the dependencies tag. Within this tag, add a new dependency element to define the information of the jar package to be imported. The following is an example:
<dependencies>
  <dependency>
    <groupId>com.example</groupId>
    <artifactId>example-jar</artifactId>
    <version>1.0.0</version>
  </dependency>
</dependencies>
In the above example, groupId specifies the group identifier of the jar package, artifactId specifies the component identifier of the jar package, and version specifies the version number of the jar package. You need to replace this information with the corresponding information of the jar package you actually use.
5. Save the pom.xml file: Save the changes to the pom.xml file.
6. Build the project: Enter the project root directory on the command line and execute the following command to build the project:
mvn clean install
Maven will automatically parse the dependencies and download all Required jar package. If all goes well, you should be able to successfully build the project and import the required jar packages.
7. Verify the import: After importing the jar package into the project, you can verify whether the jar package has been imported correctly by writing code. Make sure you can access and use the classes and methods in the imported jar package.
Please note that if you are using an IDE, such as Eclipse or IntelliJ IDEA, you can directly import the jar package in the IDE without modifying the pom.xml file. The specific import method may vary from IDE to IDE. You can refer to the documentation or tutorials of the relevant IDE to learn how to import jar packages in the IDE.
In addition, if you are using private jar packages or jar packages that are not available in public repositories, you may need to configure a local repository or private repository to store and access these jar packages. In this case, you need to install the jar packages into a local or private repository and reference them in the pom.xml file. For specific operations, please refer to the instructions on configuring local warehouses and private warehouses in the Maven documentation.
The above is the detailed content of How to import jar package in maven. For more information, please follow other related articles on the PHP Chinese website!
 怎么在maven中将springboot打成jar包May 17, 2023 am 08:19 AM
maven的命令:1.mvncleanpackage-DskipTests:在项目目录下运行此命令,在target目录下生成jar包或war包。2.mvnclean:清理项目生产的临时文件,一般是模块下的target目录3.mvncompile-DskipTests:模块安装命令将打包的的jar/war文件复制到你的本地仓库中,供其他模块使用-Dmaven.test.skip=true跳过测试(同时会跳过testcompile).4.mvntest:测试命令,或执行src/test/java/下
 解析Maven本地仓库配置的全面指南Jan 05, 2024 pm 12:40 PM
Maven本地仓库配置详解,需要具体代码示例在使用Maven进行项目构建时,本地仓库的配置是非常重要的一部分。本文将详细介绍如何正确配置Maven本地仓库,并附带代码示例。Maven本地仓库是用于保存项目中所需的依赖库的地方。当Maven构建项目时,它会根据项目中的pom.xml文件中的依赖配置,自动从远程仓库中下载所需的依赖库,并保存在本地仓库中。这样,当
 maven的本地仓库怎么配置Jan 04, 2024 am 11:18 AM
maven配置本地仓库的步骤:1、下载和安装Maven;2、配置环境变量;3、创建本地仓库文件夹;4、配置Maven的settings.xml文件;5、修改本地仓库位置;6、保存并关闭settings.xml文件;7、测试配置。详细介绍:1、下载和安装Maven,需要在计算机上下载和安装Maven,可以从Maven官网下载最新版本的Maven,根据操作系统选择合适的安装包等等。
 maven下载慢怎么办Jan 03, 2024 pm 03:42 PM
maven下载慢的解决办法:1、网络问题;2、代理设置;3、镜像设置;4、清理本地仓库;5、使用Maven的下载管理功能;6、升级Maven版本;7、插件问题;8、清理系统缓存;9、尝试使用其他工具。详细介绍:1、网络问题,检查网络连接是否稳定,如果网络不稳定可能导致下载速度慢,尝试切换到其他网络环境或者使用更稳定的网络连接;2、代理设置,如果网络需要通过代理服务器访问等等。
 Springboot2.6集成redis maven报错怎么解决May 28, 2023 pm 12:55 PM
Springboot2.6集成redismaven报错org.springframework.bootspring-boot-starter-data-redis当加这个配置后,POM.xml的第一行总是报错:DescriptionResourcePathLocationTypeio.lettuce:lettuce-core:jar:6.1.8.RELEASEfailedtotransferfromhttps://repo.maven.apache.org/maven2duringaprevio
 maven打包插件有哪些Jan 03, 2024 pm 05:18 PM
maven打包插件有:1、maven-jar-plugin;2、maven-assembly-plugin;3、maven-shade-plugin;4、spring-boot-maven-plugin;5、maven-dependency-plugin;6、maven-resources-plugin;7、maven-compiler-plugin等等。
 Java之怎么实现maven打完jar包之后将jar包放到指定位置May 13, 2023 am 11:46 AM
方式一通过maven-jar-plugin指定outputDirectory输出路径可以排除某些配置文件,没有文件夹的话会自动创建!org.apache.maven.pluginsmaven-jar-pluginD:\test**/*.properties**/*.xml**/*.ymlstatic/**templates/**方式二通过maven-resources-plugin指定outputDirectory输出路径org.apache.maven.pluginsmaven-resourc
 Java错误:Maven错误,如何解决和避免Jun 24, 2023 pm 05:33 PM
在Java开发过程中,Maven是一个非常常用的工具。它可以帮助我们管理依赖、构建项目、运行测试等。然而,有时候我们会遇到Maven错误,这会给我们带来一定的麻烦。本文将介绍一些常见的Maven错误及其解决方法,以及如何避免这些错误的发生。一、依赖错误1.缺少依赖缺少依赖是Maven中最常见的错误之一。这通常是由于依赖配置不正确导致的。在使用Maven时,我


Hot AI Tools

Undresser.AI Undress
AI-powered app for creating realistic nude photos

AI Clothes Remover
Online AI tool for removing clothes from photos.

Undress AI Tool
Undress images for free

Clothoff.io
AI clothes remover

AI Hentai Generator
Generate AI Hentai for free.

Hot Article

Hot Tools

SAP NetWeaver Server Adapter for Eclipse
Integrate Eclipse with SAP NetWeaver application server.

EditPlus Chinese cracked version
Small size, syntax highlighting, does not support code prompt function

Dreamweaver Mac version
Visual web development tools

Notepad++7.3.1
Easy-to-use and free code editor

VSCode Windows 64-bit Download
A free and powerful IDE editor launched by Microsoft


