
Home >System Tutorial >LINUX >Automated installation of DevStack
Automated installation of DevStack

- PHPzforward
- 2024-01-08 13:45:48743browse
| Introduction | Lightbot Devstack currently supports Ubuntu 14.04 and CentOS 7, but most OpenStack developers around the world are using Ubuntu 14.04. So in order to reduce trouble, it is recommended that you use Ubuntu 14.04. By default, both Devstack and OpenStack are installed using Master's code. This often happens. The installation is successful today but fails tomorrow, and the code is changing all the time. Therefore, we not only need to specify the OpenStack version, but also the Devstack version to provide the probability of successful installation. |
The operating system I use is Ubuntu 14.04. The default software package source is from abroad and the speed is relatively slow, so we modify the file /etc/apt/sources.list and change it to the following content.
deb http://cn.archive.ubuntu.com/ubuntu/ trusty main restricted universe multiverse<br>
deb http://cn.archive.ubuntu.com/ubuntu/ trusty-security main restricted universe multiverse<br>
deb http://cn.archive.ubuntu.com/ubuntu/ trusty-updates main restricted universe multiverse<br>
deb http://cn.archive.ubuntu.com/ubuntu/ trusty-proposed main restricted universe multiverse<br>
deb http://cn.archive.ubuntu.com/ubuntu/ trusty-backports main restricted universe multiverse
Or use the following command to update:
sed -i 's/us.archive/cn.archive/g' /etc/apt/sources.list<br>
apt-get update
One of the reasons why installing devstack is painful is that the OpenStack code needs to be downloaded from github. This often leads to various errors due to network reasons, which is simply embarrassing. Various errors are currently provided in China. Complete OpenStack github's mirrorhttp://git.trystack.cn, so the success probability of Devstack will be greatly improved. In addition, devstack will also download the image, and the download process is also very slow. trystack also provides commonly used image downloadshttp://images.trystack.cn.
Currently, there are three stable versions on the official github. We install the Ocata version here.
apt-get install git<br>
git clone http://git.trystack.cn/openstack-dev/devstack.git -b stable/ocata
Currently, Devstack scripts no longer support running directly as root. You need to create a stack user to run.
cd devstack/tools/<br>
./create-stack-user.sh
Modify the permissions of the devstack directory so that the stack user can run it.
cd ..<br>
mv devstack /opt/stack<br>
chown -R stack:stack /opt/stack/devstack
Many components of OpenStack need to be downloaded from the pip source. The default is a foreign source. We need to set it to a domestic source so that it can be configured quickly. Configure it under the root and stack directories.
First create .pip directories under the home directory, and then create the file pip.conf under the directory, with the following content:
mkdir .pip<br>
cat >> .pip/pip.conf
su - stack<br>
cd devstack<br>
cp samples/local.conf .
Make simple modifications to the file local.conf as follows:
[[local|localrc]]<br>
ADMIN_PASSWORD=secret<br>
DATABASE_PASSWORD=$ADMIN_PASSWORD<br>
RABBIT_PASSWORD=$ADMIN_PASSWORD<br>
SERVICE_PASSWORD=$ADMIN_PASSWORD<br>
LOGFILE=$DEST/logs/stack.sh.log<br>
LOGDAYS=2<br>
SWIFT_HASH=66a3d6b56c1f479c8b4e70ab5c2000f5<br>
SWIFT_REPLICAS=1<br>
SWIFT_DATA_DIR=$DEST/data
# use TryStack git mirror
GIT_BASE=http://git.trystack.cn
NOVNC_REPO=http://git.trystack.cn/kanaka/noVNC.git
SPICE_REPO=http://git.trystack.cn/git/spice/spice-html5.git
Multiple errors may occur during the process, most of which are due to network reasons. Just run the command repeatedly.
./stack.sh
After a long wait, depending on the network status, it will take about an hour for the following interface to appear, which means the installation is complete.
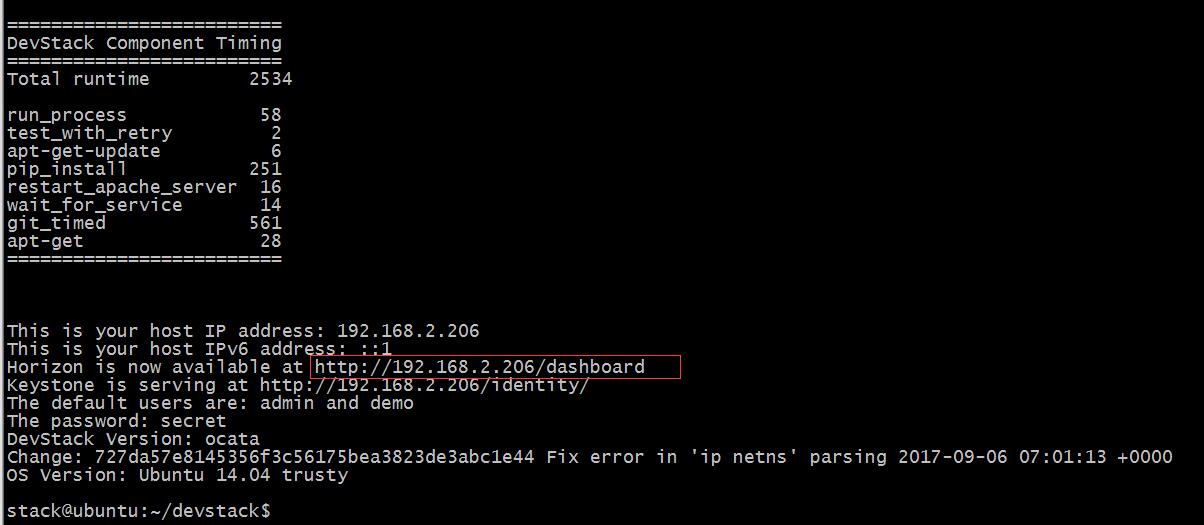
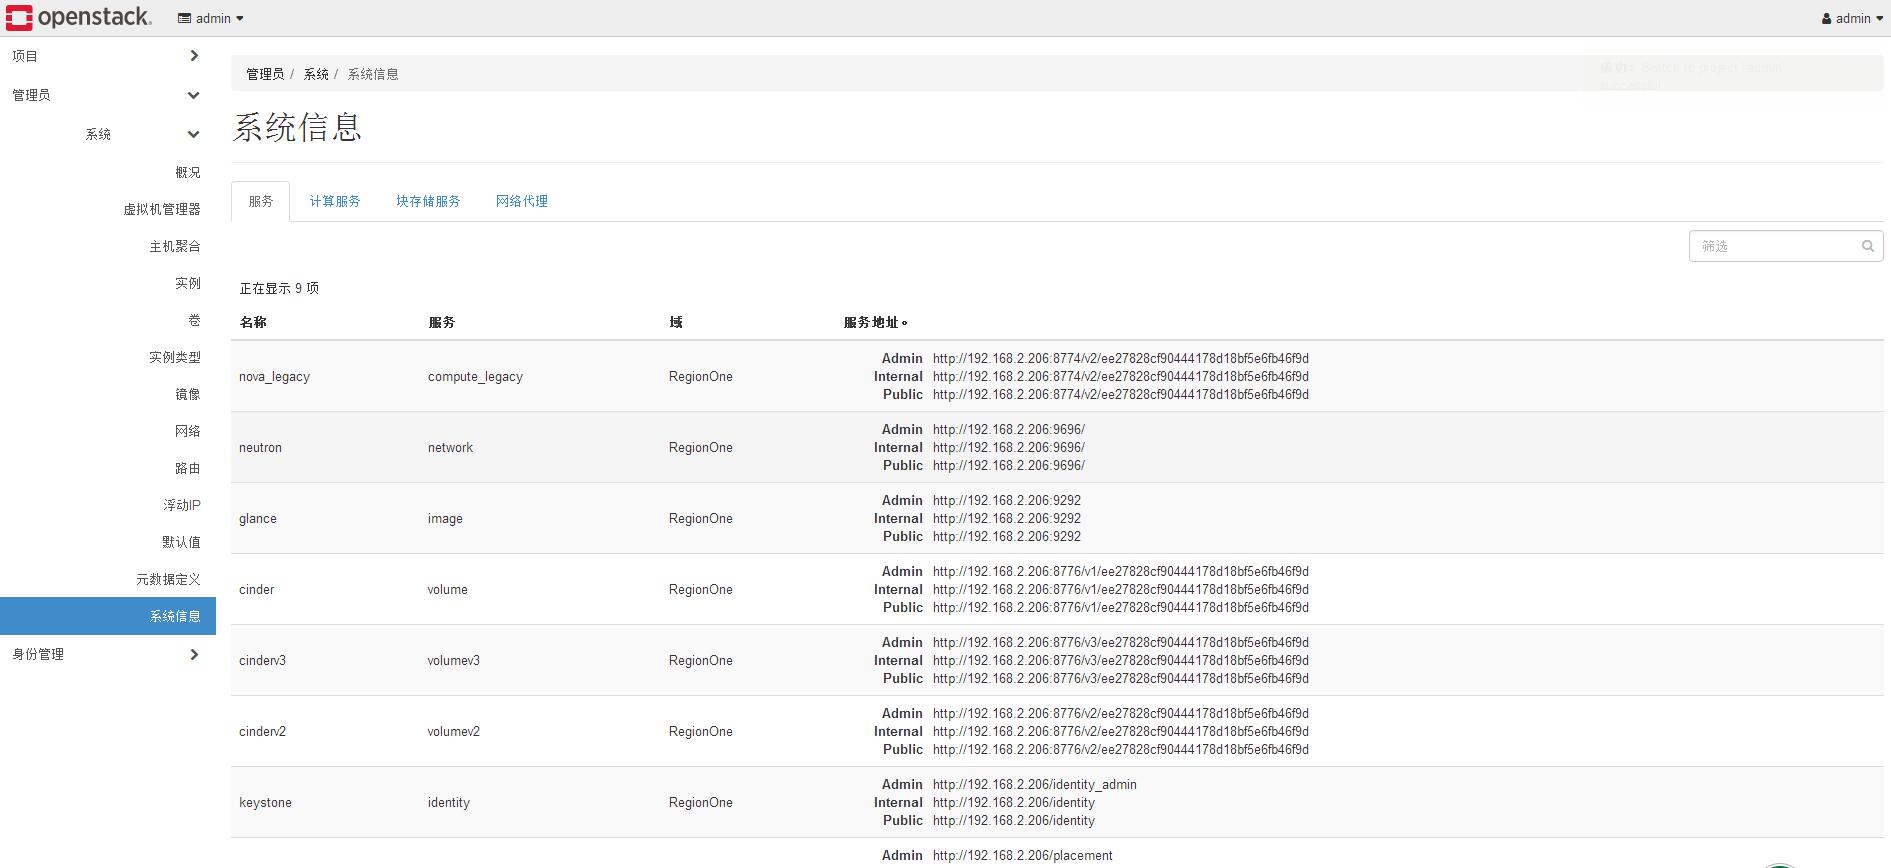
Then we log in to view.

You can see that the login is successful and the services are running normally.
The above is the detailed content of Automated installation of DevStack. For more information, please follow other related articles on the PHP Chinese website!