
Home >System Tutorial >LINUX >How to add or delete the kernel in ubuntu 20.04 jupyter under conda environment
How to add or delete the kernel in ubuntu 20.04 jupyter under conda environment

- WBOYWBOYWBOYWBOYWBOYWBOYWBOYWBOYWBOYWBOYWBOYWBOYWBforward
- 2024-01-07 12:07:56845browse
1. Create environment
conda create -n env_name # 创建env_name环境
conda create -n env_name package_name # 创建包含package_name软件包的env_name环境
2. List environment
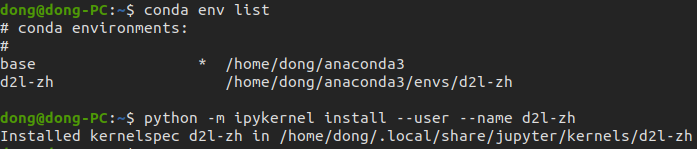
conda env list # 列举当前所有环境
conda info --envs # 列举当前所有环境
3. Add kernel
conda install nb_conda_kernels # 安装nb_conda_kernels
conda install ipykernel # 安装ipykernel
# 将环境写入jupyter notebook的kernel中
python -m ipykernel install --user --name env_name --display-name "你想为kernel添加的名称"
4. Delete the kernel
jupyter kernelspec remove env_name # 如果给env_name起了别名,将env_name替换成别名

The above is the detailed content of How to add or delete the kernel in ubuntu 20.04 jupyter under conda environment. For more information, please follow other related articles on the PHP Chinese website!
Statement:
This article is reproduced at:jb51.net. If there is any infringement, please contact admin@php.cn delete
Previous article:How to customize touchpad gestures in Ubuntu 16.04 system?Next article:How to customize touchpad gestures in Ubuntu 16.04 system?