

How to set up wireless opening in wifi sharing master

How to set up wireless opening in wifi sharing master
WiFi Sharing Master is a free wireless WiFi hotspot sharing software. It can use the wireless network card of a laptop or desktop to share free wireless hotspots to smartphones and other mobile portable devices, making it convenient for users to surf the Internet.
1. First visit the official website of WiFi Sharing Master and download the latest version of WiFi Sharing Master installation program. 2. After the download is completed, double-click to run the installation program and follow the prompts to complete the installation. 3. During the installation process, installation prompts for some additional software may pop up. You can choose whether to install them according to your personal needs. 4. After the installation is complete, open WiFi Sharing Master. 5. In the WiFi Sharing Master interface, select the setting option. 6. In the setting options, configure the required WiFi sharing
The installation process is relatively simple, just take the next step along the way.
2. It will open automatically after the installation is completed. At this time, the main interface of WiFi Sharing Master will appear. Click "Create Free WiFi" to automatically create a free WiFi.
3. The WiFi name and password displayed in the second step are the WiFi name and required password you see when you use your phone or tablet to connect to the hotspot.
4. Find WiFi Sharing Master in the system tray icon, right-click to close the hotspot and select Exit to exit the program.
common problem:
1. Change password: You can change the password when WiFi is turned off. First stop the current WiFi connection, then change the password and re-create a new WiFi connection.
2. Unable to connect to the hotspot: You can try right-clicking on the Wi-Fi icon on the taskbar and select "Unable to connect to WiFi", and then the system will provide some solutions for your reference.
3. Hotspot cannot be found: If your computer cannot search for WiFi hotspot, please try the following solutions. You can right-click the tray icon and select "Cannot find WiFi", and the system will display relevant solutions. You can follow the prompts to restore the hotspot search function.
How to set the password for wifi sharing master
Just set it directly.
After the computer is connected to any LAN port of the router, you can enter the settings page and complete the configuration by setting and modifying the router's WiFi name (SSID) and password.
Methods as below:
1. Open the browser and enter the router gateway IP address in the address bar (usually it can be found on the label on the back of the router, usually 192.168.1.1. If you have modified it, please use your modified IP address). 2. Enter the login username and password (by default, the username and password are usually admin);
2. After successful login, the running status will be displayed. Click "Wireless Settings";
3. Then click "Wireless Security Settings" and fill in a custom name in the wireless network name (SSID) column. Generally, you can use a combination of letters and numbers.
4. Next, you need to set a password to protect your network. Normally, we recommend choosing to use the WPA-PSK/WPA2-PSK encryption method and setting a password (the password length is recommended to be between 8 and 16 characters, and an alphanumeric combination can be used). This ensures your network security.
5. After setting the password, click Save and it will prompt you to restart;
6. Click "Restart Router" in "System Tools" to restart routing.
How to open wifi sharing master on win10
Please refer to the following answers:
1. First, make sure the wireless function is turned on on the laptop. You can click the Start menu in the lower left corner of the computer desktop, enter cmd in the search box, and then find the cmd.exe handler in the list. Next, right-click the program and select Run as administrator.
2. Enter the following command in the opened command dialog box: netsh wlan set hostednetwork mode=allow ssid=livdran2012
key=100100100, then press Enter, there is no need to close it;
mode: Whether to enable the virtual WiFi network card. If it is changed to disallow, it will be disabled;
SSID is the name of the wireless network. It is recommended to use English to set it. (The following uses livdran2012 as an example, you can set it freely);
Key Tip: The wireless network password must contain more than eight characters. In this example, we use "100100100", but you are free to set any password you like.
3. After running successfully, open the Network and Sharing Center and click "Change Adapter Settings" on the left side of the window;
4. After entering the adapter settings, you will find that there is an additional network card named "Microsoft Virtual WiFi Miniport".
If your computer does not have a wireless network connection named "Adapter" 2, you can try to update the wireless network card driver. If there is still no "Adapter" wireless network connection 2 after the driver update, you can rename the existing wireless network connection 2 to virtual WiFi. Doing so can help you better manage your wireless connection.
5. On the network connection, right-click the network connection connected to the Internet and select "Properties". Next, under the "Sharing" tab, check "Allow other network users to connect through this computer's Internet connection (N)" and select "Virtual WiFi" from the drop-down menu. Finally, click the OK button to apply the settings.
6. Then you will notice that the word "Shared" will be displayed next to the shared network card icon, which means that the "Broadband Connection" has been shared to the "Virtual WiFi".
7. Next, continue to enter in the command prompt: netsh wlan start hostednetwork, and then press the Enter key to start the hosted network.
8. Finally, you will notice that the red cross of the virtual WiFi disappears, which means that the WiFi base station has been successfully established and started. Now, you can use a WiFi-enabled device to search for the wireless network you established (for example, livdran2012 in the example), and then enter the password you set before (for example, 100100100 in the example), so that you can start enjoying shared Internet access The fun was gone.
The above is the detailed content of How to set up wireless opening in wifi sharing master. For more information, please follow other related articles on the PHP Chinese website!

 Linux vs Mac: How to Install Linux on Mac - MiniToolMay 14, 2025 am 01:21 AM
What’s the difference between Linux and Mac? Do you want to install Linux on Mac? This post from php.cn will show you all. You can refer to this guide to dual boot Linux and macOS.
 What Is MHTML & What Are the Differences Between It and HTML - MiniToolMay 14, 2025 am 01:20 AM
What is MHTML? How to open or view it? What are the differences between it and HTML? How to convert MHTML to HTML? If you are looking for the answers to the above questions, you can refer to this post from php.cn.
 Solve Deleted Files Keep Reappearing in Windows 10 - MiniToolMay 14, 2025 am 01:19 AM
This article focuses on the topic that deleted files keep reappearing in Windows 10, introducing the responsible reasons and feasible solutions.
 How to Deactivate Windows 10/11 by Uninstalling Product Key - MiniToolMay 14, 2025 am 01:18 AM
This post teaches you how to deactivate Windows 10/11 by removing product key or license. You can use that product key to activate another computer later if you want. For more computer tips and tricks, you can visit php.cn Software official website.
 Instant Fixes for Error 0164: Memory Size DecreasedMay 14, 2025 am 01:15 AM
Some Windows users report that they are prompted by the error 0164 memory size decreased screen every time they boot the computer. What’s wrong with it? If you are in the same boat, congratulations! You’ve come to the right place! In this post from p
 Best Fixes: This Page Isn't Available Right Now on Facebook - MiniToolMay 14, 2025 am 01:11 AM
This Page Isn’t Available Right Now is an error message you may encounter when you visit Facebook using your web browser. In this php.cn post, we will list some effective methods you can try to get rid of this error.
 Windows 11 KB5010414 Was Released with Many New Features - MiniToolMay 14, 2025 am 01:09 AM
Windows 11 KB5010414, a new optional update for Windows 11, is available now. Do you know what’s new and fixes in it? php.cn Software will show you this information in this post. Besides, it also tells you how to download and install it on your compu
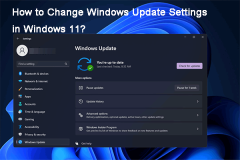 How to Change Windows Update Settings in Windows 11? - MiniToolMay 14, 2025 am 01:08 AM
Want to pause Windows Update on your Windows 11 computer? Want to set active hours to arrange a computer restart to complete the update process? You need to know how to change Windows Update settings in Windows 11. This php.cn post will show you the


Hot AI Tools

Undresser.AI Undress
AI-powered app for creating realistic nude photos

AI Clothes Remover
Online AI tool for removing clothes from photos.

Undress AI Tool
Undress images for free

Clothoff.io
AI clothes remover

Video Face Swap
Swap faces in any video effortlessly with our completely free AI face swap tool!

Hot Article
Hot Tools

mPDF
mPDF is a PHP library that can generate PDF files from UTF-8 encoded HTML. The original author, Ian Back, wrote mPDF to output PDF files "on the fly" from his website and handle different languages. It is slower than original scripts like HTML2FPDF and produces larger files when using Unicode fonts, but supports CSS styles etc. and has a lot of enhancements. Supports almost all languages, including RTL (Arabic and Hebrew) and CJK (Chinese, Japanese and Korean). Supports nested block-level elements (such as P, DIV),

SublimeText3 Chinese version
Chinese version, very easy to use

WebStorm Mac version
Useful JavaScript development tools

Zend Studio 13.0.1
Powerful PHP integrated development environment

Dreamweaver Mac version
Visual web development tools

