Home >System Tutorial >Windows Series >How to edit the hosts file under Win10 system
How to edit the hosts file under Win10 system
- 王林forward
- 2024-01-05 13:08:151667browse
How to modify the hosts file in win10 system? I believe many friends have encountered this problem. Today, the editor has compiled the relevant content and the steps to solve it. Let’s take a look below.

Steps to modify the hosts file in Win10 system
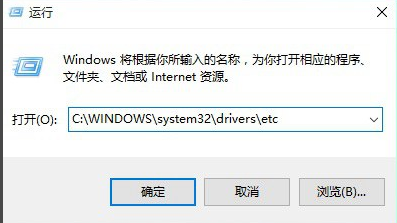
1. If you want to modify the hosts file, you first need to find this file. Open the "Run" dialog box, then enter the hosts file path: C:\WINDOWS\system32\drivers\etc, then click OK
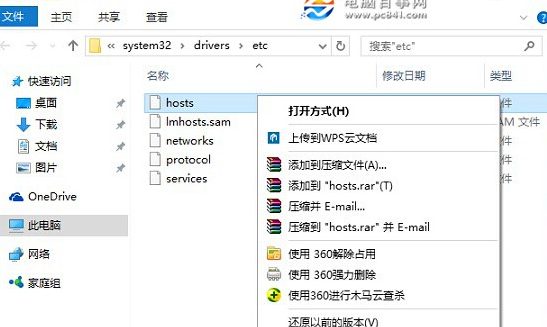
2, and then find the hosts file After selecting the location, right-click on the hosts file, and then open "Properties" in the pop-up option, as shown in the figure
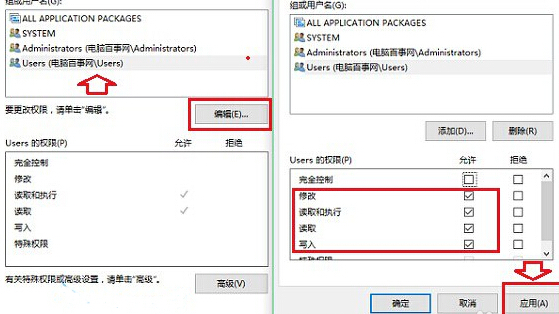
3. After opening the properties of the hosts file, click Go to the "Security" option, click on the current username that needs to be changed, and then click "Edit" below. In the pop-up operation interface, first click to select the account name that requires higher permissions. If you need to assign the permission to modify the hosts file to the user named "Computer Pepsi Network", select "Modify" and "Write" at the top and bottom. After completing, click "Apply" in the lower right corner
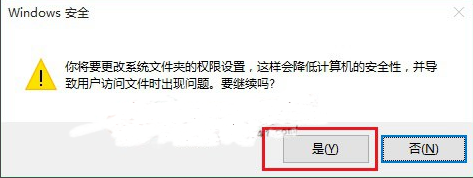
4. Next, a "Windows Security" prompt box will pop up, to the effect of modifying system files. After folder permissions, system security may be reduced. We don’t need to worry about it here. Just click "Yes"
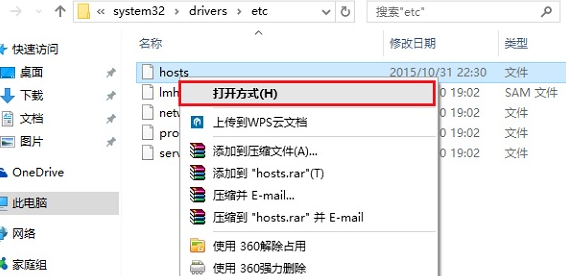
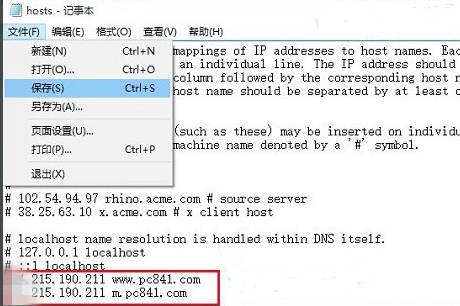
5. Set up writing and modifying the hosts file for the current user After obtaining the permissions, you can easily modify the Win10 hosts file. The specific method is to right-click on the hosts file, click "Open with" in the pop-up menu
The above is the detailed content of How to edit the hosts file under Win10 system. For more information, please follow other related articles on the PHP Chinese website!

